
:max_bytes(150000):strip_icc():format(webp)/how-to-use-a-ps5-controller-on-your-pc-or-mac-5089439-b56739aa27bd48858200878a6b64f952.jpg)
In 2024, From Novice to Pro 20 Adobe Premiere Shortcuts to Elevate Your Skills
From Novice to Pro: 20 Adobe Premiere Shortcuts to Elevate Your Skills
Top 20 Adobe Premiere Shortcuts You Will Use When Editing Video Files

Benjamin Arango
Mar 27, 2024• Proven solutions
Whilst the conventional mouse control allows you to perform any task that Premiere is capable of, for efficient workflow the keyboard shortcuts cannot be beaten. We all work a little differently, and thankfully Adobe understands that, so although here we will be concentrating on the standard keyboard layout, the keyboard shortcuts can be customized to be anything you want and saved as a custom profile, there are even presets already included for Avid Media Composer and Final Cut Pro for those who are maybe transitioning from those packages or just prefer the way they work.
This is a basic tutorial about Adobe Premiere, professional video editing software. However, if video editing is new to you, consider Wondershare Filmora (originally Wondershare Video Editor) , which is a powerful but easy-to-use tool for users just starting out. Download the free trial version below.
 Download Mac Version ](https://tools.techidaily.com/wondershare/filmora/download/ )
This is achieved by going through the path edit > keyboard shortcuts as below:

Before we step into the most useful shortcuts, a brief note here on the different platforms, although I’m sure most readers are aware. The PC and Mac versions of the software do share the same basic shortcuts with the one caveat that where the PC uses the Control and Alt keys, the Mac has Command and Option keys instead. Other than that the functionality is the same. I’ll include the shortcuts for both platforms with each to make referencing easier.
1Select Window
I’m starting with this one simply because I find it the most used of all, especially if like me you prefer a custom layout for all your windows. If your program monitor is hidden for instance, you can just press shift+4 and there it is. The shortcuts are the same for both platforms here.
- Audio Clip Mixer Shift+9
- Audio Track Mixer Shift+6
- Effect Controls Shift+5
- Effects Shift+7
- Media Browser Shift+8
- Program Monitor Shift+4
- Project Shift+1
- Source Monitor Shift+2
- Timelines Shift+3
2 Import
Whilst the shortcuts for editing and manipulating clips are extremely important for efficient workflow, it should be remembered that those relating to the basic operation of the program are just as useful, as we see here. Using Control and I (Command and I on Mac) brings up the import media dialogue box instantly.

3Capture Panel
There are multiple shortcuts that can be used within the capture panel, but because this is such an intrinsic aspect of the Premiere workflow, being the entry into a project for all media, I think the available shortcuts are all as valuable as each other here.
- Navigate Through Fields - Tab
- Cancel Capture - Esc
- Fast Forward - F
- Rewind - R
- Go to In Point - Q
- Go to Out Point - W
- Record - G
- Stop - S
- Step Back - Left Arrow
- Step Forward - Right Arrow

4 Timeline Panel
In a similar vein to the Capture Panel, the Timeline Panel has a set of shortcuts specific to all its basic operations, and are essential for a faster workflow.
- Clear Ins and Outs - G
- Clear In Point - D
- Clear Out Point - F
- Go to In Point- Q
- Go to Out Point - W
- Match Frame - M
- Start and Stop - Spacebar
- Play Normal Speed - L
- Play Reverse Normal Speed - J
- Set In Point - I
- Set Out Point - o
- Shuttle Stop - K
- Trim - T
- Arc Tool - A
- Ellipse Tool – E

5 Navigation within a clip
This one works within the program monitor/timeline or source monitor windows, ensure the desired one is active first of course. You can move to a specific time code within the clip, or go forwards or backwards a set number of frames using the number pad. To go to a specific time code simply type that on the number pad. To travel a set number of frames simply type + or – (to signify direction) and the number of frames.
6Marking Clips
By far the simplest way to mark clips is to use the keyboard shortcut.
For marking clips use X , whilst marking a selection is / .
7 In and Out
In addition to marking clips via shortcuts, it is also far easier to mark In and Out points this way.
- To Mark In use I , whilst to mark Out use O .
- To Clear In the shortcut is Control+Shift+I for PC and Option+I for Mac.
- To Clear Out Control+Shift+O for PC, Option+O for Mac.
8Playing Clips
Going hand in hand with the shortcuts for marking, are the keyboard commands for playing clips. These are:
- Play In to Out: Control+Shift+Space (PC) and Option+K for Mac
- Clear In and Out: Control+Shift+X (PC) and Option+X for Mac
- Play Around: The same for both platforms and is Shift+K.
To get the best from this it is necessary to set some options beforehand, as Play Around plays the portion of the timeline around the Playhead, and where it plays is dependent on the options set. This is done through the menu via edit > preferences > playback, here I have preroll and postroll set to 4 seconds, meaning that it plays 4 seconds prior and following the point where the playhead is placed.

In addition, turning on looping for this can help to fine tune edits.
9Toggle Audio During Scrubbing
There are times you may want to hear audio when scrubbing, however turning it off can have beneficial effects on performance for lower end computers. The shortcut makes it an easy process to turn off and on as required.
The shortcut is Shift+S for both platforms.
10Slide a clip within the sequence
There are a couple of options available here from the shortcuts, slide one frame or 5 frames.
- To slide one frame to the left is Alt+, for PC or Option+, for Mac. To increase to five frames add Shift to either shortcut.
- To slide one frame to the right is Alt+. for PC and Option+. for Mac. Again, to increase to five frames add Shift.
11Slip within a sequence
As with the slide options, the choice is one frame or five frames.
- To slip one frame to the left is Control+Alt+Left for PC or Option+Command+Left for Mac. To increase to five frames add Shift to either shortcut.
- To slip one frame to the right is Control+Alt+Right for PC and Option+Command+Right for Mac. Again, to increase to five frames add Shift.
12Nudging
You can move a clip up or down simply by using the Up and Down arrow keys, whilst holding Alt or Option at the same time allows you to select just the video or audio to move.
13Multi Camera Selection
This is a tool that allows you to work with multiple camera angles of the same subject or scene. To switch between different cameras quickly is extremely useful and accomplished with the numerical keys.
Numbers 1 through 9 select the corresponding camera.
14Add an edit
This option cuts the track (or tracks) that are targeted. The shortcut for this is Control+K or Command+K.
You can view all added edits within a sequence by selecting show through edits within the sequence menu.

15Add the default Transition
This option applies the default transition to all selected media. To do this use Shift+D.
16 Match Frame
Locating a specific frame within the sequence for adding in a second clip is very useful, the shortcut is M, a great timesaver.
17Zoom to sequence
Being able to zoom in is great, it makes working in the sequence panel much easier, at least for me, however the one drawback I find is that I tend to get lost when looking for a particular clip. Using / enable you to quickly zoom out for navigation and back in again to work
18Jump to Edit
Navigating from edit to edit is a very simple process with the shortcuts available to you.
Page up takes you to the previous edit point, whilst page down takes you to the next.
With practice these shortcuts become second nature and you will find your workflow becomes not only faster but a smoother operation as well.
19Toggle the type of Trim used
Quickly shift between Standard, Ripple and Roll trim types.
Shift+T for PC, Control+T for Mac
20Ripple Trim
This enables you to trim the head or tail of the clip very quickly, making an extremely efficient workflow. To trim the next edit from the Playhead use W, for the previous edit from the playhead use Q.
Benjamin Arango
Benjamin Arango is a writer and a lover of all things video.
Follow @Benjamin Arango
Benjamin Arango
Mar 27, 2024• Proven solutions
Whilst the conventional mouse control allows you to perform any task that Premiere is capable of, for efficient workflow the keyboard shortcuts cannot be beaten. We all work a little differently, and thankfully Adobe understands that, so although here we will be concentrating on the standard keyboard layout, the keyboard shortcuts can be customized to be anything you want and saved as a custom profile, there are even presets already included for Avid Media Composer and Final Cut Pro for those who are maybe transitioning from those packages or just prefer the way they work.
This is a basic tutorial about Adobe Premiere, professional video editing software. However, if video editing is new to you, consider Wondershare Filmora (originally Wondershare Video Editor) , which is a powerful but easy-to-use tool for users just starting out. Download the free trial version below.
Download Mac Version ](https://tools.techidaily.com/wondershare/filmora/download/ )
This is achieved by going through the path edit > keyboard shortcuts as below:
Before we step into the most useful shortcuts, a brief note here on the different platforms, although I’m sure most readers are aware. The PC and Mac versions of the software do share the same basic shortcuts with the one caveat that where the PC uses the Control and Alt keys, the Mac has Command and Option keys instead. Other than that the functionality is the same. I’ll include the shortcuts for both platforms with each to make referencing easier.
1Select Window
I’m starting with this one simply because I find it the most used of all, especially if like me you prefer a custom layout for all your windows. If your program monitor is hidden for instance, you can just press shift+4 and there it is. The shortcuts are the same for both platforms here.
- Audio Clip Mixer Shift+9
- Audio Track Mixer Shift+6
- Effect Controls Shift+5
- Effects Shift+7
- Media Browser Shift+8
- Program Monitor Shift+4
- Project Shift+1
- Source Monitor Shift+2
- Timelines Shift+3
2 Import
Whilst the shortcuts for editing and manipulating clips are extremely important for efficient workflow, it should be remembered that those relating to the basic operation of the program are just as useful, as we see here. Using Control and I (Command and I on Mac) brings up the import media dialogue box instantly.
3Capture Panel
There are multiple shortcuts that can be used within the capture panel, but because this is such an intrinsic aspect of the Premiere workflow, being the entry into a project for all media, I think the available shortcuts are all as valuable as each other here.
- Navigate Through Fields - Tab
- Cancel Capture - Esc
- Fast Forward - F
- Rewind - R
- Go to In Point - Q
- Go to Out Point - W
- Record - G
- Stop - S
- Step Back - Left Arrow
- Step Forward - Right Arrow
4 Timeline Panel
In a similar vein to the Capture Panel, the Timeline Panel has a set of shortcuts specific to all its basic operations, and are essential for a faster workflow.
- Clear Ins and Outs - G
- Clear In Point - D
- Clear Out Point - F
- Go to In Point- Q
- Go to Out Point - W
- Match Frame - M
- Start and Stop - Spacebar
- Play Normal Speed - L
- Play Reverse Normal Speed - J
- Set In Point - I
- Set Out Point - o
- Shuttle Stop - K
- Trim - T
- Arc Tool - A
- Ellipse Tool – E
5 Navigation within a clip
This one works within the program monitor/timeline or source monitor windows, ensure the desired one is active first of course. You can move to a specific time code within the clip, or go forwards or backwards a set number of frames using the number pad. To go to a specific time code simply type that on the number pad. To travel a set number of frames simply type + or – (to signify direction) and the number of frames.
6Marking Clips
By far the simplest way to mark clips is to use the keyboard shortcut.
For marking clips use X , whilst marking a selection is / .
7 In and Out
In addition to marking clips via shortcuts, it is also far easier to mark In and Out points this way.
- To Mark In use I , whilst to mark Out use O .
- To Clear In the shortcut is Control+Shift+I for PC and Option+I for Mac.
- To Clear Out Control+Shift+O for PC, Option+O for Mac.
8Playing Clips
Going hand in hand with the shortcuts for marking, are the keyboard commands for playing clips. These are:
- Play In to Out: Control+Shift+Space (PC) and Option+K for Mac
- Clear In and Out: Control+Shift+X (PC) and Option+X for Mac
- Play Around: The same for both platforms and is Shift+K.
To get the best from this it is necessary to set some options beforehand, as Play Around plays the portion of the timeline around the Playhead, and where it plays is dependent on the options set. This is done through the menu via edit > preferences > playback, here I have preroll and postroll set to 4 seconds, meaning that it plays 4 seconds prior and following the point where the playhead is placed.
In addition, turning on looping for this can help to fine tune edits.
9Toggle Audio During Scrubbing
There are times you may want to hear audio when scrubbing, however turning it off can have beneficial effects on performance for lower end computers. The shortcut makes it an easy process to turn off and on as required.
The shortcut is Shift+S for both platforms.
10Slide a clip within the sequence
There are a couple of options available here from the shortcuts, slide one frame or 5 frames.
- To slide one frame to the left is Alt+, for PC or Option+, for Mac. To increase to five frames add Shift to either shortcut.
- To slide one frame to the right is Alt+. for PC and Option+. for Mac. Again, to increase to five frames add Shift.
11Slip within a sequence
As with the slide options, the choice is one frame or five frames.
- To slip one frame to the left is Control+Alt+Left for PC or Option+Command+Left for Mac. To increase to five frames add Shift to either shortcut.
- To slip one frame to the right is Control+Alt+Right for PC and Option+Command+Right for Mac. Again, to increase to five frames add Shift.
12Nudging
You can move a clip up or down simply by using the Up and Down arrow keys, whilst holding Alt or Option at the same time allows you to select just the video or audio to move.
13Multi Camera Selection
This is a tool that allows you to work with multiple camera angles of the same subject or scene. To switch between different cameras quickly is extremely useful and accomplished with the numerical keys.
Numbers 1 through 9 select the corresponding camera.
14Add an edit
This option cuts the track (or tracks) that are targeted. The shortcut for this is Control+K or Command+K.
You can view all added edits within a sequence by selecting show through edits within the sequence menu.
15Add the default Transition
This option applies the default transition to all selected media. To do this use Shift+D.
16 Match Frame
Locating a specific frame within the sequence for adding in a second clip is very useful, the shortcut is M, a great timesaver.
17Zoom to sequence
Being able to zoom in is great, it makes working in the sequence panel much easier, at least for me, however the one drawback I find is that I tend to get lost when looking for a particular clip. Using / enable you to quickly zoom out for navigation and back in again to work
18Jump to Edit
Navigating from edit to edit is a very simple process with the shortcuts available to you.
Page up takes you to the previous edit point, whilst page down takes you to the next.
With practice these shortcuts become second nature and you will find your workflow becomes not only faster but a smoother operation as well.
19Toggle the type of Trim used
Quickly shift between Standard, Ripple and Roll trim types.
Shift+T for PC, Control+T for Mac
20Ripple Trim
This enables you to trim the head or tail of the clip very quickly, making an extremely efficient workflow. To trim the next edit from the Playhead use W, for the previous edit from the playhead use Q.
Benjamin Arango
Benjamin Arango is a writer and a lover of all things video.
Follow @Benjamin Arango
The Ultimate List of Free Game Download Sites for PC, Android, and Beyond
Top 10 Best Free Game Download Sites [PC & Android][2024]

Ollie Mattison
Mar 27, 2024• Proven solutions

We all know and firmly believe that games are an integral part of our life. But the world has progressed, and we yearn to achieve real-life experiences through virtual reality instead of experiencing the actual thing. Online games are not only mentally stimulating, but they are also very addictive. Not everyone wants to pay to play games for a couple of hours, so here is a list of top free game downloading sites. You can download full versions of your favorite games for free.
Recommended Video Recorder & Editor for Gameplay: Filmora
If you want to edit a video recorded from games with more effects and templates, we recommend using Filmora . It is an easy-to-use video editor. It offers various title templates. You can also use it to record game videos. Just download it to have a try. Don’t know how to make a video? Visit the Wondershare Video Community and get some inspiration in video creation.
Part 1: Best Free PC Game Download Sites
1 Acid Play
Platforms: OS X and Windows

Key Features:
- Huge gaming library
The acid play has a gigantic collection of games of various types. The games at acid play have been categorized into action, arcade, board games, RPG, card games, puzzles, driving games, simulation, etc.
- Custom Search
The customized search helps you find the exact game you are looking for. It saves time since you cannot browse through thousands of games.
- Ratings
If you are new to this site or looking for a new game to play, you can choose only without trying every game to decide the best one. Just check the ratings provided by other players, and it will solve your problem. You can also rate a game according to your liking.
Pros:
- The games are easily downloadable and free.
- There is a large variety of games available to play.
Cons:
- The site is not updated, and no new games are introduced.
2 Origin Games
Platforms: OS X and Windows
Origin games are another best-known digital distribution platform for a free online gaming experience. It contains a fairly large library of premium games, but origin games provide links for free downloads for a limited time.
Key Features:
- Social Features
Origin provides its users with many social features like profile management, networking with friends through chatting, and video streaming via TwitchTV. You can also share your game library and community integration through social media and networking sites like Facebook, Xbox Live, PlayStation Network, and Nintendo Network.
- Variety in games
It provides various games, from PC games to Fifa and even classic games like Plant Vs. Zombies are also available.
- On-the-house games
The on-the-house features allow the customers to download a free trial of a premium game.
Pros:
- It provides great game streaming features.
- is developed by a renowned and successful company so that it can be trusted.
- The ‘on-the-house specials’ are appreciated by many gamers, allowing them to play a paid game for free now and then.
Cons:
- It has a lot of updates and takes an unreasonable amount of time to install and update the software.
- Customers have complained that they provide expired discount codes.
- Customer service needs to be improved as it is not very responsive.
3 AllGamesAtoZ
Platforms: OS X and Windows
If you want the best full version of a game for free, then AllGamesAtoZ is where you should go.
Key Features:
- The website is full of addictive games from different genres like action, arcade, shooting, role-playing, adventure, racing, simulation, etc.
- Multiple links for downloading a single game are available.
- A customized search bar is available so that you can locate the exact game you are looking for without having to browse through thousands of games.
- The games on AllGamesAtoZ are available on Windows, Linux, and Mac.
- A forum for game reviews is provided, so it is easier to decide which game you want to download without trying them all.
Pros:
- The gaming library is enormous.
- The game reviews make it easier to make a decision and save time.
- The website does not transfer viruses and is entirely safe from scams.
Cons:
- The downloading process is quite long.
- The website is not updated with new games.
4 Mega Games
Platforms: OS X and Windows
It is another highly recommended online gaming site. It not only provides PC games for free but also offers 3D PlayStation games to be downloaded on your PC without any charge.

Key Features:
- Search and download
Mega games allow a search and download option for every game published on their site.
- PlayStation games
It has provided its customers with not only PC games but also 3D PlayStation games that can be downloaded for free.
- Cheat codes
Apart from all the standard gaming features, mega games also provide free cheat codes for the games.
Pros:
- The games are easily downloaded.
- The games have variety.
Cons:
- The website stops working after a while, and the download gets interrupted
5 Caiman.us
Platforms: OS X and Windows
It is another digital distribution platform for free online gaming. After the death of the site’s developer, the site has gone offline.

Key Features:
- It has a vast collection of games and over twenty free games categories.
- 2D and 3D gaming experiences are also provided.
- A customized search is available to make it easier for players to find the game they are looking for.
Pros:
- There is a vast collection of free games to download and play.
Cons:
- The site is not well organized and confusing.
- The search bar is at the very bottom of the page, so a person might find it hard to locate.
- Since the site has gone offline, the games are not updated, so there are no new games.
Part 2: Best Android Game Download Sites to Download Free Android Games
Android is growing very fast; now, almost everyone uses it and prefers it over any other software. Here are the best websites from where you can download free android apps:
1 Google Play
Google Play is the most common website to download free android apps. It is free, it is fast, and it is efficient. You can not only use this from your android mobile but also operate it and download apps using your laptop.

Key Features:
- The apps are easily downloaded, depending upon your internet connection.
- The purchase methods are through credit cards, and the procedure is straightforward.
- The platform allows everyone and anyone to sell their games.
- Sign up through your Google account is necessary to access these features.
Pros:
- It is easily accessible.
- It is pre-installed on all android supported devices.
- It contains a massive collection of unique apps, from books to music, workout, and games of various types.
Cons:
- Since everyone and anyone can access it without paying any registration fee, it is exposed to scams and harassment.
- A few games do not function and keep crashing.
2 Android Games Room

It contains thousands of free gaming apps in different categories like action, arcade, adventure, simulation, song games, and puzzle games. The download links are readily available; you can even access this site from your mobile by scanning a QR code. This site is a pretty good platform to download free games but has certain flaws. It does not allow a multiplayer gaming experience, and no customer services are provided.
3 Android Apps
It is another platform to download android apps for free. This site is pretty good since it updates games that developers handpick almost daily. You can also promote your app using the ‘promote your app’ feature. The site has a lot of updates and takes an unreasonable amount of time to install and update the software. Furthermore, you can say that they do not have a customer service function because nobody ever responds to the customer’s queries.
4 1 Mobile
One mobile is a free android store. It provides its users the easiest way to locate, download and manage free apps. 1 Mobile has over eighty (80) million apps. One mobile has just been recently updated, has a brand new interface design, and operates much smoother. The content is more prosperous, smoother, and a thousand times better than before the latest update. All the apps and games are 100% free forever without hidden charges. It supports various languages like English, Korean, Chinese, French, Spanish, Japanese, and Portugal.
5 Approx

It provides the best free apps not only for android but OS as well. You can download it on your phone by scanning a QR code. This software has been functioning for the past six years and is free from viruses or malware.
To furnish your gameplay videos, Filmora also provides some cool effects, transitions, and elements, such as camera shake chaos effects, distortion effects, 3D change, speed blur transitions, and more. Moreover, you can always find some specially designed gaming effects in the Filmstock effects store.
Ollie Mattison
Ollie Mattison is a writer and a lover of all things video.
Follow @Ollie Mattison
Ollie Mattison
Mar 27, 2024• Proven solutions
We all know and firmly believe that games are an integral part of our life. But the world has progressed, and we yearn to achieve real-life experiences through virtual reality instead of experiencing the actual thing. Online games are not only mentally stimulating, but they are also very addictive. Not everyone wants to pay to play games for a couple of hours, so here is a list of top free game downloading sites. You can download full versions of your favorite games for free.
Recommended Video Recorder & Editor for Gameplay: Filmora
If you want to edit a video recorded from games with more effects and templates, we recommend using Filmora . It is an easy-to-use video editor. It offers various title templates. You can also use it to record game videos. Just download it to have a try. Don’t know how to make a video? Visit the Wondershare Video Community and get some inspiration in video creation.
Part 1: Best Free PC Game Download Sites
1 Acid Play
Platforms: OS X and Windows
Key Features:
- Huge gaming library
The acid play has a gigantic collection of games of various types. The games at acid play have been categorized into action, arcade, board games, RPG, card games, puzzles, driving games, simulation, etc.
- Custom Search
The customized search helps you find the exact game you are looking for. It saves time since you cannot browse through thousands of games.
- Ratings
If you are new to this site or looking for a new game to play, you can choose only without trying every game to decide the best one. Just check the ratings provided by other players, and it will solve your problem. You can also rate a game according to your liking.
Pros:
- The games are easily downloadable and free.
- There is a large variety of games available to play.
Cons:
- The site is not updated, and no new games are introduced.
2 Origin Games
Platforms: OS X and Windows
Origin games are another best-known digital distribution platform for a free online gaming experience. It contains a fairly large library of premium games, but origin games provide links for free downloads for a limited time.
Key Features:
- Social Features
Origin provides its users with many social features like profile management, networking with friends through chatting, and video streaming via TwitchTV. You can also share your game library and community integration through social media and networking sites like Facebook, Xbox Live, PlayStation Network, and Nintendo Network.
- Variety in games
It provides various games, from PC games to Fifa and even classic games like Plant Vs. Zombies are also available.
- On-the-house games
The on-the-house features allow the customers to download a free trial of a premium game.
Pros:
- It provides great game streaming features.
- is developed by a renowned and successful company so that it can be trusted.
- The ‘on-the-house specials’ are appreciated by many gamers, allowing them to play a paid game for free now and then.
Cons:
- It has a lot of updates and takes an unreasonable amount of time to install and update the software.
- Customers have complained that they provide expired discount codes.
- Customer service needs to be improved as it is not very responsive.
3 AllGamesAtoZ
Platforms: OS X and Windows
If you want the best full version of a game for free, then AllGamesAtoZ is where you should go.
Key Features:
- The website is full of addictive games from different genres like action, arcade, shooting, role-playing, adventure, racing, simulation, etc.
- Multiple links for downloading a single game are available.
- A customized search bar is available so that you can locate the exact game you are looking for without having to browse through thousands of games.
- The games on AllGamesAtoZ are available on Windows, Linux, and Mac.
- A forum for game reviews is provided, so it is easier to decide which game you want to download without trying them all.
Pros:
- The gaming library is enormous.
- The game reviews make it easier to make a decision and save time.
- The website does not transfer viruses and is entirely safe from scams.
Cons:
- The downloading process is quite long.
- The website is not updated with new games.
4 Mega Games
Platforms: OS X and Windows
It is another highly recommended online gaming site. It not only provides PC games for free but also offers 3D PlayStation games to be downloaded on your PC without any charge.
Key Features:
- Search and download
Mega games allow a search and download option for every game published on their site.
- PlayStation games
It has provided its customers with not only PC games but also 3D PlayStation games that can be downloaded for free.
- Cheat codes
Apart from all the standard gaming features, mega games also provide free cheat codes for the games.
Pros:
- The games are easily downloaded.
- The games have variety.
Cons:
- The website stops working after a while, and the download gets interrupted
5 Caiman.us
Platforms: OS X and Windows
It is another digital distribution platform for free online gaming. After the death of the site’s developer, the site has gone offline.
Key Features:
- It has a vast collection of games and over twenty free games categories.
- 2D and 3D gaming experiences are also provided.
- A customized search is available to make it easier for players to find the game they are looking for.
Pros:
- There is a vast collection of free games to download and play.
Cons:
- The site is not well organized and confusing.
- The search bar is at the very bottom of the page, so a person might find it hard to locate.
- Since the site has gone offline, the games are not updated, so there are no new games.
Part 2: Best Android Game Download Sites to Download Free Android Games
Android is growing very fast; now, almost everyone uses it and prefers it over any other software. Here are the best websites from where you can download free android apps:
1 Google Play
Google Play is the most common website to download free android apps. It is free, it is fast, and it is efficient. You can not only use this from your android mobile but also operate it and download apps using your laptop.
Key Features:
- The apps are easily downloaded, depending upon your internet connection.
- The purchase methods are through credit cards, and the procedure is straightforward.
- The platform allows everyone and anyone to sell their games.
- Sign up through your Google account is necessary to access these features.
Pros:
- It is easily accessible.
- It is pre-installed on all android supported devices.
- It contains a massive collection of unique apps, from books to music, workout, and games of various types.
Cons:
- Since everyone and anyone can access it without paying any registration fee, it is exposed to scams and harassment.
- A few games do not function and keep crashing.
2 Android Games Room
It contains thousands of free gaming apps in different categories like action, arcade, adventure, simulation, song games, and puzzle games. The download links are readily available; you can even access this site from your mobile by scanning a QR code. This site is a pretty good platform to download free games but has certain flaws. It does not allow a multiplayer gaming experience, and no customer services are provided.
3 Android Apps
It is another platform to download android apps for free. This site is pretty good since it updates games that developers handpick almost daily. You can also promote your app using the ‘promote your app’ feature. The site has a lot of updates and takes an unreasonable amount of time to install and update the software. Furthermore, you can say that they do not have a customer service function because nobody ever responds to the customer’s queries.
4 1 Mobile
One mobile is a free android store. It provides its users the easiest way to locate, download and manage free apps. 1 Mobile has over eighty (80) million apps. One mobile has just been recently updated, has a brand new interface design, and operates much smoother. The content is more prosperous, smoother, and a thousand times better than before the latest update. All the apps and games are 100% free forever without hidden charges. It supports various languages like English, Korean, Chinese, French, Spanish, Japanese, and Portugal.
5 Approx
It provides the best free apps not only for android but OS as well. You can download it on your phone by scanning a QR code. This software has been functioning for the past six years and is free from viruses or malware.
To furnish your gameplay videos, Filmora also provides some cool effects, transitions, and elements, such as camera shake chaos effects, distortion effects, 3D change, speed blur transitions, and more. Moreover, you can always find some specially designed gaming effects in the Filmstock effects store.
Ollie Mattison
Ollie Mattison is a writer and a lover of all things video.
Follow @Ollie Mattison
Ollie Mattison
Mar 27, 2024• Proven solutions
We all know and firmly believe that games are an integral part of our life. But the world has progressed, and we yearn to achieve real-life experiences through virtual reality instead of experiencing the actual thing. Online games are not only mentally stimulating, but they are also very addictive. Not everyone wants to pay to play games for a couple of hours, so here is a list of top free game downloading sites. You can download full versions of your favorite games for free.
Recommended Video Recorder & Editor for Gameplay: Filmora
If you want to edit a video recorded from games with more effects and templates, we recommend using Filmora . It is an easy-to-use video editor. It offers various title templates. You can also use it to record game videos. Just download it to have a try. Don’t know how to make a video? Visit the Wondershare Video Community and get some inspiration in video creation.
Part 1: Best Free PC Game Download Sites
1 Acid Play
Platforms: OS X and Windows
Key Features:
- Huge gaming library
The acid play has a gigantic collection of games of various types. The games at acid play have been categorized into action, arcade, board games, RPG, card games, puzzles, driving games, simulation, etc.
- Custom Search
The customized search helps you find the exact game you are looking for. It saves time since you cannot browse through thousands of games.
- Ratings
If you are new to this site or looking for a new game to play, you can choose only without trying every game to decide the best one. Just check the ratings provided by other players, and it will solve your problem. You can also rate a game according to your liking.
Pros:
- The games are easily downloadable and free.
- There is a large variety of games available to play.
Cons:
- The site is not updated, and no new games are introduced.
2 Origin Games
Platforms: OS X and Windows
Origin games are another best-known digital distribution platform for a free online gaming experience. It contains a fairly large library of premium games, but origin games provide links for free downloads for a limited time.
Key Features:
- Social Features
Origin provides its users with many social features like profile management, networking with friends through chatting, and video streaming via TwitchTV. You can also share your game library and community integration through social media and networking sites like Facebook, Xbox Live, PlayStation Network, and Nintendo Network.
- Variety in games
It provides various games, from PC games to Fifa and even classic games like Plant Vs. Zombies are also available.
- On-the-house games
The on-the-house features allow the customers to download a free trial of a premium game.
Pros:
- It provides great game streaming features.
- is developed by a renowned and successful company so that it can be trusted.
- The ‘on-the-house specials’ are appreciated by many gamers, allowing them to play a paid game for free now and then.
Cons:
- It has a lot of updates and takes an unreasonable amount of time to install and update the software.
- Customers have complained that they provide expired discount codes.
- Customer service needs to be improved as it is not very responsive.
3 AllGamesAtoZ
Platforms: OS X and Windows
If you want the best full version of a game for free, then AllGamesAtoZ is where you should go.
Key Features:
- The website is full of addictive games from different genres like action, arcade, shooting, role-playing, adventure, racing, simulation, etc.
- Multiple links for downloading a single game are available.
- A customized search bar is available so that you can locate the exact game you are looking for without having to browse through thousands of games.
- The games on AllGamesAtoZ are available on Windows, Linux, and Mac.
- A forum for game reviews is provided, so it is easier to decide which game you want to download without trying them all.
Pros:
- The gaming library is enormous.
- The game reviews make it easier to make a decision and save time.
- The website does not transfer viruses and is entirely safe from scams.
Cons:
- The downloading process is quite long.
- The website is not updated with new games.
4 Mega Games
Platforms: OS X and Windows
It is another highly recommended online gaming site. It not only provides PC games for free but also offers 3D PlayStation games to be downloaded on your PC without any charge.
Key Features:
- Search and download
Mega games allow a search and download option for every game published on their site.
- PlayStation games
It has provided its customers with not only PC games but also 3D PlayStation games that can be downloaded for free.
- Cheat codes
Apart from all the standard gaming features, mega games also provide free cheat codes for the games.
Pros:
- The games are easily downloaded.
- The games have variety.
Cons:
- The website stops working after a while, and the download gets interrupted
5 Caiman.us
Platforms: OS X and Windows
It is another digital distribution platform for free online gaming. After the death of the site’s developer, the site has gone offline.
Key Features:
- It has a vast collection of games and over twenty free games categories.
- 2D and 3D gaming experiences are also provided.
- A customized search is available to make it easier for players to find the game they are looking for.
Pros:
- There is a vast collection of free games to download and play.
Cons:
- The site is not well organized and confusing.
- The search bar is at the very bottom of the page, so a person might find it hard to locate.
- Since the site has gone offline, the games are not updated, so there are no new games.
Part 2: Best Android Game Download Sites to Download Free Android Games
Android is growing very fast; now, almost everyone uses it and prefers it over any other software. Here are the best websites from where you can download free android apps:
1 Google Play
Google Play is the most common website to download free android apps. It is free, it is fast, and it is efficient. You can not only use this from your android mobile but also operate it and download apps using your laptop.
Key Features:
- The apps are easily downloaded, depending upon your internet connection.
- The purchase methods are through credit cards, and the procedure is straightforward.
- The platform allows everyone and anyone to sell their games.
- Sign up through your Google account is necessary to access these features.
Pros:
- It is easily accessible.
- It is pre-installed on all android supported devices.
- It contains a massive collection of unique apps, from books to music, workout, and games of various types.
Cons:
- Since everyone and anyone can access it without paying any registration fee, it is exposed to scams and harassment.
- A few games do not function and keep crashing.
2 Android Games Room
It contains thousands of free gaming apps in different categories like action, arcade, adventure, simulation, song games, and puzzle games. The download links are readily available; you can even access this site from your mobile by scanning a QR code. This site is a pretty good platform to download free games but has certain flaws. It does not allow a multiplayer gaming experience, and no customer services are provided.
3 Android Apps
It is another platform to download android apps for free. This site is pretty good since it updates games that developers handpick almost daily. You can also promote your app using the ‘promote your app’ feature. The site has a lot of updates and takes an unreasonable amount of time to install and update the software. Furthermore, you can say that they do not have a customer service function because nobody ever responds to the customer’s queries.
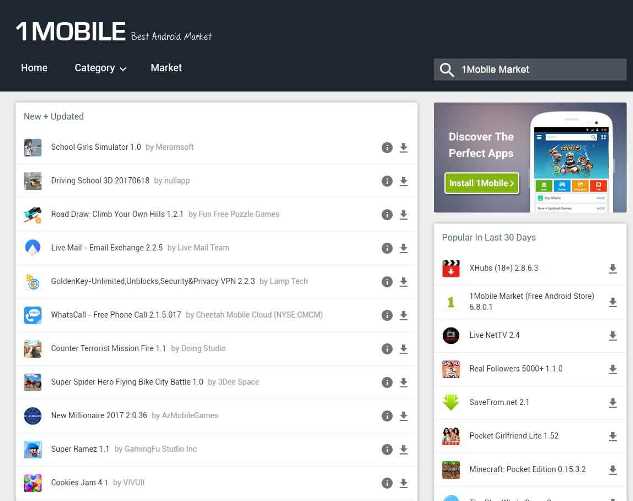
4 1 Mobile
One mobile is a free android store. It provides its users the easiest way to locate, download and manage free apps. 1 Mobile has over eighty (80) million apps. One mobile has just been recently updated, has a brand new interface design, and operates much smoother. The content is more prosperous, smoother, and a thousand times better than before the latest update. All the apps and games are 100% free forever without hidden charges. It supports various languages like English, Korean, Chinese, French, Spanish, Japanese, and Portugal.
5 Approx
It provides the best free apps not only for android but OS as well. You can download it on your phone by scanning a QR code. This software has been functioning for the past six years and is free from viruses or malware.
To furnish your gameplay videos, Filmora also provides some cool effects, transitions, and elements, such as camera shake chaos effects, distortion effects, 3D change, speed blur transitions, and more. Moreover, you can always find some specially designed gaming effects in the Filmstock effects store.
Ollie Mattison
Ollie Mattison is a writer and a lover of all things video.
Follow @Ollie Mattison
Unbeatable Sound: Tips for Selecting a Top-Notch FLAC Converter
Ways to Totally Help Your Find Best Flac Converter
An easy yet powerful editor
Numerous effects to choose from
Detailed tutorials provided by the official channel
We have eight recommendations for you below that will allow you to pretty much do whatever you want (i.e., convert FLAC to MP3, convert FLAC to ALAC, convert WAV to FLAC, MP4 to FLAC, FLAC to MP4, M4A to FLAC, WAV to FLAC, and so much more.)
We’ve even included a handy general tutorial just after this to make sure that you’re able to easily make use of your chosen FLAC Converter.
In this article
01 [How to Convert FLAC to MP3 (Fast & Brilliant Way)](#Part 1)
02 [8 Best Free FLAC to MP3 Converter](#Part 2)
Part 1 How to Convert FLAC to MP3 (Fast & Brilliant Way)
As promised, we’ll be starting this off with a general tutorial that you can refer to when using the converters that we’ve listed below! The tool that we will be using for this step-by-step breakdown is an online FLAC Converter called FreeConvert. We did not include it on our list just to make sure that you have the most options possible, but it definitely deserves a spot of its own, since it is a free FLAC converter as well.
01Step 1: Open FLAC Converter!
To start things off, you need to either launch (if it’s software) or open (a.i., open the website for an online converter) your chosen FLAC Converter.
Once you’ve got your FLAC Converter all revved up. The first true step is the ‘UPLOAD’ step. This is when you use the upload features provided to prepare the FLAC audio that you want to convert.
For the tool we use for our example, you can do it in one of two ways:
● Upload Manually: Either from your device, from Dropbox, from Google Drive, or through a URL link.
● Drag-and-Drop: Simply drag and then drop the FLAC audio for conversion.
Here’s a link to FreeConvert in case you wanted to try it out for yourself:

02Step 2: Confirm Output Format!
For our example, we’ll be converting from FLAC to MP3. And so, when prompted to choose the desired output format, we choose “MP3”!
(Most converters will have multiple audio file formats and video file formats that you can convert to if you want to do something completely different — as is shown below):

03Step 3: (Optional) Advanced Settings
Before finishing up, you might want to explore the extra advanced settings offered by your chosen FLAC Converter! Each one will have different features.
FreeConvert, as an example, will allow you to adjust volume, add fade-in, add fade-out, reverse audio, and, even, trim audio before conversion! All you have to do to access these functions is to click the “SETTINGS” icon (pointed out in the image).

04Step 4: Convert FLAC to MP3
To initiate the actual conversion with FreeConvert, all you really need to do is click the ‘Convert to MP3’ button. Other FLAC converters, while not the same, should be similar.

05Step 5: Download Converted FLAC Audio!
Finally, when the conversion has been completed, select the ‘Download MP3’ button to save your converted audio to your PC! That’s it, you’re done!

Part 2 8 Best Free FLAC to MP3 Converter
Now on to our list of the best free FLAC Converter options out there. We have eight of them for you to choose from, each unique from the other to make sure that you can find the one that suits your current need or project the most.
01****Wondershare Filmora Video Editor **
Compatibility: Windows & Mac OS
What’s New: More Video Editing Solutions!
Rating and Reviews: 5/5
Price: FREEmium
Filmora is the first software on this list of FLAC converter options. As you’ll no doubt glean from the screenshot of the UI that we included, this isn’t really your average FLAC converter. But that’s why we included it! With Filmora Pro, not only will you get the FLAC converting functions that you’re looking for, but you’ll also get many other features.

Wondershare Filmora - Best Video Editor for Mac/Windows
5,481,435 people have downloaded it.
Build unique custom animations without breaking a sweat.
Focus on creating epic stories and leave the details to Filmora’s auto features.
Start a creative adventure with drag & drop effects and endless possibilities.
Filmora simplifies advanced features to save you time and effort.
Filmora cuts out repetition so you can move on to your next creative breakthrough.

02UniConverter
Compatibility: Windows & Mac OS
What’s New: Extra Toolbox!
Rating and Reviews: 5/5
Price: FREEmium
For this next pick, just to cover our bases, we’ve chosen Wondershare Uniconverter. As you can guess from the name (and the UI, which we’ve shared below), this is an incredibly advanced converting tool. In order to match the requirements for this article, it does, of course, support FLAC as both input and output for conversion. But, even more than that, it offers bonus features (i.e., Download, Video Compressor, Video Editor, Content Merger, Screen Converter, etc.)

03XConvert
Compatibility: Windows & Mac OS + Android & iOS Support
What’s New: Google Drive & Dropbox Upload!
Rating and Reviews: 3/5
Price: FREE
With XConvert, we offer a secondary option for those who are looking for a FLAC converter online. This tool, much like FreeConvert, does not require any download or installation process. You can use it directly on your computer, smartphone, or tablet devices. Of course, unlike Filmora Pro or Wondershare UniConverter, it does not have extra bonus functions. But, it is, at the very least, 100% FREE.

04FLAC MP3 Converter
Compatibility: Mac OS & iOS Support
What’s New: High Quality FLAC to MP3 Conversion
Rating and Reviews: 3.5/5
Price: FREEmium
If you’re a Mac user and are looking for a quick, FREE solution for FLAC to MP3 conversion, you might want to consider the FLAC MP3 converter, which is available on the app store! This app is not 100% FREE, but you do have the opportunity to use it for general conversion if that’s all you need.

05123Apps
Compatibility: Windows and Mac & iOS and Android Support!
What’s New: Track Info Editing Tools!
Rating and Reviews: 3.5/5
Price: FREE
Up next is another online FLAC converter that you can use! One that will allow you to make sure that there is no quality loss! This tool is simply called Audio Converter, and it comes from 123Apps. It works just like any online audio converter — which means that it is FREE and can be accessed on most devices.

06Audacity
Compatibility: Windows OS
What’s New: Advanced Audio Editing Functions!
Rating and Reviews: 4/5
Price: FREE
When one talks about FREE audio editors, the one most frequently discussed is often Audacity! As you can see, the UI for it is pretty old, but it comes with tons of advanced features. Of course, the one that you’re probably most concerned about is its converting functions! For that, we can confirm that Audacity will, in fact, allow you to convert from FLAC or convert to FLAC. The process will be different, but it’s possible!

07MediaHuman Audio Converter
Compatibility: Windows & Mac OS
What’s New: Audio Editing Functions
Rating and Reviews: 4/5
Price: FREE
When it comes to Mac-prevalent audio converters, MediaHuman is often discussed as well! It is available for Windows, but its interface is best for its Mac version. As you can see from the UI screenshot, it’s very clean and easy to use. Allowing you to get your conversions done with no fuss!

08Freemake Audio Converter
Compatibility: Windows OS
What’s New: Advanced Audio Conversion (1000+ file support)
Rating and Reviews: 3.5/5
Price: FREE
The last of the tools on this list, Freemake, is another Windows-only software! Freemake allows you to convert to and from FLAC and offers some bonus editing features (though, notably, not as much as Wondershare’s UniConverter, which locks some of its more advanced features for its premium version.)

Key Takeaways from This Episode
● Need a quick and easy way to convert from FLAC to MP3? How about WAV to FLAC? Whether you’re converting from or to FLAC, this article has made sure to give you options!
● Most FLAC converters, you’ll find, work much the same way (demonstrated in our tutorial in Part 1!)
● But, despite the similarities, there are multiple unique methods of converting from and to FLAC format that you can use! Hopefully, you’ll be able to find one that suits your project from the list that we provided in Part 2!)
We have eight recommendations for you below that will allow you to pretty much do whatever you want (i.e., convert FLAC to MP3, convert FLAC to ALAC, convert WAV to FLAC, MP4 to FLAC, FLAC to MP4, M4A to FLAC, WAV to FLAC, and so much more.)
We’ve even included a handy general tutorial just after this to make sure that you’re able to easily make use of your chosen FLAC Converter.
In this article
01 [How to Convert FLAC to MP3 (Fast & Brilliant Way)](#Part 1)
02 [8 Best Free FLAC to MP3 Converter](#Part 2)
Part 1 How to Convert FLAC to MP3 (Fast & Brilliant Way)
As promised, we’ll be starting this off with a general tutorial that you can refer to when using the converters that we’ve listed below! The tool that we will be using for this step-by-step breakdown is an online FLAC Converter called FreeConvert. We did not include it on our list just to make sure that you have the most options possible, but it definitely deserves a spot of its own, since it is a free FLAC converter as well.
01Step 1: Open FLAC Converter!
To start things off, you need to either launch (if it’s software) or open (a.i., open the website for an online converter) your chosen FLAC Converter.
Once you’ve got your FLAC Converter all revved up. The first true step is the ‘UPLOAD’ step. This is when you use the upload features provided to prepare the FLAC audio that you want to convert.
For the tool we use for our example, you can do it in one of two ways:
● Upload Manually: Either from your device, from Dropbox, from Google Drive, or through a URL link.
● Drag-and-Drop: Simply drag and then drop the FLAC audio for conversion.
Here’s a link to FreeConvert in case you wanted to try it out for yourself:
02Step 2: Confirm Output Format!
For our example, we’ll be converting from FLAC to MP3. And so, when prompted to choose the desired output format, we choose “MP3”!
(Most converters will have multiple audio file formats and video file formats that you can convert to if you want to do something completely different — as is shown below):
03Step 3: (Optional) Advanced Settings
Before finishing up, you might want to explore the extra advanced settings offered by your chosen FLAC Converter! Each one will have different features.
FreeConvert, as an example, will allow you to adjust volume, add fade-in, add fade-out, reverse audio, and, even, trim audio before conversion! All you have to do to access these functions is to click the “SETTINGS” icon (pointed out in the image).
04Step 4: Convert FLAC to MP3
To initiate the actual conversion with FreeConvert, all you really need to do is click the ‘Convert to MP3’ button. Other FLAC converters, while not the same, should be similar.
05Step 5: Download Converted FLAC Audio!
Finally, when the conversion has been completed, select the ‘Download MP3’ button to save your converted audio to your PC! That’s it, you’re done!
Part 2 8 Best Free FLAC to MP3 Converter
Now on to our list of the best free FLAC Converter options out there. We have eight of them for you to choose from, each unique from the other to make sure that you can find the one that suits your current need or project the most.
01****Wondershare Filmora Video Editor **
Compatibility: Windows & Mac OS
What’s New: More Video Editing Solutions!
Rating and Reviews: 5/5
Price: FREEmium
Filmora is the first software on this list of FLAC converter options. As you’ll no doubt glean from the screenshot of the UI that we included, this isn’t really your average FLAC converter. But that’s why we included it! With Filmora Pro, not only will you get the FLAC converting functions that you’re looking for, but you’ll also get many other features.
Wondershare Filmora - Best Video Editor for Mac/Windows
5,481,435 people have downloaded it.
Build unique custom animations without breaking a sweat.
Focus on creating epic stories and leave the details to Filmora’s auto features.
Start a creative adventure with drag & drop effects and endless possibilities.
Filmora simplifies advanced features to save you time and effort.
Filmora cuts out repetition so you can move on to your next creative breakthrough.
02UniConverter
Compatibility: Windows & Mac OS
What’s New: Extra Toolbox!
Rating and Reviews: 5/5
Price: FREEmium
For this next pick, just to cover our bases, we’ve chosen Wondershare Uniconverter. As you can guess from the name (and the UI, which we’ve shared below), this is an incredibly advanced converting tool. In order to match the requirements for this article, it does, of course, support FLAC as both input and output for conversion. But, even more than that, it offers bonus features (i.e., Download, Video Compressor, Video Editor, Content Merger, Screen Converter, etc.)
03XConvert
Compatibility: Windows & Mac OS + Android & iOS Support
What’s New: Google Drive & Dropbox Upload!
Rating and Reviews: 3/5
Price: FREE
With XConvert, we offer a secondary option for those who are looking for a FLAC converter online. This tool, much like FreeConvert, does not require any download or installation process. You can use it directly on your computer, smartphone, or tablet devices. Of course, unlike Filmora Pro or Wondershare UniConverter, it does not have extra bonus functions. But, it is, at the very least, 100% FREE.
04FLAC MP3 Converter
Compatibility: Mac OS & iOS Support
What’s New: High Quality FLAC to MP3 Conversion
Rating and Reviews: 3.5/5
Price: FREEmium
If you’re a Mac user and are looking for a quick, FREE solution for FLAC to MP3 conversion, you might want to consider the FLAC MP3 converter, which is available on the app store! This app is not 100% FREE, but you do have the opportunity to use it for general conversion if that’s all you need.
05123Apps
Compatibility: Windows and Mac & iOS and Android Support!
What’s New: Track Info Editing Tools!
Rating and Reviews: 3.5/5
Price: FREE
Up next is another online FLAC converter that you can use! One that will allow you to make sure that there is no quality loss! This tool is simply called Audio Converter, and it comes from 123Apps. It works just like any online audio converter — which means that it is FREE and can be accessed on most devices.
06Audacity
Compatibility: Windows OS
What’s New: Advanced Audio Editing Functions!
Rating and Reviews: 4/5
Price: FREE
When one talks about FREE audio editors, the one most frequently discussed is often Audacity! As you can see, the UI for it is pretty old, but it comes with tons of advanced features. Of course, the one that you’re probably most concerned about is its converting functions! For that, we can confirm that Audacity will, in fact, allow you to convert from FLAC or convert to FLAC. The process will be different, but it’s possible!
07MediaHuman Audio Converter
Compatibility: Windows & Mac OS
What’s New: Audio Editing Functions
Rating and Reviews: 4/5
Price: FREE
When it comes to Mac-prevalent audio converters, MediaHuman is often discussed as well! It is available for Windows, but its interface is best for its Mac version. As you can see from the UI screenshot, it’s very clean and easy to use. Allowing you to get your conversions done with no fuss!
08Freemake Audio Converter
Compatibility: Windows OS
What’s New: Advanced Audio Conversion (1000+ file support)
Rating and Reviews: 3.5/5
Price: FREE
The last of the tools on this list, Freemake, is another Windows-only software! Freemake allows you to convert to and from FLAC and offers some bonus editing features (though, notably, not as much as Wondershare’s UniConverter, which locks some of its more advanced features for its premium version.)
Key Takeaways from This Episode
● Need a quick and easy way to convert from FLAC to MP3? How about WAV to FLAC? Whether you’re converting from or to FLAC, this article has made sure to give you options!
● Most FLAC converters, you’ll find, work much the same way (demonstrated in our tutorial in Part 1!)
● But, despite the similarities, there are multiple unique methods of converting from and to FLAC format that you can use! Hopefully, you’ll be able to find one that suits your project from the list that we provided in Part 2!)
Intelligent Video Editors for Effortless Reframing
The auto-frame feature is needed to edit the videos professionally. Its purpose is to adjust the video clips so that the action of a scene is never out of the frame even after reformatting the video. Specifically, the quality of your video is not affected, and no frame is lost or damaged when you reformat the video for different aspect ratios.
The smart auto-reframe feature is mainly used for posting videos on social media platforms such as Facebook, Instagram, YouTube, etc. This article provides you with detailed information about the best video editors that are enriched with the smart auto-reframe feature. The method of using these tools is also provided.
Top Video Editors with Auto-Reframe for Smart Crop
Following are some of the best video editors that consist of an auto-reframe feature for smart crop:
1. Wondershare Filmora Video Editor
Supported OS: Windows and macOS
Pricing: Free trial, $ 79.99 for perpetual plan
For Win 7 or later (64-bit)
For macOS 10.12 or later
Wondershare Filmora Video Editor is a powerful and easy video editing software that provides different methods to save and share the video. This software includes GIF support, 4K editing support, and an audio equalizer. You can remove background noise from the video. Its key features also include video stabilization , color tuning, scene detection, advanced text editor and audio mixer,
Wondershare Filmora comes with plenty of smart features, among which auto-reframe is top of the list. It saves your editing time to create or edit a professional video. This feature can detect a moving object in your video and crops it automatically to suit different aspect ratios so you can post it on various platforms. In this way, it enhances the efficiency of your video. To use the auto-reframe feature in Filmora, you can follow the steps below:
Step 1: Install and Launch Software
Download the software and launch it on your devices. From Tools, select Auto Reframe.

Step 2: Import File
Use the drag and drop feature to import the file or click on the Import button for selecting and importing it.

Step 3: Choose Aspect Ratio
To start reframing, select the aspect ratio you need. You can also define the motion speed of the reframed video clip to make it fast or slow or keep the original speed. And then click Analyze to apply changes. Here I will choose 9:16 portrait mode to take the example.
Step 4: Adjust Frame
Filmora will convert the video to the selected aspect ratio automatically. After analyzing, select the frame and adjust its position.

Step 4: Export File
Click the Export button to save the file when you are done with reframing, adjustment, and editing. Share it where you want to.

2. Adobe Premiere Rush
Supported OS: Android, iOS, Windows and macOS
Pricing: Free trial, $9.99 per month
Adobe Premiere Rush is a desktop and mobile video editing app that lets you create innovative videos from your computer or mobile phone. It enables you to control your creations with audio features and graphic templates. It allows you to capture, color-correct, change clip sequence, trim, add color filters, text overlays, and record voiceovers .
The feature of auto-reframe is also available in this software that allows you to adjust your video and do reframing. You can set the frames according to your needs and requirements through the application of Auto Reframe to your video without affecting its quality when uploaded on social media platforms.
Step 1: Download the Software
Download the software on your mobile or computer and launch it.
Step 2: Import a Video
Import a video to the software you want to edit and adjust its frames.
Step 3: Apply Auto Frame
Click Effects panel and then select Auto Reframe, which will automatically keep the most important parts of the shot in the frame, and then the process will be started.
Step 4: Adjust Frames and Add Effects
Click Adjust Frame to adjust frame size according to your needs. To add Pan and Zoom effects or other effects, click Effects, select Motion menu.

Step 4: Adjust and Export
Set the speed of the video and the clip duration, and then export your video when editing is done. Save it to your device and share it.
3. Adobe Premiere Pro
Supported OS: Windows and macOS
Pricing: $20.99 per month (annual plan monthly paid)
Adobe Premiere Pro is a video editing software that is flexible and efficient for professional videos. It consists of powerful creative tools for audio, graphics, and colors. It allows you to create simultaneous projects and use motion graphic templates to enhance your video. This software also provides the feature of VR audio editing, transitions, adding effects, etc.
Adobe has added the smart auto-reframe feature to the software, especially for the broadcasters to optimize their content for different social media platforms. Using the auto-reframe feature, they can edit video in both YouTube’s landscape interface and Instagram’s vertical format.
Step 1: Download and Launch Software
Download the software from its official website, install it and launch it to use.
Step 2: Select the Sequence
Right-click and select the Auto Reframe Sequence option. Click New Item and select Sequence to create a sequence or add an already shot sequence.
Step 3: Apply Auto Reframe Feature
Select Effects and double click Auto Reframe tab to apply its effects. Select Aspect Ratio for reframing the video.

Step 4: Export and Save
Export the file when the auto frame feature is applied. Save it and share it.
4. Final Cut Pro X
Supported OS: Mac OS
Pricing: Free trial, $299.99
Final Cut Pro X was developed by Apple. It is a video editing software that allows you to edit a simple video to a traditional one because it consists of the Object Tracker for adding dynamic text to the video.
You can also add colors to the moving footage. You can apply tracking data to other graphics and text files to enhance your work.
The smart auto-frame feature present in Final Cut Pro X allows you to adjust the aspect ratios of the video file. Smart Conform feature will enable you to Auto Reframe in this Apple’s software where it works on sequences.
Step 1: Download and Install Software
Download Final Cut Pro X from its official website, install and launch it.
Step 2: Create Project
Create a project with the aspect ratio you need, i.e., vertical, landscape, square, etc, and click Smart Conform to apply Auto Reframe, and then set frame size and set the aspect ratio to maximize image quality. In this way, Final Cut Pro will analyze all the clips, focus on the most interesting parts, and automatically conform each clip to fill the entire frame.

Step 3: Add File and Adjust
Add file to the timeline, and you will the video is auto reframed in the Preview window. You can skim through the project to check how the Smart Conform tool did on the rest of the clips.
If you find some frames are out of the edge, you can manually adjust its position with keyframing.
Step 4: Save File
After everything is finely adjusted, export the edited and adjusted video and save it to your device.
5. Kamua
Supported OS: Online tool available for all devices
Pricing: Free
Kamua is a video editing browser-based tool that does not require to be downloaded. It comes with a user-friendly interface that makes it easy to use and understand. You can add subtitles to your video using this tool. It allows you to add filters to your video to make it effective and gain the attention of your followers. Its Ai features let you crop the video efficiently.
You can change the dimensions of the video and aspect ratio from vertical to horizontal using the Auto Reframe feature. In this software, the Auto Reframe feature is enabled by the AutoCrop feature that allows you to resize and reframe your video or the clips that have movement.
Step 1: Visit the Official Website
Open the official website of Kamua to use it for reframing: https://kamua.com/ .
Step 2: Select Aspect Ratio
Open Crop Settings and set the Aspect ratio for your file
Step 3: Apply Feature
Toggle AutoCrop and click Generate AutoCrop Preview. Set the aspect ratio and video dimensions
Step 4: Export File
Export the edited file when you are done with the reframing and resizing step. Save the file and share it to your desired platform.
Note: Since 16 November, 2021, Kamua is part of Jellysmack and the services has been discontinued. If you didn’t register it before, you may can’t use the features mentioned above.
Conclusion
The modern video editing software comes with the feature of smart auto reframing. This feature allows you to upload your video according to the platform where you want to upload it. For example, if you need to upload a video on YouTube, you can set the aspect ratio in the landscape interface. And if you want to upload your video on Instagram, you can set the aspect ratio to vertical format. These tools also allow you to set video dimensions. They not only allow you to edit videos but also the images having motion.
For Win 7 or later (64-bit)
For macOS 10.12 or later
Wondershare Filmora Video Editor is a powerful and easy video editing software that provides different methods to save and share the video. This software includes GIF support, 4K editing support, and an audio equalizer. You can remove background noise from the video. Its key features also include video stabilization , color tuning, scene detection, advanced text editor and audio mixer,
Wondershare Filmora comes with plenty of smart features, among which auto-reframe is top of the list. It saves your editing time to create or edit a professional video. This feature can detect a moving object in your video and crops it automatically to suit different aspect ratios so you can post it on various platforms. In this way, it enhances the efficiency of your video. To use the auto-reframe feature in Filmora, you can follow the steps below:
Step 1: Install and Launch Software
Download the software and launch it on your devices. From Tools, select Auto Reframe.
Step 2: Import File
Use the drag and drop feature to import the file or click on the Import button for selecting and importing it.
Step 3: Choose Aspect Ratio
To start reframing, select the aspect ratio you need. You can also define the motion speed of the reframed video clip to make it fast or slow or keep the original speed. And then click Analyze to apply changes. Here I will choose 9:16 portrait mode to take the example.
Step 4: Adjust Frame
Filmora will convert the video to the selected aspect ratio automatically. After analyzing, select the frame and adjust its position.
Step 4: Export File
Click the Export button to save the file when you are done with reframing, adjustment, and editing. Share it where you want to.
2. Adobe Premiere Rush
Supported OS: Android, iOS, Windows and macOS
Pricing: Free trial, $9.99 per month
Adobe Premiere Rush is a desktop and mobile video editing app that lets you create innovative videos from your computer or mobile phone. It enables you to control your creations with audio features and graphic templates. It allows you to capture, color-correct, change clip sequence, trim, add color filters, text overlays, and record voiceovers .
The feature of auto-reframe is also available in this software that allows you to adjust your video and do reframing. You can set the frames according to your needs and requirements through the application of Auto Reframe to your video without affecting its quality when uploaded on social media platforms.
Step 1: Download the Software
Download the software on your mobile or computer and launch it.
Step 2: Import a Video
Import a video to the software you want to edit and adjust its frames.
Step 3: Apply Auto Frame
Click Effects panel and then select Auto Reframe, which will automatically keep the most important parts of the shot in the frame, and then the process will be started.
Step 4: Adjust Frames and Add Effects
Click Adjust Frame to adjust frame size according to your needs. To add Pan and Zoom effects or other effects, click Effects, select Motion menu.
Step 4: Adjust and Export
Set the speed of the video and the clip duration, and then export your video when editing is done. Save it to your device and share it.
3. Adobe Premiere Pro
Supported OS: Windows and macOS
Pricing: $20.99 per month (annual plan monthly paid)
Adobe Premiere Pro is a video editing software that is flexible and efficient for professional videos. It consists of powerful creative tools for audio, graphics, and colors. It allows you to create simultaneous projects and use motion graphic templates to enhance your video. This software also provides the feature of VR audio editing, transitions, adding effects, etc.
Adobe has added the smart auto-reframe feature to the software, especially for the broadcasters to optimize their content for different social media platforms. Using the auto-reframe feature, they can edit video in both YouTube’s landscape interface and Instagram’s vertical format.
Step 1: Download and Launch Software
Download the software from its official website, install it and launch it to use.
Step 2: Select the Sequence
Right-click and select the Auto Reframe Sequence option. Click New Item and select Sequence to create a sequence or add an already shot sequence.
Step 3: Apply Auto Reframe Feature
Select Effects and double click Auto Reframe tab to apply its effects. Select Aspect Ratio for reframing the video.
Step 4: Export and Save
Export the file when the auto frame feature is applied. Save it and share it.
4. Final Cut Pro X
Supported OS: Mac OS
Pricing: Free trial, $299.99
Final Cut Pro X was developed by Apple. It is a video editing software that allows you to edit a simple video to a traditional one because it consists of the Object Tracker for adding dynamic text to the video.
You can also add colors to the moving footage. You can apply tracking data to other graphics and text files to enhance your work.
The smart auto-frame feature present in Final Cut Pro X allows you to adjust the aspect ratios of the video file. Smart Conform feature will enable you to Auto Reframe in this Apple’s software where it works on sequences.
Step 1: Download and Install Software
Download Final Cut Pro X from its official website, install and launch it.
Step 2: Create Project
Create a project with the aspect ratio you need, i.e., vertical, landscape, square, etc, and click Smart Conform to apply Auto Reframe, and then set frame size and set the aspect ratio to maximize image quality. In this way, Final Cut Pro will analyze all the clips, focus on the most interesting parts, and automatically conform each clip to fill the entire frame.
Step 3: Add File and Adjust
Add file to the timeline, and you will the video is auto reframed in the Preview window. You can skim through the project to check how the Smart Conform tool did on the rest of the clips.
If you find some frames are out of the edge, you can manually adjust its position with keyframing.
Step 4: Save File
After everything is finely adjusted, export the edited and adjusted video and save it to your device.
5. Kamua
Supported OS: Online tool available for all devices
Pricing: Free
Kamua is a video editing browser-based tool that does not require to be downloaded. It comes with a user-friendly interface that makes it easy to use and understand. You can add subtitles to your video using this tool. It allows you to add filters to your video to make it effective and gain the attention of your followers. Its Ai features let you crop the video efficiently.
You can change the dimensions of the video and aspect ratio from vertical to horizontal using the Auto Reframe feature. In this software, the Auto Reframe feature is enabled by the AutoCrop feature that allows you to resize and reframe your video or the clips that have movement.
Step 1: Visit the Official Website
Open the official website of Kamua to use it for reframing: https://kamua.com/ .
Step 2: Select Aspect Ratio
Open Crop Settings and set the Aspect ratio for your file
Step 3: Apply Feature
Toggle AutoCrop and click Generate AutoCrop Preview. Set the aspect ratio and video dimensions
Step 4: Export File
Export the edited file when you are done with the reframing and resizing step. Save the file and share it to your desired platform.
Note: Since 16 November, 2021, Kamua is part of Jellysmack and the services has been discontinued. If you didn’t register it before, you may can’t use the features mentioned above.
Conclusion
The modern video editing software comes with the feature of smart auto reframing. This feature allows you to upload your video according to the platform where you want to upload it. For example, if you need to upload a video on YouTube, you can set the aspect ratio in the landscape interface. And if you want to upload your video on Instagram, you can set the aspect ratio to vertical format. These tools also allow you to set video dimensions. They not only allow you to edit videos but also the images having motion.
Also read:
- New 2024 Approved Digital Drawing Board How to Convert Videos Into Cartoons and Animations
- New In 2024, The Art of Cartoonization A Comprehensive Guide to Video Conversion
- Updated Free to Use The 10 Best Open-Source Video Editing Tools for 2024
- New 2024 Approved Looking Beyond Pinnacle Studio Best Mac Video Editors
- The Ultimate Guide to Rapid Video Trimming on Mac (Updated 2023)
- The Ultimate Guide to Video Metadata Editing on Mac 8 Top Picks
- New 2024 Approved Kapwing Slow Motion Tutorial Turn Your Clips Into Epic Moments
- Updated 2024 Approved Lower Thirds Mastery Tips and Tricks for FCPX Users
- Updated In 2024, Discover the Best Free Online Video Editor Jaycut Tutorial and Review
- Updated 2024 Approved The Best of the Best Top 12 Audio Converters for Any Format
- New In 2024, From Scratch to Pro Understanding XML Files in FCPX
- 2024 Approved The Ultimate List of Aspect Ratio Converter Tools
- In 2024, FCP 2023 Color Correction Essentials From Basics to Advanced
- Updated In 2024, Filmora 13 Free Download The Ultimate Video Editing Software
- New 2024 Approved Mastering Pixel Calculations A Simple and Effective Method
- The Ultimate Guide to iMovie Alternatives for Windows 11/10 for 2024
- How To Restore Missing Pictures Files from Nord CE 3 Lite 5G.
- How do i sign a .dotm file electronically
- In 2024, How Can I Catch the Regional Pokémon without Traveling On Tecno Spark 10C | Dr.fone
- Here are Some Pro Tips for Pokemon Go PvP Battles On Oppo Find N3 Flip | Dr.fone
- In 2024, How to Transfer Data from Itel A60s to Other Android Devices? | Dr.fone
- Top 10 Fingerprint Lock Apps to Lock Your Vivo X Flip Phone
- In 2024, How to Unlock Itel S23 Phone without Google Account?
- How To Unlock Apple iPhone 15 Plus 3 Ways To Unlock
- How to A70 Get Deleted photos Back with Ease and Safety?
- Updated Generate Tones Easily 5 Top Online Tools
- In 2024, Sim Unlock Xiaomi Redmi Note 12 Pro 5G Phones without Code 2 Ways to Remove Android Sim Lock
- Full Guide to Fix iToolab AnyGO Not Working On Nokia G310 | Dr.fone
- In 2024, Top 4 SIM Location Trackers To Easily Find Your Lost Xiaomi 13T Device
- Title: In 2024, From Novice to Pro 20 Adobe Premiere Shortcuts to Elevate Your Skills
- Author: Charlotte
- Created at : 2024-05-19 10:32:18
- Updated at : 2024-05-20 10:32:18
- Link: https://smart-video-creator.techidaily.com/in-2024-from-novice-to-pro-20-adobe-premiere-shortcuts-to-elevate-your-skills/
- License: This work is licensed under CC BY-NC-SA 4.0.
