
:max_bytes(150000):strip_icc():format(webp)/patch-tuesday-2625783-d6bcf232b3c64fc5958037ad31299bd9.png)
New 2024 Approved Calculate Aspect Ratios Like a Pro Best Online Tools
Calculate Aspect Ratios Like a Pro: Best Online Tools
Best 5 Aspect Ratio Calculators Online
An easy yet powerful editor
Numerous effects to choose from
Detailed tutorials provided by the official channel
Have you noticed how certain old movies play with black padding on either side of the screen while watching the television?

With this guide of the best five aspect ratio calculators online we’ve put together for you, you cannot go wrong!
In this article
01 [Typical Aspect Ratios and Sizes of Screens and Videos](#Part 1)
02 [How Do I Know the Aspect Ratio of My Video?](#Part 2)
03 [How Can I Change the Aspect Ratio of an Image Online?](#Part 3)
04 [How to Change the Aspect Ratio in Filmora/Filmora Pro?](#Part 4)
Part 1 Part 1: Typical Aspect Ratios and Sizes of Screens and Videos
An aspect ratio is a measurement representing the ratio between the width and height of a screen or a video. It determines the length of your video or screen. Not only screens and videos, but you can use the concept also in images.
And, it is written as ‘x:y’ where ‘x’ is the width and ‘y’ is the height.
There isn’t any one-size-fits-all when we need to use the video aspect ratios. Aspect ratios are generally selected based on where the video will post, how it will be visible, and what aim it usually serves.
Videos utilized for social media will vary from trailers shows or movies shown in theaters. There are common aspect ratios for modern televisions, but broadcasters can consider using the aspect ratio that operates great with their audience and content.
Since most videos showcase through standard online video platforms, custom aspect ratios are not commonly used.
Here are a few standard aspect ratios that you can use for live streaming and other video creation:

16:9
A 16:9 aspect ratio represents a wide rectangle. It is also called “1.71:1,” the most accessible form of the ratio, mathematically speaking.
This ratio is mainly used in video creation and streaming and is considered the international standard format for cinema and television.
Many also tend to use this highly famous aspect ratio on their sites.
It is also more cost-effective to use screens compatible with this ratio instead of their predecessors. The standardization of computer monitors and televisions saved producers both the money and time spent in the research field.
One of the ideal resolutions you can use with a 16:9 aspect ratio is 4Kor 3840 pixels by 2160 pixels.
1:1
The 1:1 video aspect ratio is one of the ideal squares used with square television sets.
It is much less in demand but usually visible on social media platforms like Facebook or Instagram.
Many cameras still have a square setting even though it’s not the most commonly used aspect ratio.
4:3
The 4:3 aspect ratio was the general screen size for computer monitors and televisions before 16:9 and 16:10. The reason for the switch was the HDTV birth. It’s because the 16:9 and 16:10 aspect ratios allow for better resolutions than 4:3 do.
This aspect ratio was still considered for Apple iPads until they released the 2018 iPad Pro.
3:2
The 3:2 aspect ratio was primarily seen in classic 35 mm still photography still used on tablets, laptops, and various game consoles in the handheld form.
Many micro- to medium-sized cameras still use the 3:2 aspect ratio settings, but broadcasters rarely use it today.
21:9
The 21:9 aspect ratios have a pretty specific purpose. It is often called cinematic widescreen or ultra-widescreen.
It is also helpful for films with an anamorphic format. Anamorphic format videos create an optical illusion that offers a 360-degree view.
You are likely to look for the videos with this aspect ratio in notable museums, theme parks, theaters, and the like.
9:16
A 9:16 aspect ratio is for tall videos. This aspect ratio became famous after the launch of smartphones with video capabilities.
For instance, the optimal measure for an Instagram story is 1080 px by 1920 px, and thus its ratio comes out as 9:16. The same goes for other famous apps with “story” features, including Snapchat and Facebook.
This makes sense because the iPhone camera’s video setting can record footage in both 16:9 and 9:16.
Part 2 How Do I Know the Aspect Ratio of My Video?

Most cameras with video capabilities are available with various aspect ratio settings. This helps you decide which aspect ratio you’d like your video to have before recording it.
If you are looking to determine the aspect ratio of a video already shot, you can easily access additional information for the file.
The information button is a small “i” in a circle on Mac. Move on to right-click a file and select “Properties“ on your PC.
It may give you the actual width and height of the video, but you can divide the two to find the aspect ratio.
However, you don’t need to hassle as we’ll enlist the best five aspect ratio calculators online below.
01Calculate Aspect Ratio

Our first pick-in aspect ratio calculator online is used simply by entering Common Presets. Then, there are tabs where you can enter Ratio Width, Ratio Height, Pixels Width, and Pixels Height.
It can help determine the aspect ratio of both the images and the videos.
Pros
Good user interface
Simple tabs for inputs
Fast loading speed
Cons
Pretty confusing for beginners to know which inputs to enter
02Digital Rebellion Aspect Ratio Calculator

Again, here’s an aspect ratio calculator online that is pretty straightforward than the one on the previous list. It helps you identify both the pixel dimensions and aspect ratios of the images and videos.
You’re only required to enter your inputs in Calculate and Preset tab to get Resolution as outcomes.
Pros
It can also be used to calculate pixel dimensions
Interactive user interface
No ads
Cons
Pretty confusing when it comes to entering Preset
03Toolstud Aspect Ratio Calculator

This aspect ratio calculator online is the simplest on our list as you’re only required to enter the Width-Height of an image or screen whose aspect ratio needs to be calculated.
Plus, the best part is that it gives you the detailed analysis of Calculation in terms of Size, Aspect Ratio, Angle of Diagonal, and Length of Diagonal etc.
Pros
Detailed calculation
Only needs to enter width and height
Simple user interface
Cons
A bit slow in processing
04Aspect Ratio Calculator

Again, this is the most straightforward aspect ratio calculator online with fewer complexities than others on the list. You must enter your desired width for an image or a video to get the outcome as an idea; height is a must to maintain that height.
Or, you can enter both the width and height to know the aspect ratio, dimensions, and mode.
Pros
Detailed calculation
Easy to calculate
A guide on how to use it
Cons
Slow user interface
05Calculator Online

You need to enter width and height within this tool and select among the common ratios to know the aspect ratio. However, it’s pretty unknown and confusing whether it’s applicable on both the images and videos or not.
Pros
Interactive user interface
With a guide on how to use
Various options
Cons
Display ads
Part 3 How Can I Change the Aspect Ratio of an Image Online?
You need to select among the aspect ratio calculator mentioned above online or go for the particular one for images.
Here, we’ll use Kapwing to resize the image dimensions within its editor.
Step 1: Visit Kapwing official website as follows
Go to https://www.kapwing.com/tools/resize-image

Step 2: Enter its editor
Now, you’re within its editor. Upload your image, which needs to change in terms of aspect ratio.

Step 3: Select output
Now, you need to choose the output. Make sure you haven’t selected the image to do this. There’s an output size on the left panel, which you can choose among 1:1, 9:16, 16:9, 5:4, and 4:5, and custom size.

Part 4 How to Change the Aspect Ratio in Filmora/Filmora Pro?

Wondershare Filmora - Best Video Editor for Mac/Windows
5,481,435 people have downloaded it.
Build unique custom animations without breaking a sweat.
Focus on creating epic stories and leave the details to Filmora’s auto features.
Start a creative adventure with drag & drop effects and endless possibilities.
Filmora simplifies advanced features to save you time and effort.
Filmora cuts out repetition so you can move on to your next creative breakthrough.
To permanently change the aspect ratio, you need a video editor or converter as one of the best aspect ratio calculators online.
Here, we’d like to recommend a significant aspect ratio changer - Wondershare Filmora Video Editor , which allows you to create both the 4:3, 9:16, 16:9, and 1:1 aspect ratio videos quite simply. You can conveniently share the created videos on YouTube, Apple TV, Vimeo, and mobile devices.
The Filmora also assists you in changing the project aspect ratio after launching the video editor program. Hit the drop-down tab and go through the 16:9, 1:1, 9:16, 4:3, and 21:9 aspect ratios to select among.

Key Takeaways from This Episode
● A complete overview of aspect ratio calculators.
● Understanding 5 best aspect ratio calculators.
● An ideal aspect ratio calculator to permanently change the video’s aspect ratio.
Have you noticed how certain old movies play with black padding on either side of the screen while watching the television?
With this guide of the best five aspect ratio calculators online we’ve put together for you, you cannot go wrong!
In this article
01 [Typical Aspect Ratios and Sizes of Screens and Videos](#Part 1)
02 [How Do I Know the Aspect Ratio of My Video?](#Part 2)
03 [How Can I Change the Aspect Ratio of an Image Online?](#Part 3)
04 [How to Change the Aspect Ratio in Filmora/Filmora Pro?](#Part 4)
Part 1 Part 1: Typical Aspect Ratios and Sizes of Screens and Videos
An aspect ratio is a measurement representing the ratio between the width and height of a screen or a video. It determines the length of your video or screen. Not only screens and videos, but you can use the concept also in images.
And, it is written as ‘x:y’ where ‘x’ is the width and ‘y’ is the height.
There isn’t any one-size-fits-all when we need to use the video aspect ratios. Aspect ratios are generally selected based on where the video will post, how it will be visible, and what aim it usually serves.
Videos utilized for social media will vary from trailers shows or movies shown in theaters. There are common aspect ratios for modern televisions, but broadcasters can consider using the aspect ratio that operates great with their audience and content.
Since most videos showcase through standard online video platforms, custom aspect ratios are not commonly used.
Here are a few standard aspect ratios that you can use for live streaming and other video creation:
16:9
A 16:9 aspect ratio represents a wide rectangle. It is also called “1.71:1,” the most accessible form of the ratio, mathematically speaking.
This ratio is mainly used in video creation and streaming and is considered the international standard format for cinema and television.
Many also tend to use this highly famous aspect ratio on their sites.
It is also more cost-effective to use screens compatible with this ratio instead of their predecessors. The standardization of computer monitors and televisions saved producers both the money and time spent in the research field.
One of the ideal resolutions you can use with a 16:9 aspect ratio is 4Kor 3840 pixels by 2160 pixels.
1:1
The 1:1 video aspect ratio is one of the ideal squares used with square television sets.
It is much less in demand but usually visible on social media platforms like Facebook or Instagram.
Many cameras still have a square setting even though it’s not the most commonly used aspect ratio.
4:3
The 4:3 aspect ratio was the general screen size for computer monitors and televisions before 16:9 and 16:10. The reason for the switch was the HDTV birth. It’s because the 16:9 and 16:10 aspect ratios allow for better resolutions than 4:3 do.
This aspect ratio was still considered for Apple iPads until they released the 2018 iPad Pro.
3:2
The 3:2 aspect ratio was primarily seen in classic 35 mm still photography still used on tablets, laptops, and various game consoles in the handheld form.
Many micro- to medium-sized cameras still use the 3:2 aspect ratio settings, but broadcasters rarely use it today.
21:9
The 21:9 aspect ratios have a pretty specific purpose. It is often called cinematic widescreen or ultra-widescreen.
It is also helpful for films with an anamorphic format. Anamorphic format videos create an optical illusion that offers a 360-degree view.
You are likely to look for the videos with this aspect ratio in notable museums, theme parks, theaters, and the like.
9:16
A 9:16 aspect ratio is for tall videos. This aspect ratio became famous after the launch of smartphones with video capabilities.
For instance, the optimal measure for an Instagram story is 1080 px by 1920 px, and thus its ratio comes out as 9:16. The same goes for other famous apps with “story” features, including Snapchat and Facebook.
This makes sense because the iPhone camera’s video setting can record footage in both 16:9 and 9:16.
Part 2 How Do I Know the Aspect Ratio of My Video?
Most cameras with video capabilities are available with various aspect ratio settings. This helps you decide which aspect ratio you’d like your video to have before recording it.
If you are looking to determine the aspect ratio of a video already shot, you can easily access additional information for the file.
The information button is a small “i” in a circle on Mac. Move on to right-click a file and select “Properties“ on your PC.
It may give you the actual width and height of the video, but you can divide the two to find the aspect ratio.
However, you don’t need to hassle as we’ll enlist the best five aspect ratio calculators online below.
01Calculate Aspect Ratio
Our first pick-in aspect ratio calculator online is used simply by entering Common Presets. Then, there are tabs where you can enter Ratio Width, Ratio Height, Pixels Width, and Pixels Height.
It can help determine the aspect ratio of both the images and the videos.
Pros
Good user interface
Simple tabs for inputs
Fast loading speed
Cons
Pretty confusing for beginners to know which inputs to enter
02Digital Rebellion Aspect Ratio Calculator
Again, here’s an aspect ratio calculator online that is pretty straightforward than the one on the previous list. It helps you identify both the pixel dimensions and aspect ratios of the images and videos.
You’re only required to enter your inputs in Calculate and Preset tab to get Resolution as outcomes.
Pros
It can also be used to calculate pixel dimensions
Interactive user interface
No ads
Cons
Pretty confusing when it comes to entering Preset
03Toolstud Aspect Ratio Calculator
This aspect ratio calculator online is the simplest on our list as you’re only required to enter the Width-Height of an image or screen whose aspect ratio needs to be calculated.
Plus, the best part is that it gives you the detailed analysis of Calculation in terms of Size, Aspect Ratio, Angle of Diagonal, and Length of Diagonal etc.
Pros
Detailed calculation
Only needs to enter width and height
Simple user interface
Cons
A bit slow in processing
04Aspect Ratio Calculator
Again, this is the most straightforward aspect ratio calculator online with fewer complexities than others on the list. You must enter your desired width for an image or a video to get the outcome as an idea; height is a must to maintain that height.
Or, you can enter both the width and height to know the aspect ratio, dimensions, and mode.
Pros
Detailed calculation
Easy to calculate
A guide on how to use it
Cons
Slow user interface
05Calculator Online
You need to enter width and height within this tool and select among the common ratios to know the aspect ratio. However, it’s pretty unknown and confusing whether it’s applicable on both the images and videos or not.
Pros
Interactive user interface
With a guide on how to use
Various options
Cons
Display ads
Part 3 How Can I Change the Aspect Ratio of an Image Online?
You need to select among the aspect ratio calculator mentioned above online or go for the particular one for images.
Here, we’ll use Kapwing to resize the image dimensions within its editor.
Step 1: Visit Kapwing official website as follows
Go to https://www.kapwing.com/tools/resize-image
Step 2: Enter its editor
Now, you’re within its editor. Upload your image, which needs to change in terms of aspect ratio.
Step 3: Select output
Now, you need to choose the output. Make sure you haven’t selected the image to do this. There’s an output size on the left panel, which you can choose among 1:1, 9:16, 16:9, 5:4, and 4:5, and custom size.
Part 4 How to Change the Aspect Ratio in Filmora/Filmora Pro?
Wondershare Filmora - Best Video Editor for Mac/Windows
5,481,435 people have downloaded it.
Build unique custom animations without breaking a sweat.
Focus on creating epic stories and leave the details to Filmora’s auto features.
Start a creative adventure with drag & drop effects and endless possibilities.
Filmora simplifies advanced features to save you time and effort.
Filmora cuts out repetition so you can move on to your next creative breakthrough.
To permanently change the aspect ratio, you need a video editor or converter as one of the best aspect ratio calculators online.
Here, we’d like to recommend a significant aspect ratio changer - Wondershare Filmora Video Editor , which allows you to create both the 4:3, 9:16, 16:9, and 1:1 aspect ratio videos quite simply. You can conveniently share the created videos on YouTube, Apple TV, Vimeo, and mobile devices.
The Filmora also assists you in changing the project aspect ratio after launching the video editor program. Hit the drop-down tab and go through the 16:9, 1:1, 9:16, 4:3, and 21:9 aspect ratios to select among.
Key Takeaways from This Episode
● A complete overview of aspect ratio calculators.
● Understanding 5 best aspect ratio calculators.
● An ideal aspect ratio calculator to permanently change the video’s aspect ratio.
Top 6 Video Dubbing Tools for PC: Free Download Options
Best 6 Video Dubbing Software for PC in 2024

Shanoon Cox
Mar 27, 2024• Proven solutions
If you are a content creator and want to make your videos appealing to the masses, then you must master the art of video dubbing . It has become a vital part of post-production, making your videos available to an international audience. To get that effortless playback experience, you need to use the best video dubbing software. In this post, I will familiarize you with 6 of the best video dubbing software for PC with a free download option. Let’s begin!
- Part 1: What to Consider before Choosing Video Dubbing Software?
- Part 2: 6 Best Video Dubbing Software for PC [Free Download]
What to Consider While Choosing Video Dubbing Software?
Since there are so many videos dubbing software , picking the right tool to fit your needs can be crucial. I recommend considering the following things in mind while selecting a dubbing tool.
Voice Recording
If you are using different tools for voice recording and dubbing, then it will create a lot of problems. Therefore, getting an all-in-one solution to meet your post-production needs is better.
Audio Editing and Syncing
The tool should be able to extract the audio segment from the video, letting you edit it the way you like. Some applications even come with a syncing tool to save you time.
Learn how to sync video and audio in FCPX here.
Compatibility
Also, ensure that the hardware (like microphone or audio card) you use is supported by the tool. Besides that, it should also be compatible with your computer and the video and audio formats you are using.
Import/Export Features
You should be able to import files from different formats and export the dubbed video in the format of your choice.
Have problems exported? See how to export with Compressor here.
Other Things
Make sure that the application is easy to use. Otherwise, you would have to spend a lot of time learning its features. It should have good customer support and positive feedback from existing users and must come within your budget.
The 6 Best Video Dubbing Software for PC [Free Download]
After carefully considering the above things, I have come up with the following video dubbing software you can try.
1. Wondershare Filmora


Filmora is a complete video editing tool that will meet every requirement of yours in post-production. This video dubbing software has a dedicated music and audio mixer tool that can easily help you dub your videos and add voiceovers.
- With just a single click, you can start recording the voiceover for an existing video and make further edits to it.
- There are already 100+ audio tracks that you will get in the tool to help you manage your video’s voiceover.
- It has a seamless drag-and-drop interface to easily sync your voiceover component with the picture in less time.
- You can extract the audio components separately from the video and make changes to them.
- Other features include audio fade-in/fade-out, noise removal, keyframing, and many others.
Pros
- Tons of video editing features.
- Can import/export files in different formats.
- Extremely easy to use.
Cons
- The premium version is needed to use all features.
2.Magix
Magix is another reliable video dubbing software for PC with a free download option that you can explore. Though, if you want to experience its premium features, you must buy the Magix Pro version.
- Using Magix, you can do audio voiceovers, adjust the recordings, and further edit them for a perfect dubbing experience.
- There are inbuilt audio mixers and editing tools that you can use during the post-production of videos.
- You can also find inbuilt wizards, one-click audio effects, compressors, noise cancelation, and other features.
- Magix also has hundreds of effects and templates that you can try.
Pros
- Easy to use.
- Extensive compatibility.
Cons
- The Pro version is not available for free.
3.CamStudio
If you are looking for video dubbing software for a PC free download option, then CamStudio would be an ideal pick. Since this is an open-source desktop application, you can use it without paying anything.
- You can use this tool to add music and voiceover to your videos.
- It will let you reduce the audio noise, compress it, and further edit it.
- The tool follows a lossless codec compression to ensure your videos stay of the best quality.
- Besides being a video dubbing software, you can also use it to edit your videos.
Pros
- The tool is open-source and free available.
Cons
- Limited features.
- Only supports AVI files.
- Not as user-friendly as other tools.
4.Free Audio Dub
This is another resourceful video dubbing software for PC with a free download that you can consider. While the video dubbing software does not have a lot of features, it will meet your basic post-production needs.
- You can load the video and audio files, and the application will automatically merge them.
- It has an inbuilt algorithm to sync both files and give the best-suited dubbing results.
- Furthermore, you can crop any video/audio file section or move it to sync them together.
Pros
- Lightweight.
- Free available.
Cons
- Limited features.
5.Audacity
Audacity is one of the most popular audio editing tools available for leading platforms. Since it is an open-source application, it can also be used as video dubbing software for free.
- You can import and export your audio files in different formats so that they would be compatible with your video.
- It lets us record audio for voiceover and further make changes in it with its existing presets.
- There are several features to edit, fade in/out, clip, minimize noise, and perform many operations on your audio files.
- You can also put numerous effects on your audio before exporting it for dubbing.
Pros
- Free available.
- Various audio editing features.
Cons
- There are no video editing options.
- You can only record and edit audio, but later, you will need another tool for merging with videos.
6.ApowerSoft Video Editor
Lastly, you can also use the ApowerSoft video editor as a video dubbing software as it has built-in features to record and edit audio.
- The tool is pretty easy to use and lets us record audio and perform different operations on it.
- You can drag and adjust the audio component to sync it with the picture.
- There are several existing effects and presets that you can further implement to save your time.
- Apart from importing files of different formats, you can also export them in the format of your choice.
Pros
- Easy to use.
Cons
- Fewer features for audio editing.
- The premium version is paid.
Conclusion:
Now when you know six different video dubbing software for PC with free download options, you can easily pick up the best tool. While some are free applications, others only have a free demo version. You can explore the video dubbing software on your own and even try a few of them. I would recommend going with a multi-purpose tool like Filmora that will help you edit all kinds of videos and meet your post-production needs in one place.
FAQ:
- Can I use Filmora to make high-quality changes to videos?
Filmora is an all-in-one video editor with many features and can do many things well. It makes professional video editing easy because it offers a user-friendly interface, drag-and-drop editing, and other complex video editing functions.
- How well does Magix work?
Magix Movie Studio is an easy-to-use, stylish movie editor that doesn’t cost too much. There are still some problems, like the reverse track order, but it’s clear that this is a choice, and if you use other video editing programs, you’ll get used to it.
- Is Audacity good for the new learner?
Because it is so easy to use, Audacity is a great software for beginners who want to record and edit voices and recordings like a pro because it is so easy to use. Before we learn how to use Audacity step by step, let’s look at some of the things that make it useful.
- How long can Audacity record for?
Since Audacity stores samples as 64-bit values (even on 32-bit devices), there is no 32-bit rule that says recordings can’t be longer than 231 samples (which is for example, just over 13.5 hours at a 44,100 Hz sample rate).
- How do I change things in Apowersoft?
Use magic and fantasy to make your edits. To cut or crop a video file, click the scissors or cropping icon, depending on what you want to do. To join videos, drag files into the timeline in the order you want. Add filters and video overlay to your movie to make it look better.
Shanoon Cox
Shanoon Cox is a writer and a lover of all things video.
Follow @Shanoon Cox
Shanoon Cox
Mar 27, 2024• Proven solutions
If you are a content creator and want to make your videos appealing to the masses, then you must master the art of video dubbing . It has become a vital part of post-production, making your videos available to an international audience. To get that effortless playback experience, you need to use the best video dubbing software. In this post, I will familiarize you with 6 of the best video dubbing software for PC with a free download option. Let’s begin!
- Part 1: What to Consider before Choosing Video Dubbing Software?
- Part 2: 6 Best Video Dubbing Software for PC [Free Download]
What to Consider While Choosing Video Dubbing Software?
Since there are so many videos dubbing software , picking the right tool to fit your needs can be crucial. I recommend considering the following things in mind while selecting a dubbing tool.
Voice Recording
If you are using different tools for voice recording and dubbing, then it will create a lot of problems. Therefore, getting an all-in-one solution to meet your post-production needs is better.
Audio Editing and Syncing
The tool should be able to extract the audio segment from the video, letting you edit it the way you like. Some applications even come with a syncing tool to save you time.
Learn how to sync video and audio in FCPX here.
Compatibility
Also, ensure that the hardware (like microphone or audio card) you use is supported by the tool. Besides that, it should also be compatible with your computer and the video and audio formats you are using.
Import/Export Features
You should be able to import files from different formats and export the dubbed video in the format of your choice.
Have problems exported? See how to export with Compressor here.
Other Things
Make sure that the application is easy to use. Otherwise, you would have to spend a lot of time learning its features. It should have good customer support and positive feedback from existing users and must come within your budget.
The 6 Best Video Dubbing Software for PC [Free Download]
After carefully considering the above things, I have come up with the following video dubbing software you can try.
1. Wondershare Filmora
Filmora is a complete video editing tool that will meet every requirement of yours in post-production. This video dubbing software has a dedicated music and audio mixer tool that can easily help you dub your videos and add voiceovers.
- With just a single click, you can start recording the voiceover for an existing video and make further edits to it.
- There are already 100+ audio tracks that you will get in the tool to help you manage your video’s voiceover.
- It has a seamless drag-and-drop interface to easily sync your voiceover component with the picture in less time.
- You can extract the audio components separately from the video and make changes to them.
- Other features include audio fade-in/fade-out, noise removal, keyframing, and many others.
Pros
- Tons of video editing features.
- Can import/export files in different formats.
- Extremely easy to use.
Cons
- The premium version is needed to use all features.
2.Magix
Magix is another reliable video dubbing software for PC with a free download option that you can explore. Though, if you want to experience its premium features, you must buy the Magix Pro version.
- Using Magix, you can do audio voiceovers, adjust the recordings, and further edit them for a perfect dubbing experience.
- There are inbuilt audio mixers and editing tools that you can use during the post-production of videos.
- You can also find inbuilt wizards, one-click audio effects, compressors, noise cancelation, and other features.
- Magix also has hundreds of effects and templates that you can try.
Pros
- Easy to use.
- Extensive compatibility.
Cons
- The Pro version is not available for free.
3.CamStudio
If you are looking for video dubbing software for a PC free download option, then CamStudio would be an ideal pick. Since this is an open-source desktop application, you can use it without paying anything.
- You can use this tool to add music and voiceover to your videos.
- It will let you reduce the audio noise, compress it, and further edit it.
- The tool follows a lossless codec compression to ensure your videos stay of the best quality.
- Besides being a video dubbing software, you can also use it to edit your videos.
Pros
- The tool is open-source and free available.
Cons
- Limited features.
- Only supports AVI files.
- Not as user-friendly as other tools.
4.Free Audio Dub
This is another resourceful video dubbing software for PC with a free download that you can consider. While the video dubbing software does not have a lot of features, it will meet your basic post-production needs.
- You can load the video and audio files, and the application will automatically merge them.
- It has an inbuilt algorithm to sync both files and give the best-suited dubbing results.
- Furthermore, you can crop any video/audio file section or move it to sync them together.
Pros
- Lightweight.
- Free available.
Cons
- Limited features.
5.Audacity
Audacity is one of the most popular audio editing tools available for leading platforms. Since it is an open-source application, it can also be used as video dubbing software for free.
- You can import and export your audio files in different formats so that they would be compatible with your video.
- It lets us record audio for voiceover and further make changes in it with its existing presets.
- There are several features to edit, fade in/out, clip, minimize noise, and perform many operations on your audio files.
- You can also put numerous effects on your audio before exporting it for dubbing.
Pros
- Free available.
- Various audio editing features.
Cons
- There are no video editing options.
- You can only record and edit audio, but later, you will need another tool for merging with videos.
6.ApowerSoft Video Editor
Lastly, you can also use the ApowerSoft video editor as a video dubbing software as it has built-in features to record and edit audio.
- The tool is pretty easy to use and lets us record audio and perform different operations on it.
- You can drag and adjust the audio component to sync it with the picture.
- There are several existing effects and presets that you can further implement to save your time.
- Apart from importing files of different formats, you can also export them in the format of your choice.
Pros
- Easy to use.
Cons
- Fewer features for audio editing.
- The premium version is paid.
Conclusion:
Now when you know six different video dubbing software for PC with free download options, you can easily pick up the best tool. While some are free applications, others only have a free demo version. You can explore the video dubbing software on your own and even try a few of them. I would recommend going with a multi-purpose tool like Filmora that will help you edit all kinds of videos and meet your post-production needs in one place.
FAQ:
- Can I use Filmora to make high-quality changes to videos?
Filmora is an all-in-one video editor with many features and can do many things well. It makes professional video editing easy because it offers a user-friendly interface, drag-and-drop editing, and other complex video editing functions.
- How well does Magix work?
Magix Movie Studio is an easy-to-use, stylish movie editor that doesn’t cost too much. There are still some problems, like the reverse track order, but it’s clear that this is a choice, and if you use other video editing programs, you’ll get used to it.
- Is Audacity good for the new learner?
Because it is so easy to use, Audacity is a great software for beginners who want to record and edit voices and recordings like a pro because it is so easy to use. Before we learn how to use Audacity step by step, let’s look at some of the things that make it useful.
- How long can Audacity record for?
Since Audacity stores samples as 64-bit values (even on 32-bit devices), there is no 32-bit rule that says recordings can’t be longer than 231 samples (which is for example, just over 13.5 hours at a 44,100 Hz sample rate).
- How do I change things in Apowersoft?
Use magic and fantasy to make your edits. To cut or crop a video file, click the scissors or cropping icon, depending on what you want to do. To join videos, drag files into the timeline in the order you want. Add filters and video overlay to your movie to make it look better.
Shanoon Cox
Shanoon Cox is a writer and a lover of all things video.
Follow @Shanoon Cox
‘S Ultimate Video Editors for Adding Music and Sound Effects
‘Movies are 50 % visual and 50 % sound,’ remarked famed movie director David Lynch. Even though creating a well-crafted soundtrack is just as vital as having a flawlessly shot movie, most novice filmmakers and video producers overlook the fact that sound may assist them in creating a fuller and dramatic visual output. The reality is that these software applications enable artists to create cutting-edge videos.
These tools are adept at everything from PIP to audio addition and effects addition to general video control, with a low-cost means of creating music. When all of these effects are combined, music makers become a must-have for everyone. Continue reading this article to learn about the best Video Editor with Music that makes it easier to incorporate music into your videos!
Part 1: Best Video Editors with Music on Windows and Mac
Whether it’s a personal video, a promo, or a cinematic trailer, the audio or song in a video may have a significant impact on our impression of it.
But what if you just have muted footage or a cracked and damaged audio file that has to be repaired, and you would like to add audio to the movie right now? In such a case, you may make things easy for yourself by using the applications listed below!
1 Windows 10 Photos App
Supported System: Windows 10 and Windows 11
Pricing: Free
Microsoft or Windows Photo App, a free photo viewer and editor bundled with Windows 10, provides capable image editing and photo improvements, as well as capabilities for managing and editing video, all in a touch-friendly interface.
You may doodle on photographs, add background music and 3D effects to films, and use automated object tagging to make searching easier. Microsoft Photos is a wonderful tool for working with digital photographs, and for certain users, it may even replace third-party photo applications.
The Windows 10 Photos application’s artificial intelligence function allows you to create a video with music automatically with the Automatic Video feature. It’s simple to accomplish, what’s more, there are some music track presets in the Photos app, so you can change the background music and edit it further manually.
Besides that, you can also create a new video project from scratch and choose music from its background music library.
Step 1: Launch the Photos app, go to New video and then click New Video Project button at the top of the screen, and then rename the video accordingly.

Step 2: Click on the +Add option to import photos or videos to the project from your PC or collection, and then drop and place them to the storyboard.

Step 3: Next, from the top-right, press the Background music menu, pick one from the list. And the music track will fit to the length of the video automatically. You can enable Sync your video to the music’s beat to sync music to the beat of a video.

Step 4: Then press the Done button. This is how you can use the Windows Photos App and add a soundtrack from its background music library to videos. Windows 10 has several benefits, and with the correct tools, you can get the most out of it.
2 Apple iMovie
Supported System: macOS, iOS
Pricing: Free
Apple’s entry-level desktop video editing software can transform your video and photographs into professional-looking creations. However, Apple’s video editing software hasn’t evolved much in the last several years.
Nevertheless, it still outperforms what you will get with Windows 10, which would be limited to the (albeit increasing) video capabilities integrated within Windows’ Photos app.
In your digital films, Apple iMovie contains superb capabilities for media management, color grading, speed, green-screen effects, narration, and music.
It isn’t always the first to support new formats—360-degree video is currently unavailable, but it supports 4K. Trailers and Movies are two of the greatest storyboard-based movie-making features for beginners in iMovie.
For beginner-level video editing, Apple iMovie is an excellent choice. For background sound, the iMovie creator integrates with iTunes and GarageBand, and you may choose from a good range of background soundtracks and audio effects, such as four pitch levels, cosmic, and robot.
The Reduce Background Noise option, on the other hand, is controlled by a slider. Follow these steps to add music to your videos using iMovie:
Step 1: Click the Add Media button while your application is visible in the timeline.
Step 2: To access the built-in music, go to Audio, then Soundtracks.
Step 3: To hear a sample of a soundtrack, press it. If a soundtrack is muted, press it to download it first, then tap it again to listen to it.
Step 4: Tap the Add Audio button near a soundtrack to include it in your composition. iMovie sets the music at the start of the project and instantly adjusts it to the project’s duration.

3 Wondershare Filmora
Supported System: Windows , macOS
Pricing: Free trial
Filmora video editor is among the most advanced and cutting-edge systems for making music videos . This music video creator free download is likewise available for everybody to benefit from. It is a must-have for everyone, with the greatest UI and top-notch support.
Among the most popular features that Filmora has related to adding music are the amazing audio library and the audio editing features it has. The audio library includes different genres of music, such as tender and sentimental, rock, folk, electronic, and young and bright. Some of these audio features include fade in and fade out, audio ducking, adjust level, etc. to enhance your videos after adding the audio of your desire.
Filmora can immediately detect audio beats, evaluate music rhythm, and apply editing marks as a superb music video producer. You may quickly and smartly create your music video this way. This approach is made easier by the project’s user-friendly interface.
For Win 7 or later (64-bit)
For macOS 10.12 or later
Step 1: To begin the procedure, launch Filmora and select Import Media Files to load photos and videos.
Step 2: Place the video in the timeline by dragging and dropping it. And now go to the Audio library to choose a music track to fit the video file.

Step 3: Double click the music track in the timeline, you can change the volume, speed, and other settings here.
and then you can add fade-in or fade-out effects to the audio.

Step 4: After you’ve finished editing, you may export the video in any of the 50+ codecs that the application supports.
4 Cyberlink PowerDirector 365
Supported System: Windows, MacOS
Pricing: Free trial for 30 days
The video editing program PowerDirector from CyberLink bridges the gap between professional editing and user-friendliness. It has frequently been ahead of the curve in terms of support for new formats and techniques.
It also comes with several features that will assist you in creating a great digital movie, complete with transitions, music, and titles. Best of all, it’s simple to use and renders quickly. PowerDirector is the best video editing program on the market.
The new Smart Fit Audio Duration tool allows you to change the length of background music in your movie while keeping the style and tempo of the music. When you’re down in the woods of fine-tuning video and audio features, the application’s user interface is about as plain and easy as a tool with such a massive amount of options can be, but it can still be intimidating.
Step 1: To import audio clips, go to Import Media Files and choose to import audio clips straight from your portable hard drive.
Step 2: Right-click on the song and select Add to Music Track or drag the music onto the playlist.
Step 3: You may choose from a large range of unique background music recordings. Click on the Media category in the Media Room to open a drop-down menu, where you’ll discover the Background Music selection.

5 Movavi Video Editor
Supported System: Window, macOS
Pricing: Free trial
Movavi is a video editing program with a straightforward, user-friendly interface. PiP, chroma-key, titling, adding music to video, basic keyframing, and motion tracking are all included. It isn’t as feature-rich or speedy as some competitors, but it allows you to create appealing work quickly.
It’s time to begin the post-production procedure when your video capture is finished, and your newly obtained film has been safely transferred from your camcorder to a hard disk. You may alter the audio file of your short video in any manner you like with the Movavi video editor.
Step 1: From the welcome box, choose to Create a project in full feature mode. When you’re in the editor, click the Add Media Files button to incorporate the video and audio files you want to utilize in your new project.
Step 2: Every file you choose will be instantly placed on the Movavi timeline, with video files will appear on the Video Track and audio files on the Audio Track. To eliminate the unnecessary section of the audio file, click the Split option.
Step 3: Simply press Start and wait for your movie to be exported after selecting the correct video format and setting the destination folder by deciding on the Save to section.
Conclusion
Any video without some background soundtrack or any music, in general, appears to be at its 50% percent. Users tend to lose interest soon if they don’t have something playing in the background all the time.
This is why the best Video Editor with Music reviewed in this article will ultimately do everything for you. From editing your videos and pictures, these apps are tailored to provide excellent functionality to any user. Decide on the one you liked based on the features and treat yourself to the best!
Step 2: Click on the +Add option to import photos or videos to the project from your PC or collection, and then drop and place them to the storyboard.
Step 3: Next, from the top-right, press the Background music menu, pick one from the list. And the music track will fit to the length of the video automatically. You can enable Sync your video to the music’s beat to sync music to the beat of a video.
Step 4: Then press the Done button. This is how you can use the Windows Photos App and add a soundtrack from its background music library to videos. Windows 10 has several benefits, and with the correct tools, you can get the most out of it.
2 Apple iMovie
Supported System: macOS, iOS
Pricing: Free
Apple’s entry-level desktop video editing software can transform your video and photographs into professional-looking creations. However, Apple’s video editing software hasn’t evolved much in the last several years.
Nevertheless, it still outperforms what you will get with Windows 10, which would be limited to the (albeit increasing) video capabilities integrated within Windows’ Photos app.
In your digital films, Apple iMovie contains superb capabilities for media management, color grading, speed, green-screen effects, narration, and music.
It isn’t always the first to support new formats—360-degree video is currently unavailable, but it supports 4K. Trailers and Movies are two of the greatest storyboard-based movie-making features for beginners in iMovie.
For beginner-level video editing, Apple iMovie is an excellent choice. For background sound, the iMovie creator integrates with iTunes and GarageBand, and you may choose from a good range of background soundtracks and audio effects, such as four pitch levels, cosmic, and robot.
The Reduce Background Noise option, on the other hand, is controlled by a slider. Follow these steps to add music to your videos using iMovie:
Step 1: Click the Add Media button while your application is visible in the timeline.
Step 2: To access the built-in music, go to Audio, then Soundtracks.
Step 3: To hear a sample of a soundtrack, press it. If a soundtrack is muted, press it to download it first, then tap it again to listen to it.
Step 4: Tap the Add Audio button near a soundtrack to include it in your composition. iMovie sets the music at the start of the project and instantly adjusts it to the project’s duration.
3 Wondershare Filmora
Supported System: Windows , macOS
Pricing: Free trial
Filmora video editor is among the most advanced and cutting-edge systems for making music videos . This music video creator free download is likewise available for everybody to benefit from. It is a must-have for everyone, with the greatest UI and top-notch support.
Among the most popular features that Filmora has related to adding music are the amazing audio library and the audio editing features it has. The audio library includes different genres of music, such as tender and sentimental, rock, folk, electronic, and young and bright. Some of these audio features include fade in and fade out, audio ducking, adjust level, etc. to enhance your videos after adding the audio of your desire.
Filmora can immediately detect audio beats, evaluate music rhythm, and apply editing marks as a superb music video producer. You may quickly and smartly create your music video this way. This approach is made easier by the project’s user-friendly interface.
For Win 7 or later (64-bit)
For macOS 10.12 or later
Step 1: To begin the procedure, launch Filmora and select Import Media Files to load photos and videos.
Step 2: Place the video in the timeline by dragging and dropping it. And now go to the Audio library to choose a music track to fit the video file.
Step 3: Double click the music track in the timeline, you can change the volume, speed, and other settings here.
and then you can add fade-in or fade-out effects to the audio.
Step 4: After you’ve finished editing, you may export the video in any of the 50+ codecs that the application supports.
4 Cyberlink PowerDirector 365
Supported System: Windows, MacOS
Pricing: Free trial for 30 days
The video editing program PowerDirector from CyberLink bridges the gap between professional editing and user-friendliness. It has frequently been ahead of the curve in terms of support for new formats and techniques.
It also comes with several features that will assist you in creating a great digital movie, complete with transitions, music, and titles. Best of all, it’s simple to use and renders quickly. PowerDirector is the best video editing program on the market.
The new Smart Fit Audio Duration tool allows you to change the length of background music in your movie while keeping the style and tempo of the music. When you’re down in the woods of fine-tuning video and audio features, the application’s user interface is about as plain and easy as a tool with such a massive amount of options can be, but it can still be intimidating.
Step 1: To import audio clips, go to Import Media Files and choose to import audio clips straight from your portable hard drive.
Step 2: Right-click on the song and select Add to Music Track or drag the music onto the playlist.
Step 3: You may choose from a large range of unique background music recordings. Click on the Media category in the Media Room to open a drop-down menu, where you’ll discover the Background Music selection.
5 Movavi Video Editor
Supported System: Window, macOS
Pricing: Free trial
Movavi is a video editing program with a straightforward, user-friendly interface. PiP, chroma-key, titling, adding music to video, basic keyframing, and motion tracking are all included. It isn’t as feature-rich or speedy as some competitors, but it allows you to create appealing work quickly.
It’s time to begin the post-production procedure when your video capture is finished, and your newly obtained film has been safely transferred from your camcorder to a hard disk. You may alter the audio file of your short video in any manner you like with the Movavi video editor.
Step 1: From the welcome box, choose to Create a project in full feature mode. When you’re in the editor, click the Add Media Files button to incorporate the video and audio files you want to utilize in your new project.
Step 2: Every file you choose will be instantly placed on the Movavi timeline, with video files will appear on the Video Track and audio files on the Audio Track. To eliminate the unnecessary section of the audio file, click the Split option.
Step 3: Simply press Start and wait for your movie to be exported after selecting the correct video format and setting the destination folder by deciding on the Save to section.
Conclusion
Any video without some background soundtrack or any music, in general, appears to be at its 50% percent. Users tend to lose interest soon if they don’t have something playing in the background all the time.
This is why the best Video Editor with Music reviewed in this article will ultimately do everything for you. From editing your videos and pictures, these apps are tailored to provide excellent functionality to any user. Decide on the one you liked based on the features and treat yourself to the best!
13 Stellar Video Editing Software Options (Besides WMM)
Windows Movie Maker has been a cornerstone tool for video editors for quite a while. There are a lot of amateurs who’ve made use of the free program and have done wonders with it. As it is discontinued, many Windows Movie Maker alternatives claim to offer ‘just the right video editing tool for you,’ few can live up to their promises—and most are very expensive.
We have ten other programs that can be used to create videos that include everything from Apple iMovie to other basic alternatives.
So whether you’re a beginner who wants to learn how to make a movie, a pro looking for an excellent alternative to Windows Movie Maker, or someone who wants to make a simple slide presentation or online video, you’re bound to find a video creation program here.
- Wondershare Filmora
- Avidemux Video Editor
- VirtualDub
- Sony Vegas Movie Studio
- WeVideo
- Lightworks
- ShotCut
- OpenShot
- Movavi Video Editor Plus
- VSDC Free Video Editor
- VideoPad Video Editor
- HitFilm
- Magix Movie Studio
- How To Edit a Video With a Windows Movie Maker Alternative
- Hot FAQs on Windows Movie Maker Alternatives
Part 1: Top 3 Picks for Windows Movie Maker Alternatives
The world’s best video editing software is about to change. We look at three of the most popular and valuable alternatives to Windows Movie Maker.
You will need to consider these alternatives to ensure they meet your expectations and needs.
1. Wondershare Filmora - Best Overall

Filmora is the best Windows Movie Maker Alternative designed according to your convenience.
Ratings: 4.4 Stars out 5
Starting from $49.99
2. Magix Movie Studio - Best for Collages
This alternative offers a variety of tools and plugins for anyone who wants to create professional-level videos in under a minute.
Download on Windows
Ratings: 4 stars out of 5
30-day free trials, then starts from $69.99 all the way to $129
3. Avidemux Video Editor - Best Open-Source Editor

An open-source editor that supports a wide range of formats is free! Avidemux has an interface similar to Windows Movie Maker, which makes it a perfect alternative.
Download on Windows
Ratings: 4.0 stars out of 5
Free Trial
Part 2: Ultimate Overview on 13 Best Alternatives to Windows Movie Maker
We live in visual culture, and we constantly see, capture, upload, and share videos on our smartphones, tablets, and laptops. So, it is only natural that more people seek ways to edit their videos. Windows Movie Maker was one of the most popular video editing apps. So it’s time to dig into the best Windows Movie Maker alternatives, which are arguably better and feature-rich.
| Software | OS | Media Resources | AI editing | Easy to Use | Free Trial |
|---|---|---|---|---|---|
| Wondershare Filmora | WindowsMacMobile | Yes | Yes | Yes | Yes |
| Avidemux | WindowsOS XLinuxBSD | Yes | No | Yes | Yes |
| Virtual Dub | Windows | No | No | Yes | Yes |
| Vegas Movie Studio | Windows | Yes | Yes | No | No |
| WeVideo | Online | Yes | No | Yes | Yes |
| Lightworks | LinuxOS X Windows | Yes | Yes | No | No |
| ShotCut | WindowsMacLinuxBSD | Yes | No | No | Yes |
| OpenShot | WindowsMacLinuxChrome OS | Yes | No | Yes | Yes |
| Movavi Plus | WindowsMac | Yes | No | Yes | Yes |
| VSDC | Windows | Yes | No | Yes | Yes |
| VideoPad | WindowsMaciPad/iPhone | Yes | No | Yes | Yes |
| HitFilm | WindowsMac | Yes | Yes | Yes | Yes |
| Magix Movie Studio | Windows | Yes | Yes | No | Yes |
Part 3: 13 Best Windows Movie Maker Alternatives for Windows
As we all know, Windows Movie Maker is the most used and trusted tool for creating videos in Windows. With its unique features and user-friendly interface, people often use this software to develop short and entertaining videos.
However, the fact is that Windows Movie Maker is not the current best video editing software for creating complex video projects. For this reason, we compiled a list of the 12 best alternatives to offer you a better option for Windows Movie Maker.
1. Wondershare Filmora
Filmora 11 is a powerful, easy-to-use video editor specially designed to streamline your workflow and save you hours weekly. It supports everything from Windows, Mac, and IOS to Android. The latest update to the flagship app includes several key enhancements that result in a much more efficient video creation workflow and one that’s easier to use than its rivals.
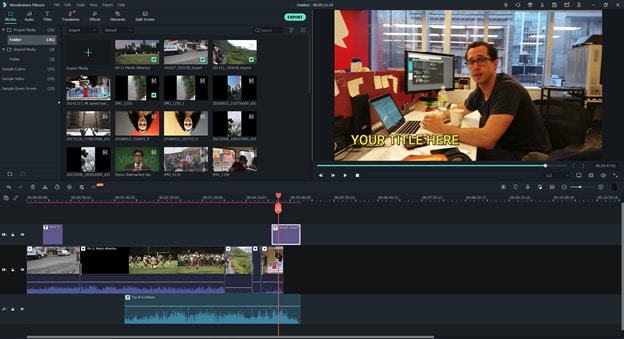
Key features
- Preset Templates
- Instant Mode
- Motion Tracking
- AI Editing Effects
- Auto Synchronization
- Plug-ins
Price
- Annual Plan: $49.99
- Perpetual Plan: $79.99
Pros
- Seamless interface for beginners
- Great customer support
- Plenty of effects and preset templates
- 4K video output options
Cons
- Rendering requires too much time
- The mobile app requires separate subscription
Supported OS: Windows , Mac , iOS , Android , iPad
G2 Ratings: 4.4 stars out of 5
Summary
Filmora’s intuitive interface allows experienced and brand-new users to create incredible videos with flawless special effects. Its high ratings and multiple supported formats make it quite popular among users.
2. Avidemux Video Editor
If you are a beginner and want to use a free, open-source software program for basic video editing, then Avidemux is a good choice. The interface is not as fancy as it could be, but there are some presets that’ll save you a lot of time. Avidemux is a cross-platform video editor that allows you to create custom videos, but it doesn’t feature the ability to share the edited footage to social media directly,
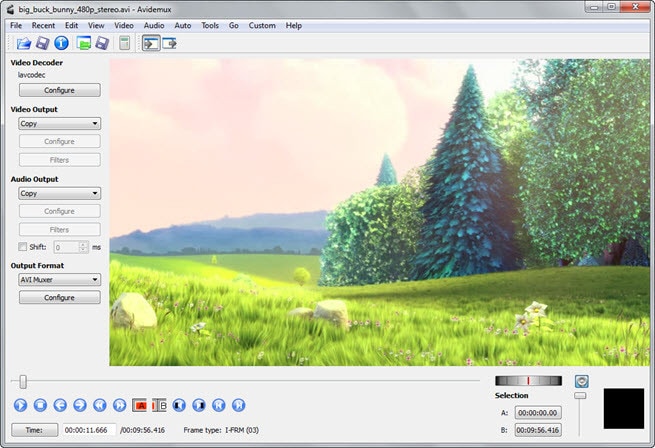
Key features
- Video and Audio Filters
- Support Popular Formats
- Convert Video For Archiving or Publishing
Price: Free
Pros
- It can convert Video To A Smaller Size
- Easy cut, trim, split video
Cons
- Out-dated UI
- Lacks sharing option
Supported OS: Windows , OS X , Linux , BSD
Uptodown Ratings: 4.0 stars out of 5
Summary
An open-source video editor that supports most formats. Due to its obsolete UI and lack of sharing features, Avidemux has average ratings.
3. VirtualDub
This open-source software is user-friendly and allows users with little experience to navigate the software without much trouble. It supports 3rd party apps and also offers batch-processing, which means working on multiple videos simultaneously makes it possible.
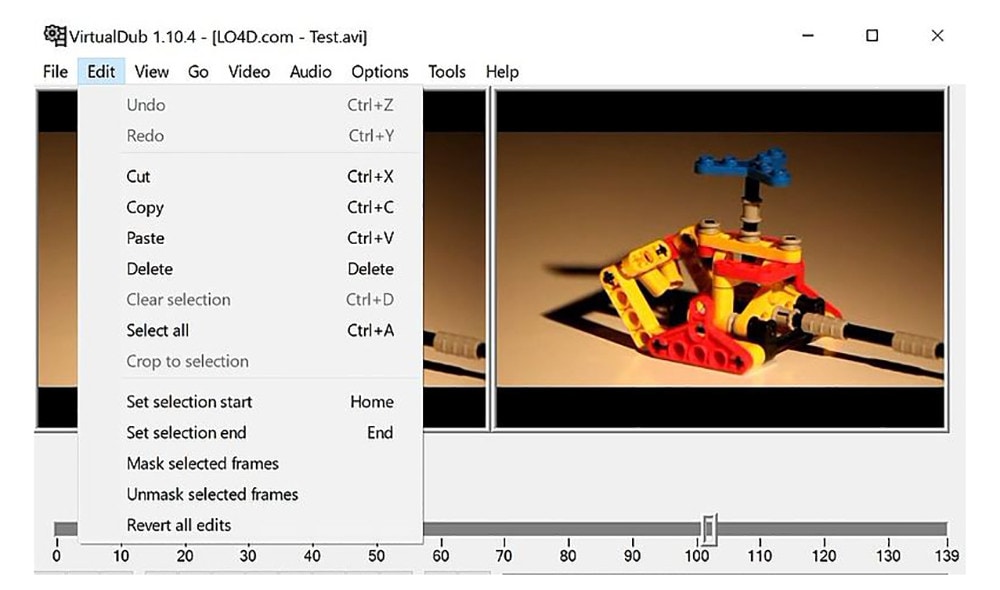
Key features
- Integrated volume and histogram meter
- Optimized disk
- Noise reduction
- Fractional frame rates
Price: Free
Pros
- Clean interface, easy to use
- Keyboard and mouse shortcuts for faster operation
- Free to use
Cons
- Not suitable for 4K editing
- Lack learning material
- Obsolete Interface
Supported OS: Windows
Compare Camp Ratings: 4.0 stars out of 5
Summary
Virtual Dub supports multitasking, and its features are pretty helpful. However, it lacks 4k editing and a friendly interface. Overall Virtual Dub is a good choice.
4. Sony Vegas Movie Studio
This video editing software makes it easy to create professional-looking videos in minimum time and effort. Vegas Movie Studio software is best for video editing professionals who have been doing it for some time and are looking for something a little more sophisticated than free alternatives. Not only does it has a high retail price, but its internal elements can be too complex for those just beginning.
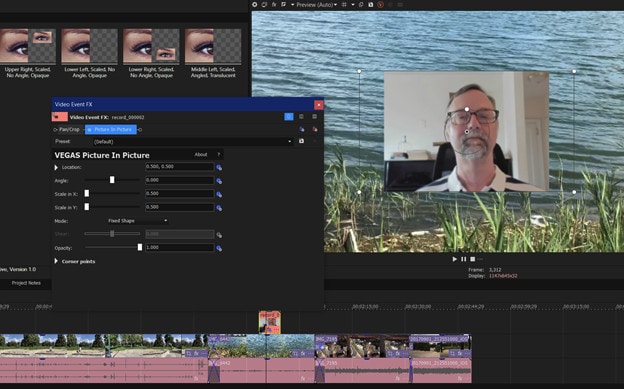
Key features
- Color correction
- HDV and AVCHD-editing
- DV batch capture
- Wide variety of file formats and codecs
Price: Starting from $7.99 USD per month
Pros
- Customizable interface
- Multicam editing
- Lots of effects and transitions, with plug-in capability
- Good slow motion and warp flow transition tools
Cons
- Less intuitive interface than competitors
- Import from camcorder not ideal
- Some tools are complex
Supported OS: Windows
G2 Ratings: 4.4 out of 5
Summary
Vegas Movie Studio is the choice of professionals. It does all the work without taking up a lot of resources, and like most programs, there is a learning curve. It’s not always intuitive for beginners, but its professional and powerful features score decent in most reviews.
5. WeVideo
This cloud-based application is a simple-to-use video editing and sharing suite. WeVideo is a full-featured video editing application that uses JumpStart technology to create amazing videos. It’s an innovative app that offers a seamless editing experience as it supports multiple formats of video, images, audio, and graphics.
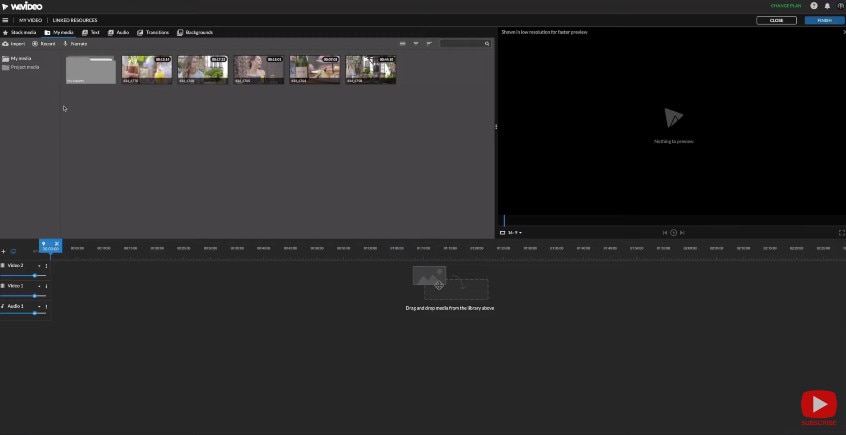
Key features
- WeVideo JumpStart
- Cloud storage
- Built-in graphics
- Customizable environment
- Advanced text editing
- Multi-track editing and storyboard
Price
- Free trial
- Power Plan: $9.99/month
- Unlimited Plan: $15.99/month
- Professional Plan: $39.99/month
- Business Plan: $73.99/month
Pros
- Constantly improving features
- Ease of use
- Storage is cloud-based
Cons
- Old fashion transition
- Leaves a watermark on free trial
Supported OS: Online
Trustpilot Ratings: 4 stars out of 5
Summary
WeVideo is a straightforward yet robust video editor. It offers a variety of features and supports multiple formats, plus its comprehensive pricing plan makes it useful for everyone.
6. Lightworks
Lightworks is the most powerful video editor in its class and an excellent tool for professionals who want to make amazing videos quickly. Lightworks is very fast and straightforward to use, and it has some great features you won’t find in any other video editor. It is available on all popular OS.

Key features
- Audio and Video Effect Plugin Support
- Cloud Connected
- Motion Graphics
- Advanced Metadata
- Proxy Workflows
- Apple ProRes decoding
Price
- Monthly Plan: $9.99/user
- Yearly Plan: $9.99/user
- Perpetual: $154.99
Pros
- High-resolution timeline rendering
- It has social media export templates
- Interfaces for multiple OS are consistent
- Instant autosave
Cons
- Commands are not always intuitive
- A bit pricey as compared to its competitors
Supported OS: Windows , Mac , Linux
Techradar Pro Ratings: 4 stars out of 5
Summary
Lightworks is not any other video editing tool available on the market of video editing tools. This video editing tool provides amateurs with the most sophisticated features in an optimized platform. Its scores are the highest on almost every review site.
7. ShotCut
Shotcut is a multiplatform video editor that lets you work with various formats for audio, video, image files, etc. This video editor makes it easy to mix and match the resolution and frame rates in a video file. All the changes you make in the editor can be undone and redone often. Shotcut is the best choice for video editing, without question.

Key features
- Webcam capture
- Audio scopes and filters
- Deinterlacing
- Eyedropper tool
- Video wipe transitions
- Keyframes for filter parameters
Price: Free
Pros
- Support for 4K resolutions
- Free
Cons
- Less intuitive than commercial apps
- Lacks built-in sharing to popular sites
Supported OS: Windows , Mac , Linux
GetApp Ratings: 4.5 out of 5 stars
Summary
Shotcut is an open-source video editor for creative professionals and is available on mac, Windows, and Linux. The free version of Shotcut has many excellent features, but it doesn’t have the slick interface or advanced techniques of the top paid editors.
8. OpenShot
An award-winning open-source video editor that creates stunning videos. OpenShot is a fast, easy-to-use, and surprisingly powerful video editor. OpenShot Video Editor allows you to work with many different types of tracks so that your edits will seem natural. OpenShot Video Editor allows you to add your custom animations or titles. The options are endless, so it all depends on your time and interest. It is available in more than 70 languages, making it ideal for all types of users.
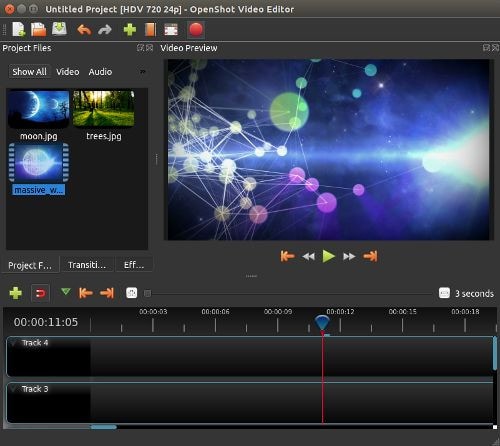
Key features
- 3D animations
- Animation and keyframes
- Multiple languages and formats
- Cross-platform
- Video-effects
Price: Free
Pros
- It is a non-linear editor with infinite tracks
- 100% free without watermark
- Frequent updates
Cons
- Obsolete interface
- Unstable performance
- Lacks some editing features
Supported OS: Window , Mac , Linux , Chrome OS
Getapp Ratings: 4.2 stars out of 5
Summary
Another open-source video-editor in the list is named OpenShot. It’s a multi-lingual and multi-supported app with unique features. Despite its unstable performance, OpenShot is still an ideal choice for many users.
9. Movavi Video Editor Plus
Movavi Video Editor Plus is the perfect tool to bring your creative ideas to life. It has special effects, ready-made intros, and keyframe animation. Using chroma keying, you can change the background of your video clips to any color or pattern that suits your need. Movavi has now redesigned its user interface to make it easy to use.
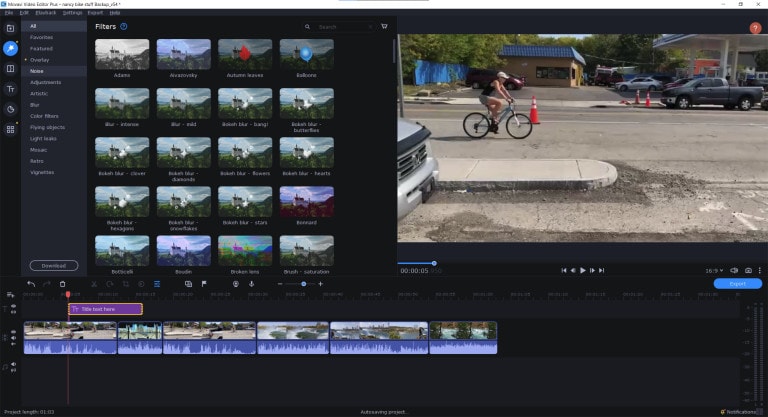
Key features
- Effects and transitions
- Built-in media pack
- Fast processing of 4K videos
- Keyframe animation
- Automatic video creation
- Cutting, trimming, joining
Price
- Free version: 7 days
- Video Editor Plus 1 year /1 PC: $49.95
- Video Editor Plus Lifetime /1 PC: $69.95
- Video Suite Lifetime /1 PC: $89.95
Pros
- Easy-to-understand user interface
- Transitions with sound
- Motion tracking and picture-in-picture tools
- Chroma-key capability
- Quick movie-creation tool
Cons
- Lacks advanced trim modes
- Slow rendering
PCMag Ratings: 4.0 stars out of 5
Summary
If you want to edit your videos with a minimal learning curve, try Movavi. You get PiP, chroma-keying, titling, basic keying, and motion tracking. The program is simple to use but doesn’t have all the features and stands four stars.
10. VSDC Free Video Editor
VSDC Free Video Editor is an online tool that lets you edit audio and video files to make your creations like movies, YouTube tutorial videos, and more. The audio and video files supported are extensive, and the software includes a codec manager. The Pro version isn’t necessary if you’re using the free edition of the software; it’s more than enough to get the job done.
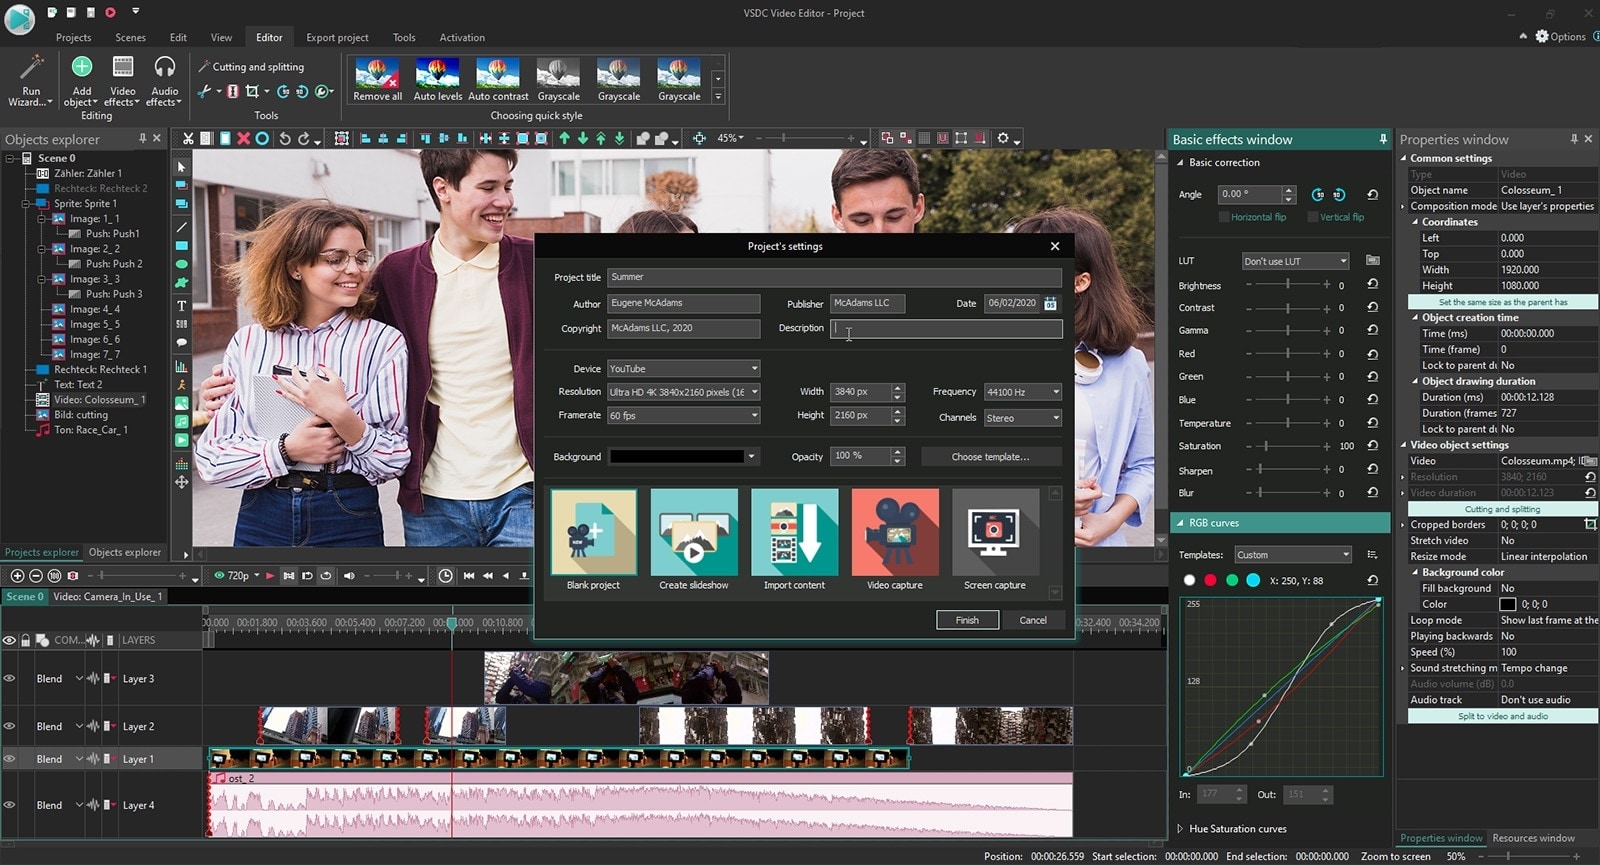
Key features
- Dark theme
- Subpixel Accuracy
- Powerful Chroma Key tool
- Trendy video effects, filters, and transitions
- Color Blending And Filters
- Built-In DVD Burning Tool
Price: Free
Pros
- Non-linear
- Video effects library
- Video stabilization
- Masking
Cons
- Outdated interface
- Lack keyboard shortcuts
- Only available on Windows
Supported OS: Windows
Capterra Ratings: 4.5 stars out 5
Summary
VSDC is a non-linear editor with extensive format support. It includes all the essential features an editor requires but with an obsolete UI. It is also ideal for many who need a powerful yet free video editor.
11. VideoPad Video Editor
VideoPad is a free video editor that can create stunning videos and perform basic editing tasks. A good video editor can help you to create videos for different social media platforms. You can make your videos look professional and polished with a few clicks and some simple editing skills. There’s nothing particularly exciting or advanced about this app; it’s simple enough for anyone new to video editing or even for seasoned editors. But the simple and easy-to-use interface makes the entire process very exciting.
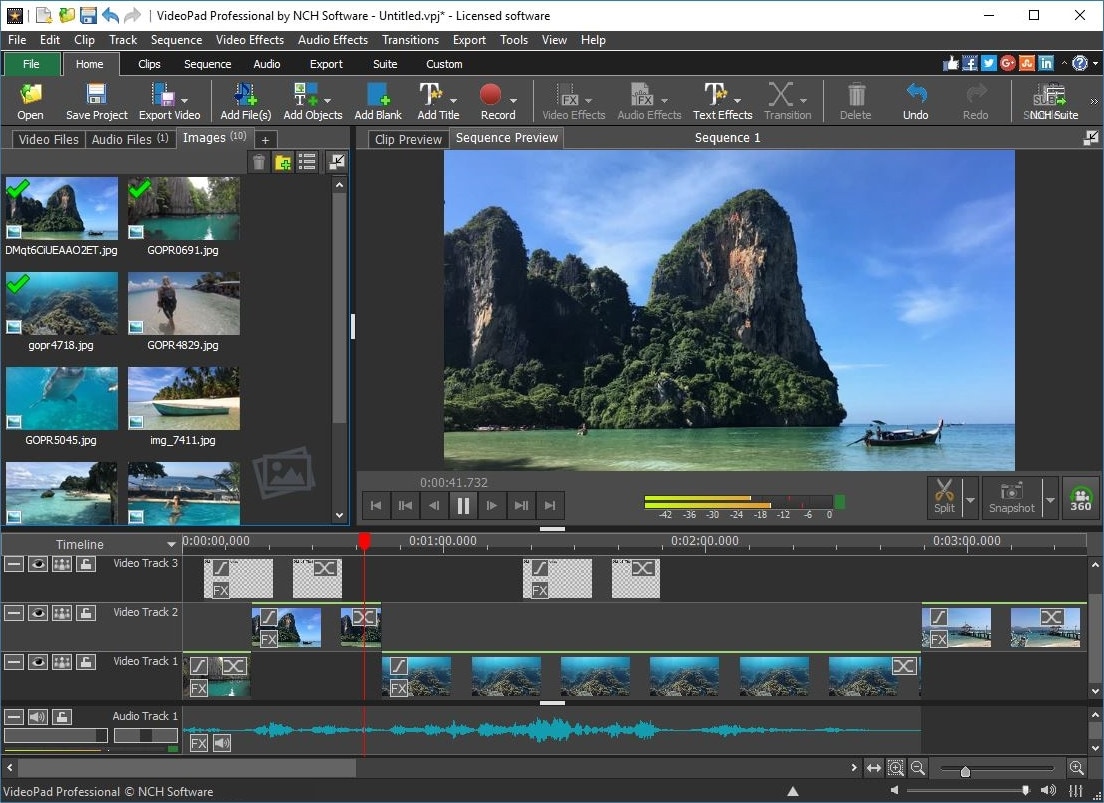
Key features
- Text snippets
- Range of transitional effects
- Plug-ins Library
- Burn finished videos to Blu-Ray, DVD, etc.
- Color correction and light balance.
Price: Free
Pros
- Simple and clean interface
- Supports multiple file formats
- Includes video effects
- Lightweight on system resources
Cons
- Lack of advanced features
Supported OS: Windows , Mac , iPad/iPhone
Tom’s guide Ratings: 3.5 stars out of 5
Summary
Video pad is a free video editor designed for beginners that is lightweight and simple. VideoPad is also great for creating quick videos for social media purposes like Youtube and Facebook. The software has a high rating, as shown above, and it’s available on Windows.
12. HitFilm
HitFilm is a helpful video editing software that makes editing easier for users. In addition to basic features, the program also provides advanced-level functions that make edited videos pop. Hitfilm Express Download has more than 400 features to help casual video editors save time. Features like: visual effects, cinematic elements, and compositing tools preset help unleash your creativity.
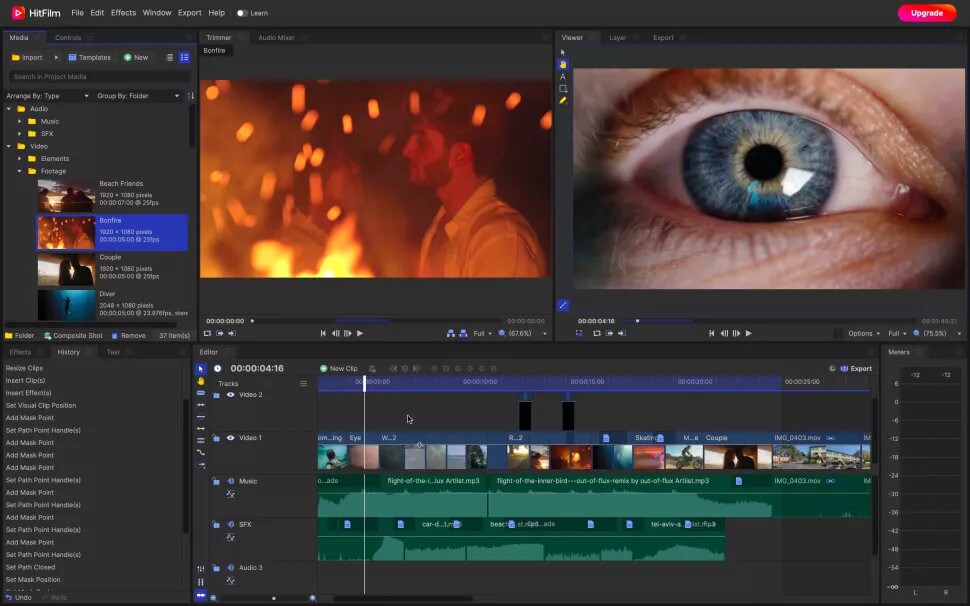
Key features
- Color Grading and correction
- Smart search
- Commentator recorder
- Lightning and lens flares
- 3D camera tracker
Price
- Free trial
- Creator: $7.50
- Pro: $12.50
- Enterprise: Custom pricing
Pros
- Intuitive interface
- It offers free tutorials and masterclasses
- Works on both Windows and Mac
Cons
- It requires heavy system requirements
TechRadar Ratings: 4.5 stars out of 5
Summary
HitFilm Express 15 is a powerful free video editing program that enables you to create high-quality videos in minutes with an intuitive interface. It offers advanced editing features such as advanced video trimming, 3D editing, and more.
13. Magix Movie Studio
Magix is the world’s leading professional audiovisual media software, with Sequoia being its industry-standard audio editing software. This movie editor is an enthusiast-level video editing software that competes with software from Adobe and CyberLink, and it even boasts support for 4K content and 360 degrees. There are many reasons to upgrade. This year’s update includes stabilization, 8K editing, motion tracking, and an in-app plug-in store.
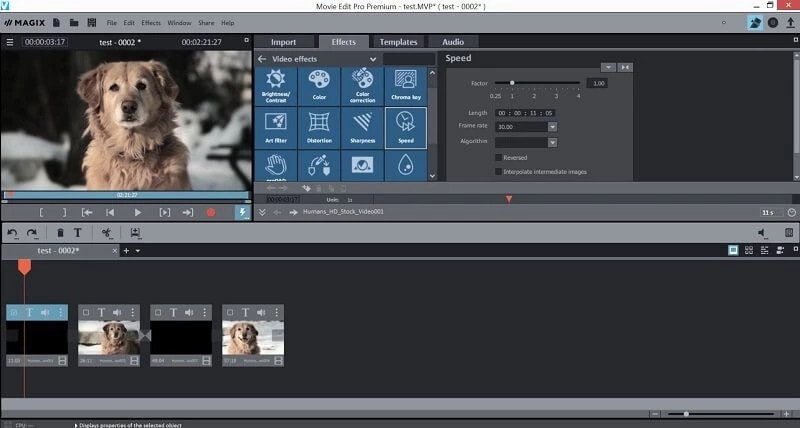
Key features
- NewBlue effects
- Fly-in animation
- New filter view
- Stabilization
- Motion tracking
- 8k support
Price
- Movie Studio 2024: $69.99 (30-day free trial)
- Movie Studio 2024 Platinum: $99.99 (30-day free trial)
- Movie Studio 2024 Suite: $129.00 (30-day free trial)
Pros
- Lots of video effects
- Responsive editing interface
- Multicam
- Trailer-like movie templates
- Solid audio editing
Cons
- Slower project rendering than others
- Lacks import and organization tools
Supported OS: Windows
PCMag Ratings: 3 stars out of 5
Summary
Magix movie studio is a powerful all-around video editing tool with many features that professional users have come to expect. It’s also relatively simple to use. But usability and performance are poor compared to other software programs like Filmora .
Part 4: How To Edit a Video With a Windows Movie Maker Alternative
Windows Movie Maker was great for editing a video, but it’s no match for some of the best video editing software. We’re talking about software capable of creating a cinematic experience in seconds, all on your computer.
When you need to edit a video with simple, quick edits, like adding a special effect or changing the background, try Filmora . Filmora is an easy-to-use application that allows you to create a movie using simple tools that don’t require additional training. You can’t beat this option if you want to create a professional-quality video for your blog or website.
Let’s dive into a quick tutorial on editing videos in Filmora:
Free Download For Win 7 or later(64-bit)
Free Download For macOS 10.14 or later
Step1 Open Wondershare Filmora on your PC or Mac
You can start a new project by clicking on ‘New Project’. And you can also change the ‘Aspect Ratio’ according to your project demand.
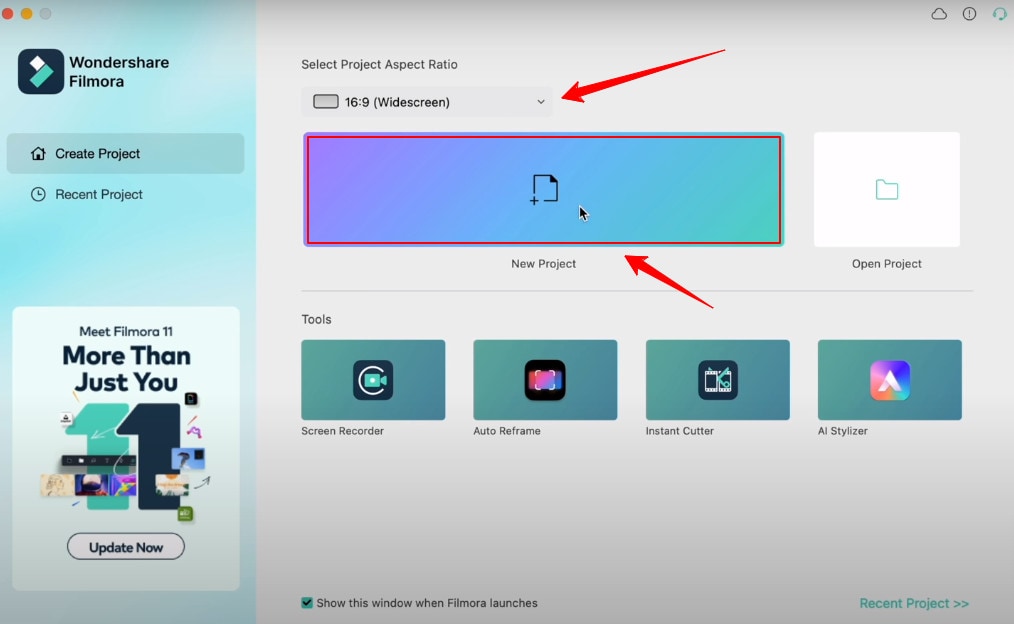
Step2 Import Videos
You can import your file by clicking the import tab on the upper-left side or clicking the import icon on the main window.
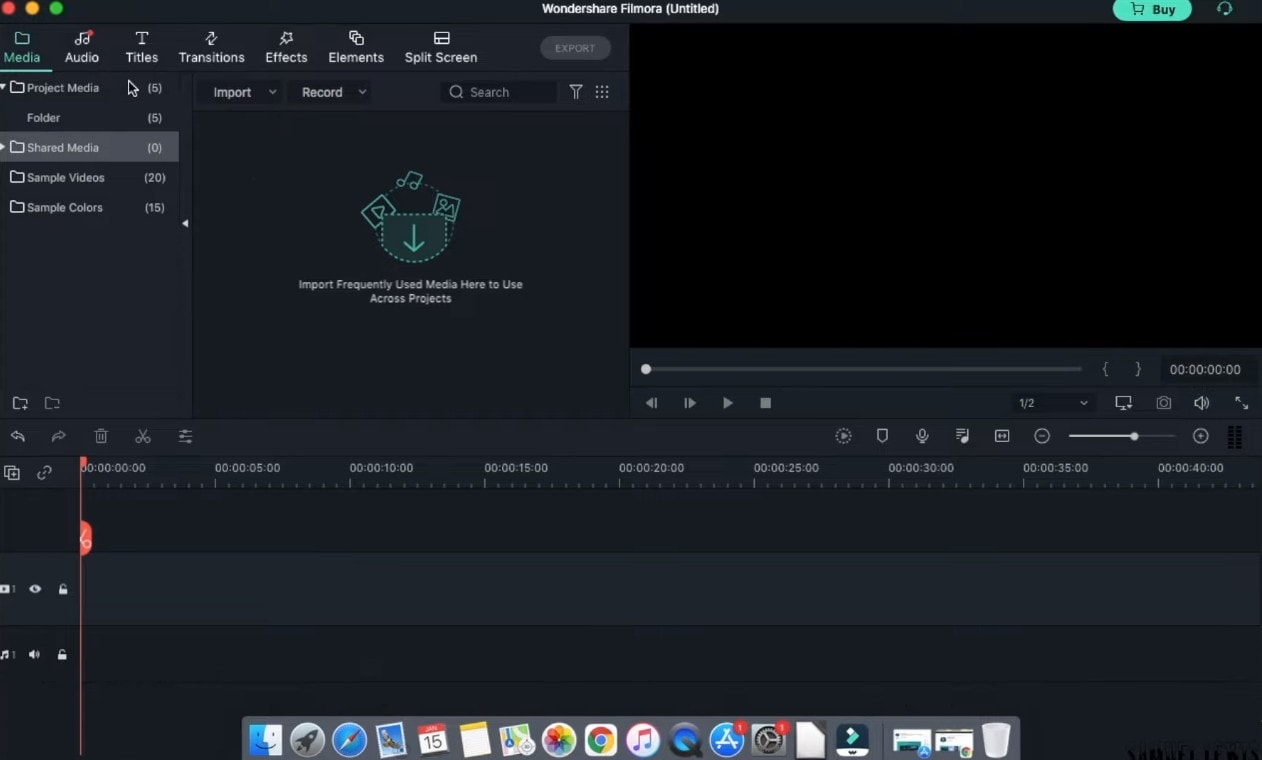
Step3 Drag and drop your footage to the timeline
After importing all the files, click and hold each individual video and drag and drop it to the timeline area according to your ideal sequence.
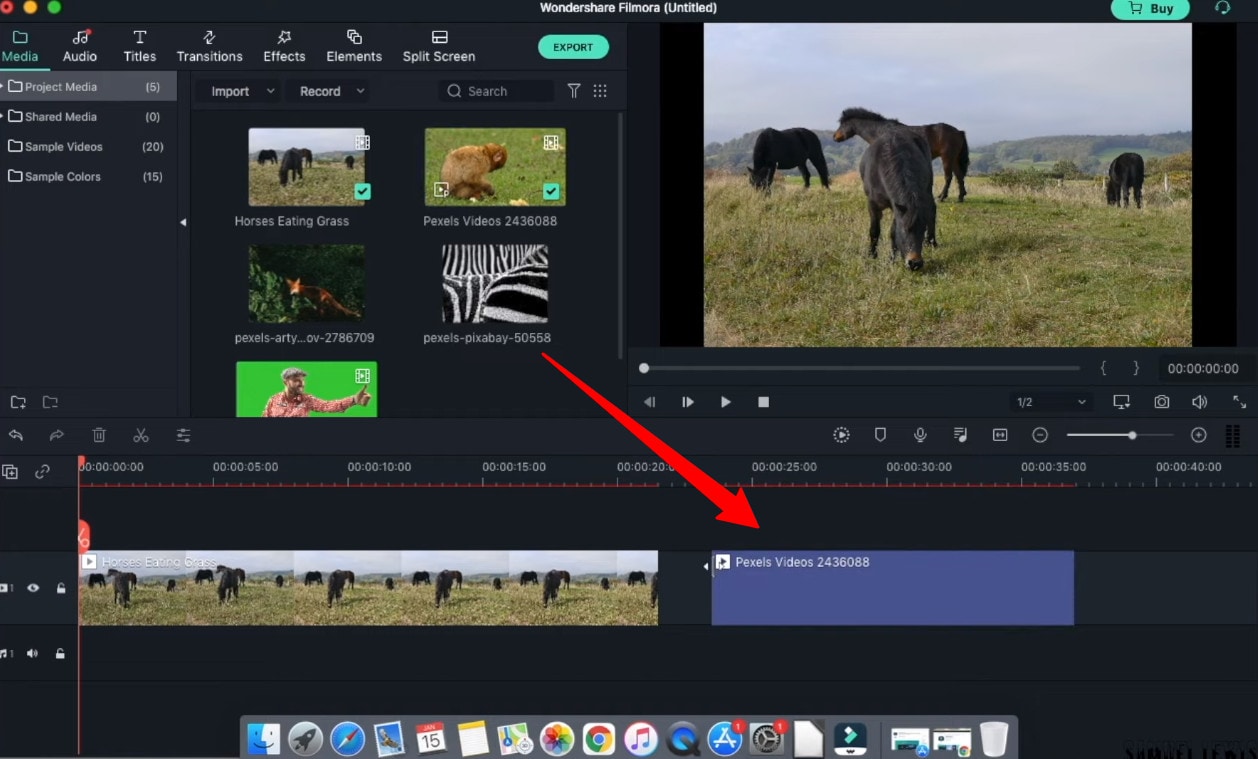
Step4 Add Audio
Go to the ‘Audio’ tab and select the audio file from the audio library. Once selected, drag and drop the audio file into the music timeline.
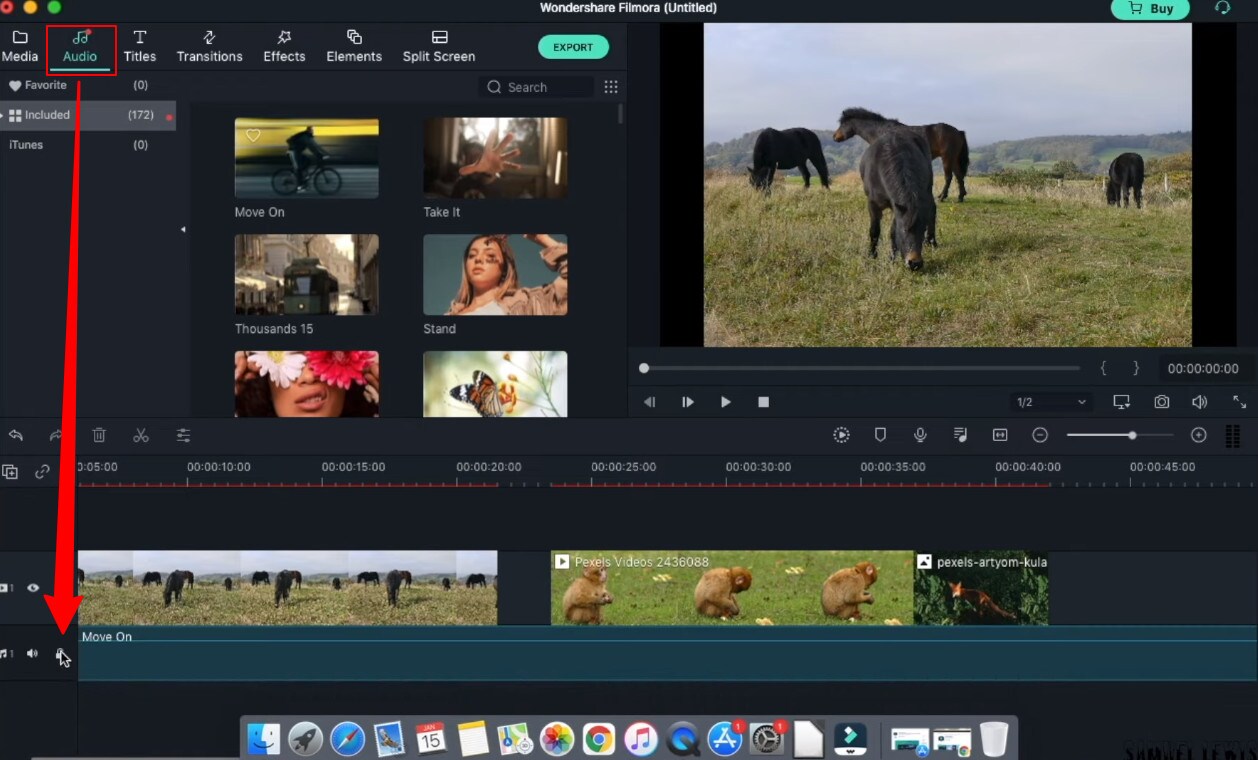
Step5 Add Titles
In your video intro, you can insert some title text. Go to the ‘Titles’ tab and select the one you like, and drag and drop it on top of the timeline. Double-click and edit the text and state your ideal statements. You can customize your text fonts and color too.
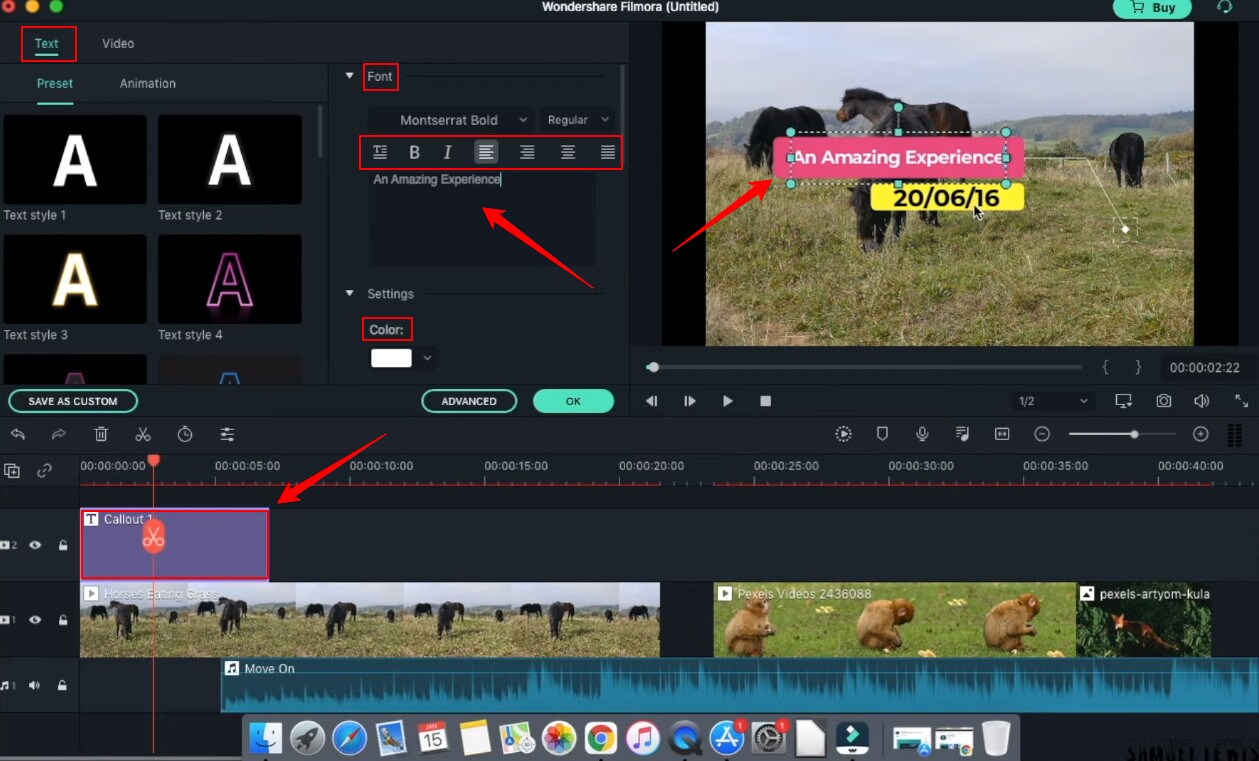
Step6 Add Transitions
You can add transition effects to ensure a smooth transition from one scene to another. The overall will get more professional look.
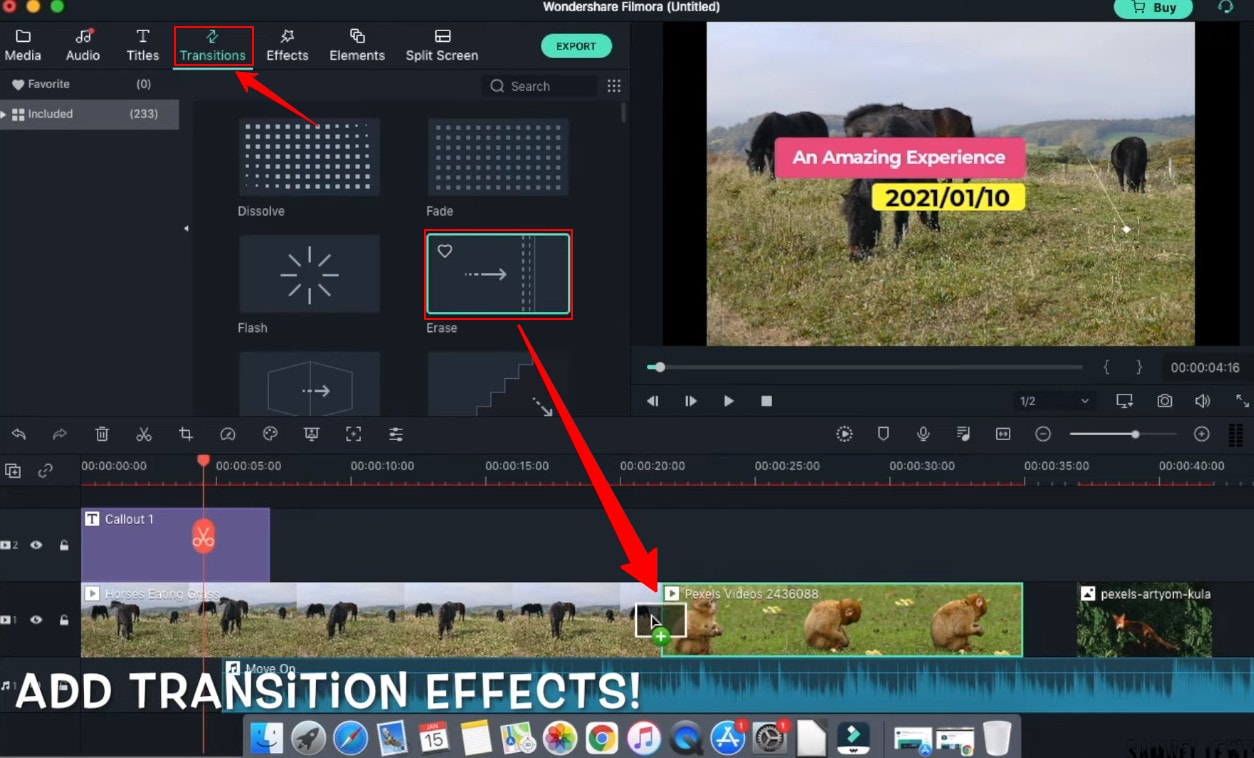
Step7 Add Effects
Next; you can get special effects to your video to make them more attractive and engaging to watch. Simple drag down the effect to your video and watch the effect take place in your selective scene.
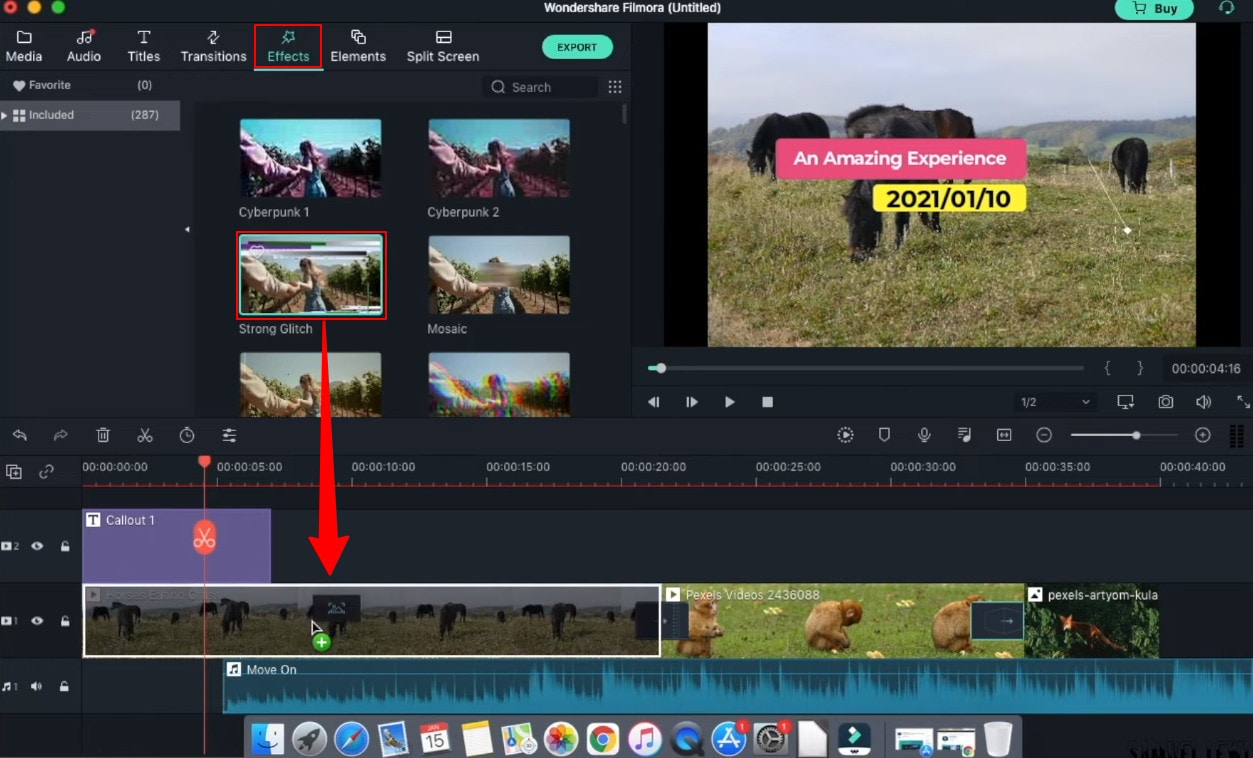
Step8 Export your work
Once all the changes have been made, hit ‘export’ from the top tab. A window will appear where you can change the settings, resolution, frame rate, bit rate, etc. Next, click the ‘export’ button down on that window, and then you can save the file in your drive.
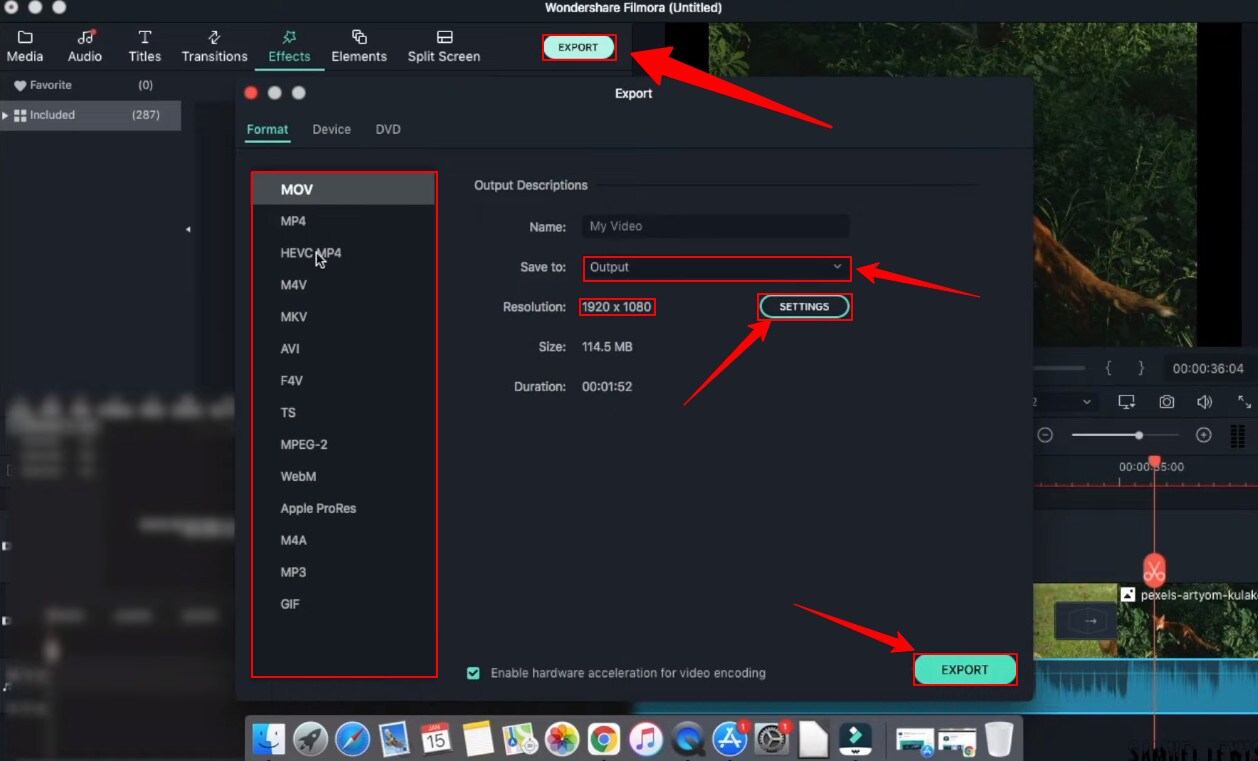
Part 5: Hot FAQs on Windows Movie Maker Alternatives
1. Why is Windows Movie Maker discontinued?
Microsoft’s video editing program, Windows Movie Maker, did not become a big hit with the public because it failed to do well on the market. Microsoft couldn’t get the support they were looking for from the program’s users. As a result, Microsoft had to cease its support of the program.
2. Is there a free version of Windows Movie Maker?
Microsoft Windows Movie maker was always accessible and pre-installed every windows product. Microsoft has discontinued support for Movie Maker and warns about free downloads of Movie Maker provided by third parties that might contain malware, viruses, or other issues.
3. What are the best free Windows Movie Maker Alternatives for Mac?
After switching to a Mac, you’ll find that the Windows Movie Maker alternatives offer much more than just a simple video editor. They provide advanced features, easy transitions, and less technical know-how to create pro-quality results. You should try using these platforms on your Mac if you have a video to edit.
- Wondershare Filmora
- Movavi
- OpenShot
Final Words
Windows Movie Maker is an excellent Windows video editor application for Windows users. But in recent years, it has become outdated due to the continuous development of new technologies. There are many alternatives for Windows Movie Maker, and here we listed some of the best ones. Most of them are free and featured packs. Each program has its unique set of features and capabilities, and each one excels in different areas. Check them out and see what you think.
Free Download For Win 7 or later(64-bit)
Free Download For macOS 10.14 or later
Part 1: Top 3 Picks for Windows Movie Maker Alternatives
The world’s best video editing software is about to change. We look at three of the most popular and valuable alternatives to Windows Movie Maker.
You will need to consider these alternatives to ensure they meet your expectations and needs.
1. Wondershare Filmora - Best Overall
Filmora is the best Windows Movie Maker Alternative designed according to your convenience.
Ratings: 4.4 Stars out 5
Starting from $49.99
2. Magix Movie Studio - Best for Collages
This alternative offers a variety of tools and plugins for anyone who wants to create professional-level videos in under a minute.
Download on Windows
Ratings: 4 stars out of 5
30-day free trials, then starts from $69.99 all the way to $129
3. Avidemux Video Editor - Best Open-Source Editor
An open-source editor that supports a wide range of formats is free! Avidemux has an interface similar to Windows Movie Maker, which makes it a perfect alternative.
Download on Windows
Ratings: 4.0 stars out of 5
Free Trial
Part 2: Ultimate Overview on 13 Best Alternatives to Windows Movie Maker
We live in visual culture, and we constantly see, capture, upload, and share videos on our smartphones, tablets, and laptops. So, it is only natural that more people seek ways to edit their videos. Windows Movie Maker was one of the most popular video editing apps. So it’s time to dig into the best Windows Movie Maker alternatives, which are arguably better and feature-rich.
| Software | OS | Media Resources | AI editing | Easy to Use | Free Trial |
|---|---|---|---|---|---|
| Wondershare Filmora | WindowsMacMobile | Yes | Yes | Yes | Yes |
| Avidemux | WindowsOS XLinuxBSD | Yes | No | Yes | Yes |
| Virtual Dub | Windows | No | No | Yes | Yes |
| Vegas Movie Studio | Windows | Yes | Yes | No | No |
| WeVideo | Online | Yes | No | Yes | Yes |
| Lightworks | LinuxOS X Windows | Yes | Yes | No | No |
| ShotCut | WindowsMacLinuxBSD | Yes | No | No | Yes |
| OpenShot | WindowsMacLinuxChrome OS | Yes | No | Yes | Yes |
| Movavi Plus | WindowsMac | Yes | No | Yes | Yes |
| VSDC | Windows | Yes | No | Yes | Yes |
| VideoPad | WindowsMaciPad/iPhone | Yes | No | Yes | Yes |
| HitFilm | WindowsMac | Yes | Yes | Yes | Yes |
| Magix Movie Studio | Windows | Yes | Yes | No | Yes |
Part 3: 13 Best Windows Movie Maker Alternatives for Windows
As we all know, Windows Movie Maker is the most used and trusted tool for creating videos in Windows. With its unique features and user-friendly interface, people often use this software to develop short and entertaining videos.
However, the fact is that Windows Movie Maker is not the current best video editing software for creating complex video projects. For this reason, we compiled a list of the 12 best alternatives to offer you a better option for Windows Movie Maker.
1. Wondershare Filmora
Filmora 11 is a powerful, easy-to-use video editor specially designed to streamline your workflow and save you hours weekly. It supports everything from Windows, Mac, and IOS to Android. The latest update to the flagship app includes several key enhancements that result in a much more efficient video creation workflow and one that’s easier to use than its rivals.
Key features
- Preset Templates
- Instant Mode
- Motion Tracking
- AI Editing Effects
- Auto Synchronization
- Plug-ins
Price
- Annual Plan: $49.99
- Perpetual Plan: $79.99
Pros
- Seamless interface for beginners
- Great customer support
- Plenty of effects and preset templates
- 4K video output options
Cons
- Rendering requires too much time
- The mobile app requires separate subscription
Supported OS: Windows , Mac , iOS , Android , iPad
G2 Ratings: 4.4 stars out of 5
Summary
Filmora’s intuitive interface allows experienced and brand-new users to create incredible videos with flawless special effects. Its high ratings and multiple supported formats make it quite popular among users.
2. Avidemux Video Editor
If you are a beginner and want to use a free, open-source software program for basic video editing, then Avidemux is a good choice. The interface is not as fancy as it could be, but there are some presets that’ll save you a lot of time. Avidemux is a cross-platform video editor that allows you to create custom videos, but it doesn’t feature the ability to share the edited footage to social media directly,
Key features
- Video and Audio Filters
- Support Popular Formats
- Convert Video For Archiving or Publishing
Price: Free
Pros
- It can convert Video To A Smaller Size
- Easy cut, trim, split video
Cons
- Out-dated UI
- Lacks sharing option
Supported OS: Windows , OS X , Linux , BSD
Uptodown Ratings: 4.0 stars out of 5
Summary
An open-source video editor that supports most formats. Due to its obsolete UI and lack of sharing features, Avidemux has average ratings.
3. VirtualDub
This open-source software is user-friendly and allows users with little experience to navigate the software without much trouble. It supports 3rd party apps and also offers batch-processing, which means working on multiple videos simultaneously makes it possible.
Key features
- Integrated volume and histogram meter
- Optimized disk
- Noise reduction
- Fractional frame rates
Price: Free
Pros
- Clean interface, easy to use
- Keyboard and mouse shortcuts for faster operation
- Free to use
Cons
- Not suitable for 4K editing
- Lack learning material
- Obsolete Interface
Supported OS: Windows
Compare Camp Ratings: 4.0 stars out of 5
Summary
Virtual Dub supports multitasking, and its features are pretty helpful. However, it lacks 4k editing and a friendly interface. Overall Virtual Dub is a good choice.
4. Sony Vegas Movie Studio
This video editing software makes it easy to create professional-looking videos in minimum time and effort. Vegas Movie Studio software is best for video editing professionals who have been doing it for some time and are looking for something a little more sophisticated than free alternatives. Not only does it has a high retail price, but its internal elements can be too complex for those just beginning.
Key features
- Color correction
- HDV and AVCHD-editing
- DV batch capture
- Wide variety of file formats and codecs
Price: Starting from $7.99 USD per month
Pros
- Customizable interface
- Multicam editing
- Lots of effects and transitions, with plug-in capability
- Good slow motion and warp flow transition tools
Cons
- Less intuitive interface than competitors
- Import from camcorder not ideal
- Some tools are complex
Supported OS: Windows
G2 Ratings: 4.4 out of 5
Summary
Vegas Movie Studio is the choice of professionals. It does all the work without taking up a lot of resources, and like most programs, there is a learning curve. It’s not always intuitive for beginners, but its professional and powerful features score decent in most reviews.
5. WeVideo
This cloud-based application is a simple-to-use video editing and sharing suite. WeVideo is a full-featured video editing application that uses JumpStart technology to create amazing videos. It’s an innovative app that offers a seamless editing experience as it supports multiple formats of video, images, audio, and graphics.
Key features
- WeVideo JumpStart
- Cloud storage
- Built-in graphics
- Customizable environment
- Advanced text editing
- Multi-track editing and storyboard
Price
- Free trial
- Power Plan: $9.99/month
- Unlimited Plan: $15.99/month
- Professional Plan: $39.99/month
- Business Plan: $73.99/month
Pros
- Constantly improving features
- Ease of use
- Storage is cloud-based
Cons
- Old fashion transition
- Leaves a watermark on free trial
Supported OS: Online
Trustpilot Ratings: 4 stars out of 5
Summary
WeVideo is a straightforward yet robust video editor. It offers a variety of features and supports multiple formats, plus its comprehensive pricing plan makes it useful for everyone.
6. Lightworks
Lightworks is the most powerful video editor in its class and an excellent tool for professionals who want to make amazing videos quickly. Lightworks is very fast and straightforward to use, and it has some great features you won’t find in any other video editor. It is available on all popular OS.
Key features
- Audio and Video Effect Plugin Support
- Cloud Connected
- Motion Graphics
- Advanced Metadata
- Proxy Workflows
- Apple ProRes decoding
Price
- Monthly Plan: $9.99/user
- Yearly Plan: $9.99/user
- Perpetual: $154.99
Pros
- High-resolution timeline rendering
- It has social media export templates
- Interfaces for multiple OS are consistent
- Instant autosave
Cons
- Commands are not always intuitive
- A bit pricey as compared to its competitors
Supported OS: Windows , Mac , Linux
Techradar Pro Ratings: 4 stars out of 5
Summary
Lightworks is not any other video editing tool available on the market of video editing tools. This video editing tool provides amateurs with the most sophisticated features in an optimized platform. Its scores are the highest on almost every review site.
7. ShotCut
Shotcut is a multiplatform video editor that lets you work with various formats for audio, video, image files, etc. This video editor makes it easy to mix and match the resolution and frame rates in a video file. All the changes you make in the editor can be undone and redone often. Shotcut is the best choice for video editing, without question.
Key features
- Webcam capture
- Audio scopes and filters
- Deinterlacing
- Eyedropper tool
- Video wipe transitions
- Keyframes for filter parameters
Price: Free
Pros
- Support for 4K resolutions
- Free
Cons
- Less intuitive than commercial apps
- Lacks built-in sharing to popular sites
Supported OS: Windows , Mac , Linux
GetApp Ratings: 4.5 out of 5 stars
Summary
Shotcut is an open-source video editor for creative professionals and is available on mac, Windows, and Linux. The free version of Shotcut has many excellent features, but it doesn’t have the slick interface or advanced techniques of the top paid editors.
8. OpenShot
An award-winning open-source video editor that creates stunning videos. OpenShot is a fast, easy-to-use, and surprisingly powerful video editor. OpenShot Video Editor allows you to work with many different types of tracks so that your edits will seem natural. OpenShot Video Editor allows you to add your custom animations or titles. The options are endless, so it all depends on your time and interest. It is available in more than 70 languages, making it ideal for all types of users.
Key features
- 3D animations
- Animation and keyframes
- Multiple languages and formats
- Cross-platform
- Video-effects
Price: Free
Pros
- It is a non-linear editor with infinite tracks
- 100% free without watermark
- Frequent updates
Cons
- Obsolete interface
- Unstable performance
- Lacks some editing features
Supported OS: Window , Mac , Linux , Chrome OS
Getapp Ratings: 4.2 stars out of 5
Summary
Another open-source video-editor in the list is named OpenShot. It’s a multi-lingual and multi-supported app with unique features. Despite its unstable performance, OpenShot is still an ideal choice for many users.
9. Movavi Video Editor Plus
Movavi Video Editor Plus is the perfect tool to bring your creative ideas to life. It has special effects, ready-made intros, and keyframe animation. Using chroma keying, you can change the background of your video clips to any color or pattern that suits your need. Movavi has now redesigned its user interface to make it easy to use.
Key features
- Effects and transitions
- Built-in media pack
- Fast processing of 4K videos
- Keyframe animation
- Automatic video creation
- Cutting, trimming, joining
Price
- Free version: 7 days
- Video Editor Plus 1 year /1 PC: $49.95
- Video Editor Plus Lifetime /1 PC: $69.95
- Video Suite Lifetime /1 PC: $89.95
Pros
- Easy-to-understand user interface
- Transitions with sound
- Motion tracking and picture-in-picture tools
- Chroma-key capability
- Quick movie-creation tool
Cons
- Lacks advanced trim modes
- Slow rendering
PCMag Ratings: 4.0 stars out of 5
Summary
If you want to edit your videos with a minimal learning curve, try Movavi. You get PiP, chroma-keying, titling, basic keying, and motion tracking. The program is simple to use but doesn’t have all the features and stands four stars.
10. VSDC Free Video Editor
VSDC Free Video Editor is an online tool that lets you edit audio and video files to make your creations like movies, YouTube tutorial videos, and more. The audio and video files supported are extensive, and the software includes a codec manager. The Pro version isn’t necessary if you’re using the free edition of the software; it’s more than enough to get the job done.
Key features
- Dark theme
- Subpixel Accuracy
- Powerful Chroma Key tool
- Trendy video effects, filters, and transitions
- Color Blending And Filters
- Built-In DVD Burning Tool
Price: Free
Pros
- Non-linear
- Video effects library
- Video stabilization
- Masking
Cons
- Outdated interface
- Lack keyboard shortcuts
- Only available on Windows
Supported OS: Windows
Capterra Ratings: 4.5 stars out 5
Summary
VSDC is a non-linear editor with extensive format support. It includes all the essential features an editor requires but with an obsolete UI. It is also ideal for many who need a powerful yet free video editor.
11. VideoPad Video Editor
VideoPad is a free video editor that can create stunning videos and perform basic editing tasks. A good video editor can help you to create videos for different social media platforms. You can make your videos look professional and polished with a few clicks and some simple editing skills. There’s nothing particularly exciting or advanced about this app; it’s simple enough for anyone new to video editing or even for seasoned editors. But the simple and easy-to-use interface makes the entire process very exciting.
Key features
- Text snippets
- Range of transitional effects
- Plug-ins Library
- Burn finished videos to Blu-Ray, DVD, etc.
- Color correction and light balance.
Price: Free
Pros
- Simple and clean interface
- Supports multiple file formats
- Includes video effects
- Lightweight on system resources
Cons
- Lack of advanced features
Supported OS: Windows , Mac , iPad/iPhone
Tom’s guide Ratings: 3.5 stars out of 5
Summary
Video pad is a free video editor designed for beginners that is lightweight and simple. VideoPad is also great for creating quick videos for social media purposes like Youtube and Facebook. The software has a high rating, as shown above, and it’s available on Windows.
12. HitFilm
HitFilm is a helpful video editing software that makes editing easier for users. In addition to basic features, the program also provides advanced-level functions that make edited videos pop. Hitfilm Express Download has more than 400 features to help casual video editors save time. Features like: visual effects, cinematic elements, and compositing tools preset help unleash your creativity.
Key features
- Color Grading and correction
- Smart search
- Commentator recorder
- Lightning and lens flares
- 3D camera tracker
Price
- Free trial
- Creator: $7.50
- Pro: $12.50
- Enterprise: Custom pricing
Pros
- Intuitive interface
- It offers free tutorials and masterclasses
- Works on both Windows and Mac
Cons
- It requires heavy system requirements
TechRadar Ratings: 4.5 stars out of 5
Summary
HitFilm Express 15 is a powerful free video editing program that enables you to create high-quality videos in minutes with an intuitive interface. It offers advanced editing features such as advanced video trimming, 3D editing, and more.
13. Magix Movie Studio
Magix is the world’s leading professional audiovisual media software, with Sequoia being its industry-standard audio editing software. This movie editor is an enthusiast-level video editing software that competes with software from Adobe and CyberLink, and it even boasts support for 4K content and 360 degrees. There are many reasons to upgrade. This year’s update includes stabilization, 8K editing, motion tracking, and an in-app plug-in store.
Key features
- NewBlue effects
- Fly-in animation
- New filter view
- Stabilization
- Motion tracking
- 8k support
Price
- Movie Studio 2024: $69.99 (30-day free trial)
- Movie Studio 2024 Platinum: $99.99 (30-day free trial)
- Movie Studio 2024 Suite: $129.00 (30-day free trial)
Pros
- Lots of video effects
- Responsive editing interface
- Multicam
- Trailer-like movie templates
- Solid audio editing
Cons
- Slower project rendering than others
- Lacks import and organization tools
Supported OS: Windows
PCMag Ratings: 3 stars out of 5
Summary
Magix movie studio is a powerful all-around video editing tool with many features that professional users have come to expect. It’s also relatively simple to use. But usability and performance are poor compared to other software programs like Filmora .
Part 4: How To Edit a Video With a Windows Movie Maker Alternative
Windows Movie Maker was great for editing a video, but it’s no match for some of the best video editing software. We’re talking about software capable of creating a cinematic experience in seconds, all on your computer.
When you need to edit a video with simple, quick edits, like adding a special effect or changing the background, try Filmora . Filmora is an easy-to-use application that allows you to create a movie using simple tools that don’t require additional training. You can’t beat this option if you want to create a professional-quality video for your blog or website.
Let’s dive into a quick tutorial on editing videos in Filmora:
Free Download For Win 7 or later(64-bit)
Free Download For macOS 10.14 or later
Step1 Open Wondershare Filmora on your PC or Mac
You can start a new project by clicking on ‘New Project’. And you can also change the ‘Aspect Ratio’ according to your project demand.
Step2 Import Videos
You can import your file by clicking the import tab on the upper-left side or clicking the import icon on the main window.
Step3 Drag and drop your footage to the timeline
After importing all the files, click and hold each individual video and drag and drop it to the timeline area according to your ideal sequence.
Step4 Add Audio
Go to the ‘Audio’ tab and select the audio file from the audio library. Once selected, drag and drop the audio file into the music timeline.
Step5 Add Titles
In your video intro, you can insert some title text. Go to the ‘Titles’ tab and select the one you like, and drag and drop it on top of the timeline. Double-click and edit the text and state your ideal statements. You can customize your text fonts and color too.
Step6 Add Transitions
You can add transition effects to ensure a smooth transition from one scene to another. The overall will get more professional look.
Step7 Add Effects
Next; you can get special effects to your video to make them more attractive and engaging to watch. Simple drag down the effect to your video and watch the effect take place in your selective scene.
Step8 Export your work
Once all the changes have been made, hit ‘export’ from the top tab. A window will appear where you can change the settings, resolution, frame rate, bit rate, etc. Next, click the ‘export’ button down on that window, and then you can save the file in your drive.
Part 5: Hot FAQs on Windows Movie Maker Alternatives
1. Why is Windows Movie Maker discontinued?
Microsoft’s video editing program, Windows Movie Maker, did not become a big hit with the public because it failed to do well on the market. Microsoft couldn’t get the support they were looking for from the program’s users. As a result, Microsoft had to cease its support of the program.
2. Is there a free version of Windows Movie Maker?
Microsoft Windows Movie maker was always accessible and pre-installed every windows product. Microsoft has discontinued support for Movie Maker and warns about free downloads of Movie Maker provided by third parties that might contain malware, viruses, or other issues.
3. What are the best free Windows Movie Maker Alternatives for Mac?
After switching to a Mac, you’ll find that the Windows Movie Maker alternatives offer much more than just a simple video editor. They provide advanced features, easy transitions, and less technical know-how to create pro-quality results. You should try using these platforms on your Mac if you have a video to edit.
- Wondershare Filmora
- Movavi
- OpenShot
Final Words
Windows Movie Maker is an excellent Windows video editor application for Windows users. But in recent years, it has become outdated due to the continuous development of new technologies. There are many alternatives for Windows Movie Maker, and here we listed some of the best ones. Most of them are free and featured packs. Each program has its unique set of features and capabilities, and each one excels in different areas. Check them out and see what you think.
Free Download For Win 7 or later(64-bit)
Free Download For macOS 10.14 or later
Also read:
- New In 2024, 10 Exceptional Online Tools for Crafting Epic Gaming Intros
- The Ultimate Guide to Video Editors for Windows 11 Free, Paid, and In-Between
- Updated In 2024, To Make Your Choice Easier From Thousands of Software I Am Listing the Top Five in the business.Let Us Go over the Specifications and Shed Light on the Comparisons
- Visual Masterpieces 10 Best Music Video Creation Services
- New Audio to Video Conversion Best Practices for MP3 to MP4 for 2024
- 2024 Approved Videopad Video Editor Review A Closer Look at Its Capabilities and Limitations
- New In 2024, The Last Wav Converter Guide Youll Ever Need Expert Insights
- Top YouTube MP3 Converters A Comprehensive Guide for 2024
- New Edit Like a Pro Top Apple Video Editing Tools
- In 2024, The Lowdown on the Best OGG Audio Converters
- In 2024, Video Editing Mastery Top Effects to Elevate Your Videos
- In 2024, Watermark-Free Video Editing Discover 8 Free Trimmers
- Updated What Sets This Mp3 Converter Windows Review Apart A Must-Read for Music Lovers for 2024
- S Top Picks 16 Free Video Editing Software for Beginners
- Updated No-Cost Video Blur Learn How to Do It Online for 2024
- New In 2024, From Novice to Pro 16 Easy-to-Use Free Video Editors for All Skill Levels
- Updated Adobe Premiere Pro CS6 Is a Kind of Video Editing Software Which Can Work Natively and Directly with the Latest Mobile
- Updated 2024 Approved S Top Animation Software 10 Best 2D Tools for Beginners and Pros
- New Reversing Video in Final Cut Pro Tips, Tricks, and Techniques
- New 2024 Approved Tips for Soundcloud to MP3 Converter
- Updated In 2024, How to Stream Any Video Format to Google Chromecast
- 2024 Approved Pixel Perfect Calculating Aspect Ratios Made Easy
- In 2024, From Concept to Reality 10 Best Music Video Making Platforms
- New The Ultimate Guide to Video Resumes Best Makers and Templates for 2024
- Updated Slow Mo or Hyper-Speed Top GIF Speed Editors Compared
- New In 2024, The Top Free WMV Video Assembly Software
- In 2024, 5 Ways to Transfer Music from OnePlus Ace 2 to Other Android Devices Easily | Dr.fone
- How to Change Your Poco M6 Pro 4G Location on life360 Without Anyone Knowing? | Dr.fone
- How to Factory Reset OnePlus 11R If I Forgot Security Code or Password? | Dr.fone
- Why is iPogo not working On Apple iPhone 13? Fixed | Dr.fone
- In 2024, Will Pokémon Go Ban the Account if You Use PGSharp On Motorola Moto G13 | Dr.fone
- In 2024, Edit and Send Fake Location on Telegram For your Vivo V30 Lite 5G in 3 Ways | Dr.fone
- In 2024, How to Transfer Apple iPhone 11 Data to iPhone 12 A Complete Guide | Dr.fone
- Updated 2024 Approved Top Web-Based Audio Visualization Tools
- Updated From Novice to Pro YouTube to MP3 Converter Reviews and Tutorials
- How to Spy on Text Messages from Computer & Nokia XR21 | Dr.fone
- How to recover old videos from your Realme 12 Pro 5G
- 5 Solutions For Vivo T2 5G Unlock Without Password
- 4 Ways to Mirror Apple iPhone 11 to Laptop via USB or Wi-Fi | Dr.fone
- How to Unlock iPhone 13 Pro Max without Passcode or Face ID | Dr.fone
- In 2024, How to Change Credit Card from Your Apple iPhone 15 Plus Apple ID and Apple Pay
- 3 Solutions to Hard Reset Nubia Z50S Pro Phone Using PC | Dr.fone
- Infinix Hot 40 Screen Unresponsive? Heres How to Fix It | Dr.fone
- Updated 2024 Approved How to Make a GIF in Photoshop
- Fix Unfortunately Settings Has Stopped on Nokia C32 Quickly | Dr.fone
- In 2024, Unlock iPhone 13 Pro Max Without Passcode Easily | Dr.fone
- How to Unlock iPhone 8 Passcode without Computer?
- The Most Useful Tips for Pokemon Go Ultra League On Poco X5 Pro | Dr.fone
- Title: New 2024 Approved Calculate Aspect Ratios Like a Pro Best Online Tools
- Author: Charlotte
- Created at : 2024-04-29 06:33:13
- Updated at : 2024-04-30 06:33:13
- Link: https://smart-video-creator.techidaily.com/new-2024-approved-calculate-aspect-ratios-like-a-pro-best-online-tools/
- License: This work is licensed under CC BY-NC-SA 4.0.
