
:max_bytes(150000):strip_icc():format(webp)/GettyImages-541365354-5c8ad42246e0fb00014a9687.jpg)
New 2024 Approved Photo and Video Collage Software Top Picks for Online Creators
Photo and Video Collage Software: Top Picks for Online Creators
Best Online Photo and Video Collage Makers in 2024

Ollie Mattison
Mar 27, 2024• Proven solutions
Sometimes a single picture or a video can’t tell the entire story you’d like to share with your friends and colleagues. If you find yourself in a similar situation often, then you already know that you have to find a way to combine several still or moving images within a frame in order to tell your story properly.
Online photo and video collage makers offer a quick solution to this problem because they feature a number of collage templates that let you merge multiple videos or photos and create a visually impressive collage. Read on if you’re looking for an easy way to produce photo or video collages because in this article we are going to take you through some of the best online photo and video collage makers you can find on the Internet.
- Part 1: Best Free & Paid Online Video Collage Makers
- Part 2: Best Online Photo Collage Makers [Free & Paid]
Making Video Collages in a More Creative Way with Filmora Video Editor
Filmora now features the animated split-screen effect which will make your videos more interesting. Just drag and drop the clips that you want in the split-screen preview window.


You may also like:
Best Online Video Collage Makers [Free & Paid]
Platforms that exclusively offer video collage-making services are rare, and in most cases, you have to use a web-based video editor if you want to create video collages online.
In addition, the video editing platforms that do provide the video collage feature, offer only a limited amount of video editing tools, which is the reason why it is still better to use video editing software for PC or Mac computers if you want to make video collages professionally. However, there are still a few online destinations where you can combine several videos with ease.
1. Kapwing
Price: Free, $17 for a monthly subscription

Kapwing is undoubtedly one of the best online video editing platforms around because it offers a broad range of video editing tools. It video collage feature lets you combine GIFs, videos and photos which makes it a perfect choice for both professional social media content creators and novice video editors. The process of creating a video collage with Kapwing is remarkably easy, as you just have to upload the videos you want to combine and adjust their position on the screen. You can then enhance the colors in each video separately, use the Bring Forward and Send Backward options or fine-tune the playback speed of the videos in your collage. However, all video collages created with the free version of the platform are going to be watermarked and you must subscribe to the Pro version of Kapwing if you want to make watermark-free video collages.
2. Animoto
Price: Free trial available, pricing plans start at $15 per month

Image from Internet
The huge selection of fully customizable templates Animoto offers enable you to create videos for a broad range of purposes. You simply have to decide if you want to make a new product launch video, real estate explainer video or step-based tutorial and then upload the materials you would like to use to create a new video. Animoto also lets you add text, photo, video or collage blocks in case the template you’ve selected doesn’t contain all the elements you want to feature in a video. So if you want to create video collages with Animoto you simply have to add as many collage blocks as you want and then import the footage you’d like to include in a video collage.
3. Kizoa
Price: Free, lifetime plans pricing start at $29.99

Yet another versatile online video editing platform that enables marketing professionals and video editing enthusiasts to create new videos in just a few simple steps. Kizoa’s collage maker grants you access to hundreds of templates you can customize to fit the demands of the project you’re currently working on. You can choose from still and animated templates that can be used for anything from wishing your friend happy holidays to putting together your fondest memories of the year together. However, choosing one of the available pricing plans is necessary if you want to make video collages with Kizoa on a constant basis.
4. FotoJet
Price: Free, pricing plans start at $3.33 per month

Even though FotoJet is primarily a platform for design and photo editing, it still enables its users to create video collages. However, you can only use photos to create video collages, which limits your options significantly. The process of making a new video collage is easy, as you just have to pick one of the available templates and proceed to upload the images you’d like to include in the collage you’re making. After customizing the template you can share your creations on social media, but keep in mind that the free version of the platform offers only limited capabilities.
5. VidDay
Price: pay per lenghth, start at $5 for 0-3 mins

VidDay enables you to create a new video collage in just three simple steps. You should start by specifying the occasion for which you’re creating a video, it can be anything from work anniversary to your best friend’s birthday. You will then be asked to add the dates and all other relevant information, and to upload the videos you’d like to include in the collage. The only downside is that the content you create with VidDay can’t be longer than two minutes and that you have to choose a subscription plan if you want to export your videos in 720p resolution.
Best Online Photo Collage Makers [Free & Paid Options]
Unlike making a video collage, creating a photo collage is a much less technically demanding operation. Hence, performing this task with a web-based photo editor is much easier because the time you’ll have to spend waiting for the pictures to upload is considerably shorter than the amount of time you’ll have to spend on uploading videos. Here are some of the best online photo collage makers you can use to make awe-inspiring collages from your photos.
1. Wondershare Pix Studio
Price: Free, $5.99 per month billed yearly, $7.99 per month billed monthly.

Wondershare PixStudio is an all-in-one and powerful online graphic design maker for everyone. This online platform empowers anyone to create a beautiful design within a few steps. No professional skills required! By simply dragging and dropping the creative elements and templates, you are capable to release your imagination and convert it to stunning artwork.
2. Ribbet
Price: Free, $3.33 per month billed yearly, $6.99 per month billed monthly

Upon arriving at Ribbet’s homepage, you should click on the Create Collage option and once the collage editor window loads you can choose the template you like the most. These presets are divided into Basic, Grid, Big Photo and Jigsaw categories and once you find the one that you want to use you just have to click on it and proceed to upload the pictures from your computer or from your accounts on social media. Optionally, you can change the background color of the collage you’re making or adjust the Proportions, Spacing and other settings. Hit the Done button when ready and continue editing the photo collage you’ve created.
3. Canva
Price: Free, pricing plans start at $12.99 per month

Canva is a platform for graphic designers that offers an easy way to create visual content for social media. It also provides the opportunity for large teams of graphic designers to collaborate on projects. The platform’s photo editor features a huge collection of customizable collage templates you can use to promote different products or services. Skilled photo editors can use Canva to create authentic photo collages, since the importing photos and arranging them on a blank canvas is a straightforward process that requires a minimum amount of time. When done, you can save your photo collages to your computer, share them on social media or store them on Google Drive.
4. Photo Joiner
Price: Free

You can create a photo collage with Photo Joiner even if you have no previous experience. You just have to open the platform’s photo collage editor and then specify how many images your collage should contain. Keep in mind that Photo Joiner allows you to add the maximum of eight pictures to a photo collage, which can limit your options if you’re trying to create a collage that contains ten or more photos. You can adjust the size and the aspect ratio for each image you add to a collage and you can also change the size and the color of the picture borders.
5. piZAP
Price: Free trial available, $2.99 per month billed annually, $2.99 per month billed annually

The large selection of templates and a broad spectrum of photo editing features make piZAP one of the best online collage makers. Furthermore, this online photo editor features a built-in library of stock images, so that you can make photo collages even if you don’t have your own material. There are a lot of different photo collage templates available that enable you to make a new photo collage effortlessly.
The piZAP platform is an excellent alternative to pricy photo editing software products because it enables its users to manipulate images at a professional level. Nonetheless, you must create an account on this platform and choose a subscription plan before you can start editing your photos with this online tool.
6. Fotor
Price: Free, pricing plans start at $8.99 per month

After signing into your account on the Fotor platform you will be able to choose from Classic Collage, Artistic Collage, Funky Collage, and Photo Stitching categories. Clicking on either of these categories enables you to access a number of different templates you can customize in accordance with your needs. The maximum number of photos you can include in a classic photo collage is limited to just ten. You’ll also have the option to resize the pictures, fine-tune the borders or change the color and the texture of the template you selected. Some templates from each of the collage categories are going to be watermarked if you are using the free version of Fotor.
7. PhotoCollage
Price: Free

This is a simple and yet a powerful photo collage maker that lets you arrange your images freely. You can just drag and drop the pictures you’d like to use in a photo collage from a folder on your computer and arrange them manually. The Template folder offers a huge collection of photo collage templates, which enables you to create a new collage in just a few minutes. The PhotoCollage platform also has the text option in case you want to add a text layer to collage you’re making. The Shape and Size, Border or Filters settings can all be used to enhance a collage and make it more visually appealing.
8. PicMonkey
Price: Free trial available, pricing plans start from $7.99 per month

PicMonkey has been among the best design and photo editing platforms for nearly a decade. That is why it is hardly surprising that creating a collage with PicMonkey is a quick and simple process. You can choose from hundreds of collage templates you can easily customize, so you just have to select the one you like and decide whether you want to keep the images that are already included in the template or replace them with the pictures you created. Keep in mind that you must select a subscription plan in order to be able to save or share your photo collages.
9. Photovisi
Price: Free, pricing plans start at $4.99 per month

Making a new photo collage with Photovisi is a fun process that can be completed in just a few easy steps. Start by browsing through the online photo collage maker’s library of templates, and click on the one that you want to use. Once the template opens you can upload the pictures from your computer or from Facebook and Instagram. You’ll also be able to add new shapes and text layers to the template or change its background. Each visual or textual element you decide to include in your photo collage can be edited so that it fits the visual style of the collage perfectly. The watermark is going to be added to all your creations if you decide to use the free version of Photovisi.
10. Adobe Spark
Price: Free, $9.99 per month for the full version

Impressing your followers on social media with the content you share won’t be difficult if you decide to create that content with Adobe Spark. There are hundreds of templates available for various kinds of social media posts, so to create a photo collage you should just pick a template. You can change the layout of the template if you want to alter its original design and you can upload images from your computer or use the Adobe Stock option. The best part is that you can apply filters to all photos you add to a photo collage and make their colors more vivid.
11. Photo Collage Maker
Price: $5.56 for a single image

Photo Collage Maker lets you choose from more than 250 photo collage templates that are suitable for virtually any purpose. The number of pictures you can include in a photo collage can vary from just two to more than 75 and it depends on the template you choose. You can also automatically desaturate all the images in a photo collage by clicking on the B&W/Color icon or change the background with a single click. Photo Collage Maker doesn’t offer any border options, so you can’t really control the spacing between the images. Downloading a 1-megapixel file from this platform is going to cost you $5.56.
Conclusion
Combining multiple photos or videos and making collages that are going to attract a lot of attention on social media has never been easier. Hopefully the online collage makers, we included in this article will help you create photo and video collages that are going to impress your friends and colleagues.
In fact, through multiple updates, now we made it super easy to make a collage video with Filmora. Rather than making a photo collage, why not make a video collage?
Ollie Mattison
Ollie Mattison is a writer and a lover of all things video.
Follow @Ollie Mattison
Ollie Mattison
Mar 27, 2024• Proven solutions
Sometimes a single picture or a video can’t tell the entire story you’d like to share with your friends and colleagues. If you find yourself in a similar situation often, then you already know that you have to find a way to combine several still or moving images within a frame in order to tell your story properly.
Online photo and video collage makers offer a quick solution to this problem because they feature a number of collage templates that let you merge multiple videos or photos and create a visually impressive collage. Read on if you’re looking for an easy way to produce photo or video collages because in this article we are going to take you through some of the best online photo and video collage makers you can find on the Internet.
- Part 1: Best Free & Paid Online Video Collage Makers
- Part 2: Best Online Photo Collage Makers [Free & Paid]
Making Video Collages in a More Creative Way with Filmora Video Editor
Filmora now features the animated split-screen effect which will make your videos more interesting. Just drag and drop the clips that you want in the split-screen preview window.
You may also like:
Best Online Video Collage Makers [Free & Paid]
Platforms that exclusively offer video collage-making services are rare, and in most cases, you have to use a web-based video editor if you want to create video collages online.
In addition, the video editing platforms that do provide the video collage feature, offer only a limited amount of video editing tools, which is the reason why it is still better to use video editing software for PC or Mac computers if you want to make video collages professionally. However, there are still a few online destinations where you can combine several videos with ease.
1. Kapwing
Price: Free, $17 for a monthly subscription
Kapwing is undoubtedly one of the best online video editing platforms around because it offers a broad range of video editing tools. It video collage feature lets you combine GIFs, videos and photos which makes it a perfect choice for both professional social media content creators and novice video editors. The process of creating a video collage with Kapwing is remarkably easy, as you just have to upload the videos you want to combine and adjust their position on the screen. You can then enhance the colors in each video separately, use the Bring Forward and Send Backward options or fine-tune the playback speed of the videos in your collage. However, all video collages created with the free version of the platform are going to be watermarked and you must subscribe to the Pro version of Kapwing if you want to make watermark-free video collages.
2. Animoto
Price: Free trial available, pricing plans start at $15 per month
Image from Internet
The huge selection of fully customizable templates Animoto offers enable you to create videos for a broad range of purposes. You simply have to decide if you want to make a new product launch video, real estate explainer video or step-based tutorial and then upload the materials you would like to use to create a new video. Animoto also lets you add text, photo, video or collage blocks in case the template you’ve selected doesn’t contain all the elements you want to feature in a video. So if you want to create video collages with Animoto you simply have to add as many collage blocks as you want and then import the footage you’d like to include in a video collage.
3. Kizoa
Price: Free, lifetime plans pricing start at $29.99
Yet another versatile online video editing platform that enables marketing professionals and video editing enthusiasts to create new videos in just a few simple steps. Kizoa’s collage maker grants you access to hundreds of templates you can customize to fit the demands of the project you’re currently working on. You can choose from still and animated templates that can be used for anything from wishing your friend happy holidays to putting together your fondest memories of the year together. However, choosing one of the available pricing plans is necessary if you want to make video collages with Kizoa on a constant basis.
4. FotoJet
Price: Free, pricing plans start at $3.33 per month
Even though FotoJet is primarily a platform for design and photo editing, it still enables its users to create video collages. However, you can only use photos to create video collages, which limits your options significantly. The process of making a new video collage is easy, as you just have to pick one of the available templates and proceed to upload the images you’d like to include in the collage you’re making. After customizing the template you can share your creations on social media, but keep in mind that the free version of the platform offers only limited capabilities.
5. VidDay
Price: pay per lenghth, start at $5 for 0-3 mins
VidDay enables you to create a new video collage in just three simple steps. You should start by specifying the occasion for which you’re creating a video, it can be anything from work anniversary to your best friend’s birthday. You will then be asked to add the dates and all other relevant information, and to upload the videos you’d like to include in the collage. The only downside is that the content you create with VidDay can’t be longer than two minutes and that you have to choose a subscription plan if you want to export your videos in 720p resolution.
Best Online Photo Collage Makers [Free & Paid Options]
Unlike making a video collage, creating a photo collage is a much less technically demanding operation. Hence, performing this task with a web-based photo editor is much easier because the time you’ll have to spend waiting for the pictures to upload is considerably shorter than the amount of time you’ll have to spend on uploading videos. Here are some of the best online photo collage makers you can use to make awe-inspiring collages from your photos.
1. Wondershare Pix Studio
Price: Free, $5.99 per month billed yearly, $7.99 per month billed monthly.
Wondershare PixStudio is an all-in-one and powerful online graphic design maker for everyone. This online platform empowers anyone to create a beautiful design within a few steps. No professional skills required! By simply dragging and dropping the creative elements and templates, you are capable to release your imagination and convert it to stunning artwork.
2. Ribbet
Price: Free, $3.33 per month billed yearly, $6.99 per month billed monthly
Upon arriving at Ribbet’s homepage, you should click on the Create Collage option and once the collage editor window loads you can choose the template you like the most. These presets are divided into Basic, Grid, Big Photo and Jigsaw categories and once you find the one that you want to use you just have to click on it and proceed to upload the pictures from your computer or from your accounts on social media. Optionally, you can change the background color of the collage you’re making or adjust the Proportions, Spacing and other settings. Hit the Done button when ready and continue editing the photo collage you’ve created.
3. Canva
Price: Free, pricing plans start at $12.99 per month
Canva is a platform for graphic designers that offers an easy way to create visual content for social media. It also provides the opportunity for large teams of graphic designers to collaborate on projects. The platform’s photo editor features a huge collection of customizable collage templates you can use to promote different products or services. Skilled photo editors can use Canva to create authentic photo collages, since the importing photos and arranging them on a blank canvas is a straightforward process that requires a minimum amount of time. When done, you can save your photo collages to your computer, share them on social media or store them on Google Drive.
4. Photo Joiner
Price: Free
You can create a photo collage with Photo Joiner even if you have no previous experience. You just have to open the platform’s photo collage editor and then specify how many images your collage should contain. Keep in mind that Photo Joiner allows you to add the maximum of eight pictures to a photo collage, which can limit your options if you’re trying to create a collage that contains ten or more photos. You can adjust the size and the aspect ratio for each image you add to a collage and you can also change the size and the color of the picture borders.
5. piZAP
Price: Free trial available, $2.99 per month billed annually, $2.99 per month billed annually
The large selection of templates and a broad spectrum of photo editing features make piZAP one of the best online collage makers. Furthermore, this online photo editor features a built-in library of stock images, so that you can make photo collages even if you don’t have your own material. There are a lot of different photo collage templates available that enable you to make a new photo collage effortlessly.
The piZAP platform is an excellent alternative to pricy photo editing software products because it enables its users to manipulate images at a professional level. Nonetheless, you must create an account on this platform and choose a subscription plan before you can start editing your photos with this online tool.
6. Fotor
Price: Free, pricing plans start at $8.99 per month
After signing into your account on the Fotor platform you will be able to choose from Classic Collage, Artistic Collage, Funky Collage, and Photo Stitching categories. Clicking on either of these categories enables you to access a number of different templates you can customize in accordance with your needs. The maximum number of photos you can include in a classic photo collage is limited to just ten. You’ll also have the option to resize the pictures, fine-tune the borders or change the color and the texture of the template you selected. Some templates from each of the collage categories are going to be watermarked if you are using the free version of Fotor.
7. PhotoCollage
Price: Free
This is a simple and yet a powerful photo collage maker that lets you arrange your images freely. You can just drag and drop the pictures you’d like to use in a photo collage from a folder on your computer and arrange them manually. The Template folder offers a huge collection of photo collage templates, which enables you to create a new collage in just a few minutes. The PhotoCollage platform also has the text option in case you want to add a text layer to collage you’re making. The Shape and Size, Border or Filters settings can all be used to enhance a collage and make it more visually appealing.
8. PicMonkey
Price: Free trial available, pricing plans start from $7.99 per month
PicMonkey has been among the best design and photo editing platforms for nearly a decade. That is why it is hardly surprising that creating a collage with PicMonkey is a quick and simple process. You can choose from hundreds of collage templates you can easily customize, so you just have to select the one you like and decide whether you want to keep the images that are already included in the template or replace them with the pictures you created. Keep in mind that you must select a subscription plan in order to be able to save or share your photo collages.
9. Photovisi
Price: Free, pricing plans start at $4.99 per month
Making a new photo collage with Photovisi is a fun process that can be completed in just a few easy steps. Start by browsing through the online photo collage maker’s library of templates, and click on the one that you want to use. Once the template opens you can upload the pictures from your computer or from Facebook and Instagram. You’ll also be able to add new shapes and text layers to the template or change its background. Each visual or textual element you decide to include in your photo collage can be edited so that it fits the visual style of the collage perfectly. The watermark is going to be added to all your creations if you decide to use the free version of Photovisi.
10. Adobe Spark
Price: Free, $9.99 per month for the full version
Impressing your followers on social media with the content you share won’t be difficult if you decide to create that content with Adobe Spark. There are hundreds of templates available for various kinds of social media posts, so to create a photo collage you should just pick a template. You can change the layout of the template if you want to alter its original design and you can upload images from your computer or use the Adobe Stock option. The best part is that you can apply filters to all photos you add to a photo collage and make their colors more vivid.
11. Photo Collage Maker
Price: $5.56 for a single image
Photo Collage Maker lets you choose from more than 250 photo collage templates that are suitable for virtually any purpose. The number of pictures you can include in a photo collage can vary from just two to more than 75 and it depends on the template you choose. You can also automatically desaturate all the images in a photo collage by clicking on the B&W/Color icon or change the background with a single click. Photo Collage Maker doesn’t offer any border options, so you can’t really control the spacing between the images. Downloading a 1-megapixel file from this platform is going to cost you $5.56.
Conclusion
Combining multiple photos or videos and making collages that are going to attract a lot of attention on social media has never been easier. Hopefully the online collage makers, we included in this article will help you create photo and video collages that are going to impress your friends and colleagues.
In fact, through multiple updates, now we made it super easy to make a collage video with Filmora. Rather than making a photo collage, why not make a video collage?
Ollie Mattison
Ollie Mattison is a writer and a lover of all things video.
Follow @Ollie Mattison
Here Are 8 Best Video Animation App on Different Devices, Android, iPhone and iPad
8 Best Video Animation App for Android/iPhone/iPad [2024]

Shanoon Cox
Mar 27, 2024• Proven solutions
For Win 7 or later (64-bit)
 Secure Download
For macOS 10.14 or later
Secure Download
Click here to get Filmora for PC by email
or Try Filmora App for mobile >>>
download filmora app for ios ](https://app.adjust.com/b0k9hf2%5F4bsu85t ) download filmora app for android ](https://app.adjust.com/b0k9hf2%5F4bsu85t )
With the advent of the great range of video animation app, drawing or art is no longer limited to artists. If you are tired of using free animaiton software on PC , a video animation app might be a choice. In fact, Anyone having the knowledge of the animation maker app can create professional and mind-boggling animated movies and videos.
Usually, people are aware of the heavy animation software on the computer. But, are you aware of the animation app that can help you create animated videos on your phone? In fact, you can also easily make an amazing video with the best animated graphic maker . In this article, you will learn about some of the best video animation apps on Android, iPhone, and iPad.
You might also like: 10 Best 2D Animation Software in 2024 [Free/Paid]
- Part1: Best Animation Apps For Android
- Part2: Best Animation Apps For iPhone
- Part3: Best Animation Apps For iPad
Part 1: Best Animation Apps For Android
1. Animate it
Whether drawing sketches or manikin poses, Animate it is one of the best video animation app for creating animations on your smartphone or tab. Whether you are a student, gamer or a professional animator, Animate it is useful for all who love animation and looking for an animation creator app on the go. The features of this animation maker app include-
- Customize, create, and edit scenes and characters
- Edit up to 32 keyframes in each clip and up to 20 files
- Reset, mirroring, pose or copy available
- Skin and character selection
- Create buildings and select from a range of props
2. Stick Fighter
You get a touchscreen interface in the Stick Fighter video animation app which lets you animate frame by frame in a flipbook style. You can use props like bows, swords, arrows on your stick image to create an animated cartoon battle. The features of this animation app include-
- Change color and size of the objects
- Use props to create the effect
- Edit clips frame by frame
- Save and export to share with other Stick Fighter users

3. Stick Draw
This is just a wow video animation app that lets you draw with your finger on your phone. Start with each frame and move to the next by saving and within a few minutes the animation can be up and running. Create stop-motion animations or draw stick figures with Stick Draw cartoon maker app. The features are-
- Several graphics- rectangular, circular, line, freeform and more
- Allows drawing with hands
- Advanced copy pasting options
- Use drawings or background images
- Easily accessible interface
- Mp4 and gif export options

Part 2: Best Animation Apps For iPhone
4. Animation Desk
Start from the scratch and create an animation frame by frame or use videos, images, or PSD layers for creating animation with the Animation Desk video animation app for iPhone. Now, creating an animation on your iPad or iPhone is easy with this animation creator app. The features are-
- Several import and export formats
- More than 46 brush options
- Rotoscoping or transforming videos into line drawing allowed
- Music addition to your animation
- 16:9 and 3:4 export video screen ratio
- Apple pencil integration

5. FlipaClip
This is the coolest cartoon maker app to relive your childhood with cartoons and animations. Create some of the best cartoon characters and explore your creativity by drawing cartoon frame by frame. It is basically the school flipbook having a contemporary twist. FlipaClip video animation software is ideal for the iPhone users and offers the best intuitive tools for storyboarding, sketching, animating or just playing around. The features are-
- Supports several popular formats like SEQ, IMAGE, GIF
- Share on a social platform like Tumblr, Facebook, YouTube
- Add videos and draw over it
- Text insertion from the choice of several fonts
- Different layers of drawing
- Grid overlay drawing

Part 3: Best Animation Apps For iPad
6. Animation Desk Classic
Create hand-drawn images with the Animation desk classic animation app for iPad users. Explore your creative ideas with this animation maker app in a short span of time. The features of Animation Desk Classic are-
- Add soundtrack or recordings
- Insert motion backgrounds, shapes, or graphics stickers
- Cut, copy, paste tool
- Pigment cans

7. Animation Creator HD
It is a combination of the best drawing app and the best animation app for iPad. With Animation Creator HD video animation app one can create animated movies on the go. Whether iPad or iPad mini, this cartoon maker app offers great drawing tools, frame management and color options to make the best out of your creativity. The features of this video animation app are-
- Retina quality and the high frame rate playback
- Infinite frames and animations
- Cineverse browsing
- Powerful drawing tools
- Easy frame management
- Life-like animation

8. Animation & Drawing by Do Ink
The simple yet powerful Animation & Drawing by Do Ink video animation app is counted amongst the best app for iPad. Even if you are a beginner, this animation app creator makes your animation creating experience, a pleasant one. The features of Animation & Drawing by Do Ink includes-
- Powerful vector tools
- Bezier curve editing
- Flipbook-style animation
- Create motion paths by dragging your finger
- Reusable art props collection
- Freehand drawing option with fill tools, pen, pencil, brushes
- Geometric shape tools
- Adjustable frame rates

Conclusion
Animation has become a vital part of any video marketing strategy. The knowledge of the right video animation app can help you to create great videos on the go. You don’t need to reach your home or office to work on your computer for animating videos. With a range of great animation app available, you just need to download and install on your Android, iPhone, or iPad, to give wings to your creative imaginations and create perfect animations always. If you want to make animation video on PC, try to use Filmora that will give you more controls on editing!
For Win 7 or later (64-bit)
Secure Download
For macOS 10.14 or later
Secure Download
Click here to get Filmora for PC by email
or Try Filmora App for mobile >>>
download filmora app for ios ](https://app.adjust.com/b0k9hf2%5F4bsu85t ) download filmora app for android ](https://app.adjust.com/b0k9hf2%5F4bsu85t )
Shanoon Cox
Shanoon Cox is a writer and a lover of all things video.
Follow @Shanoon Cox
Shanoon Cox
Mar 27, 2024• Proven solutions
For Win 7 or later (64-bit)
Secure Download
For macOS 10.14 or later
Secure Download
Click here to get Filmora for PC by email
or Try Filmora App for mobile >>>
download filmora app for ios ](https://app.adjust.com/b0k9hf2%5F4bsu85t ) download filmora app for android ](https://app.adjust.com/b0k9hf2%5F4bsu85t )
With the advent of the great range of video animation app, drawing or art is no longer limited to artists. If you are tired of using free animaiton software on PC , a video animation app might be a choice. In fact, Anyone having the knowledge of the animation maker app can create professional and mind-boggling animated movies and videos.
Usually, people are aware of the heavy animation software on the computer. But, are you aware of the animation app that can help you create animated videos on your phone? In fact, you can also easily make an amazing video with the best animated graphic maker . In this article, you will learn about some of the best video animation apps on Android, iPhone, and iPad.
You might also like: 10 Best 2D Animation Software in 2024 [Free/Paid]
- Part1: Best Animation Apps For Android
- Part2: Best Animation Apps For iPhone
- Part3: Best Animation Apps For iPad
Part 1: Best Animation Apps For Android
1. Animate it
Whether drawing sketches or manikin poses, Animate it is one of the best video animation app for creating animations on your smartphone or tab. Whether you are a student, gamer or a professional animator, Animate it is useful for all who love animation and looking for an animation creator app on the go. The features of this animation maker app include-
- Customize, create, and edit scenes and characters
- Edit up to 32 keyframes in each clip and up to 20 files
- Reset, mirroring, pose or copy available
- Skin and character selection
- Create buildings and select from a range of props
2. Stick Fighter
You get a touchscreen interface in the Stick Fighter video animation app which lets you animate frame by frame in a flipbook style. You can use props like bows, swords, arrows on your stick image to create an animated cartoon battle. The features of this animation app include-
- Change color and size of the objects
- Use props to create the effect
- Edit clips frame by frame
- Save and export to share with other Stick Fighter users
3. Stick Draw
This is just a wow video animation app that lets you draw with your finger on your phone. Start with each frame and move to the next by saving and within a few minutes the animation can be up and running. Create stop-motion animations or draw stick figures with Stick Draw cartoon maker app. The features are-
- Several graphics- rectangular, circular, line, freeform and more
- Allows drawing with hands
- Advanced copy pasting options
- Use drawings or background images
- Easily accessible interface
- Mp4 and gif export options
Part 2: Best Animation Apps For iPhone
4. Animation Desk
Start from the scratch and create an animation frame by frame or use videos, images, or PSD layers for creating animation with the Animation Desk video animation app for iPhone. Now, creating an animation on your iPad or iPhone is easy with this animation creator app. The features are-
- Several import and export formats
- More than 46 brush options
- Rotoscoping or transforming videos into line drawing allowed
- Music addition to your animation
- 16:9 and 3:4 export video screen ratio
- Apple pencil integration
5. FlipaClip
This is the coolest cartoon maker app to relive your childhood with cartoons and animations. Create some of the best cartoon characters and explore your creativity by drawing cartoon frame by frame. It is basically the school flipbook having a contemporary twist. FlipaClip video animation software is ideal for the iPhone users and offers the best intuitive tools for storyboarding, sketching, animating or just playing around. The features are-
- Supports several popular formats like SEQ, IMAGE, GIF
- Share on a social platform like Tumblr, Facebook, YouTube
- Add videos and draw over it
- Text insertion from the choice of several fonts
- Different layers of drawing
- Grid overlay drawing
Part 3: Best Animation Apps For iPad
6. Animation Desk Classic
Create hand-drawn images with the Animation desk classic animation app for iPad users. Explore your creative ideas with this animation maker app in a short span of time. The features of Animation Desk Classic are-
- Add soundtrack or recordings
- Insert motion backgrounds, shapes, or graphics stickers
- Cut, copy, paste tool
- Pigment cans
7. Animation Creator HD
It is a combination of the best drawing app and the best animation app for iPad. With Animation Creator HD video animation app one can create animated movies on the go. Whether iPad or iPad mini, this cartoon maker app offers great drawing tools, frame management and color options to make the best out of your creativity. The features of this video animation app are-
- Retina quality and the high frame rate playback
- Infinite frames and animations
- Cineverse browsing
- Powerful drawing tools
- Easy frame management
- Life-like animation
8. Animation & Drawing by Do Ink
The simple yet powerful Animation & Drawing by Do Ink video animation app is counted amongst the best app for iPad. Even if you are a beginner, this animation app creator makes your animation creating experience, a pleasant one. The features of Animation & Drawing by Do Ink includes-
- Powerful vector tools
- Bezier curve editing
- Flipbook-style animation
- Create motion paths by dragging your finger
- Reusable art props collection
- Freehand drawing option with fill tools, pen, pencil, brushes
- Geometric shape tools
- Adjustable frame rates
Conclusion
Animation has become a vital part of any video marketing strategy. The knowledge of the right video animation app can help you to create great videos on the go. You don’t need to reach your home or office to work on your computer for animating videos. With a range of great animation app available, you just need to download and install on your Android, iPhone, or iPad, to give wings to your creative imaginations and create perfect animations always. If you want to make animation video on PC, try to use Filmora that will give you more controls on editing!
For Win 7 or later (64-bit)
Secure Download
For macOS 10.14 or later
Secure Download
Click here to get Filmora for PC by email
or Try Filmora App for mobile >>>
download filmora app for ios ](https://app.adjust.com/b0k9hf2%5F4bsu85t ) download filmora app for android ](https://app.adjust.com/b0k9hf2%5F4bsu85t )
Shanoon Cox
Shanoon Cox is a writer and a lover of all things video.
Follow @Shanoon Cox
Cut AVI Files Like a Pro: Best Video Editors for All Platforms
With the growing fame of video-sharing and social media applications like Twitter, Instagram, and TikTok, the demand for simple and fast video cutting and trimming tools has dramatically increased. Nowadays, you don’t have to play with complex video editing tools to produce high-quality videos.
Thanks to several user-friendly editing software to make things easy for everybody. However, finding the right programs to trim/cut videos is still challenging, especially in AVI format.
But, guess what? These top 16 AVI video cutters for Windows, MAC, Android, iPhone, and online will make video cutting and trimming fun, especially when you learn to do it using Filmora.
In this Article
Part 1: Best AVI Video Cutter to Trim/Cut AVI Video on Windows and MAC – Filmora Video Cutter [with steps}
Part 2: Top 3 Free AVI Video Cutter on Windows
Part 3: Top 3 Free AVI Video Cutter on MAC
Part 4: Top 3 Free AVI Video Cutter on Android
Part 5: Top 3 Free AVI Video Cutter on iPhone
Part 6: Top 3 Free AVI Video Cutter Online
Part 7: Bottom Line
Part 8: FAQs
Part 1: Best AVI Video Cutter to Trim/Cut AVI Video on Windows and MAC – Filmora Video Cutter [with steps]
Filmora by Wondershare is a star video editor with outstanding outcomes. Whether you have a MAC or Windows PC, you can download Filmora regardless of your operating system. The program best serves those who intend to make high-quality videos. The software provides editing support for all video formats, including AVI.
Although Filmora is an affordable editor with tons of audio and video editing options, you can still download the software for free and create projects if watermarks don’t bother you. Moreover, you can count this tool’s capabilities in cropping, resizing, and Chroma screen support. But that’s not the only sweet fruit.
In fact, Filmora is equipped with many jaw-dropping features, including preset templates, auto beat sync, split-screen, speed ramping, motion tracking, keyframing, creative transitions, titles, filters, and much more. And the best part is, you can learn and understand Filmora in no time. That’s why the program is loved and supported by all types of users.
So does Filmora helps cut and trim AVI videos? Yes! It does if you follow these steps correctly.
Step 1: Download Filmora Video Editor
First, download Filmora Video Editor by choosing your operating system, as seen in the screenshot below.
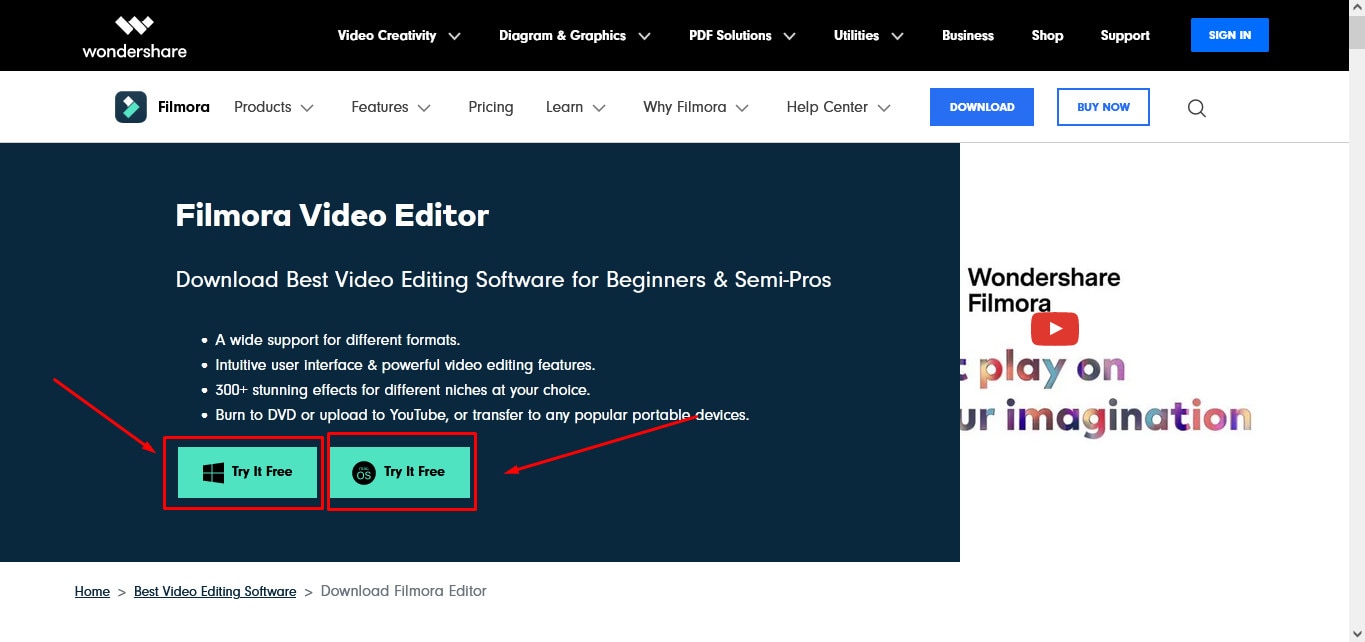
Run the setup and let it finish without any pause or break.
Step 2: Import Your Video to Filmora Video Editor
Importing your AVI video is a very simple process. Just click on the “Film Clip” icon.
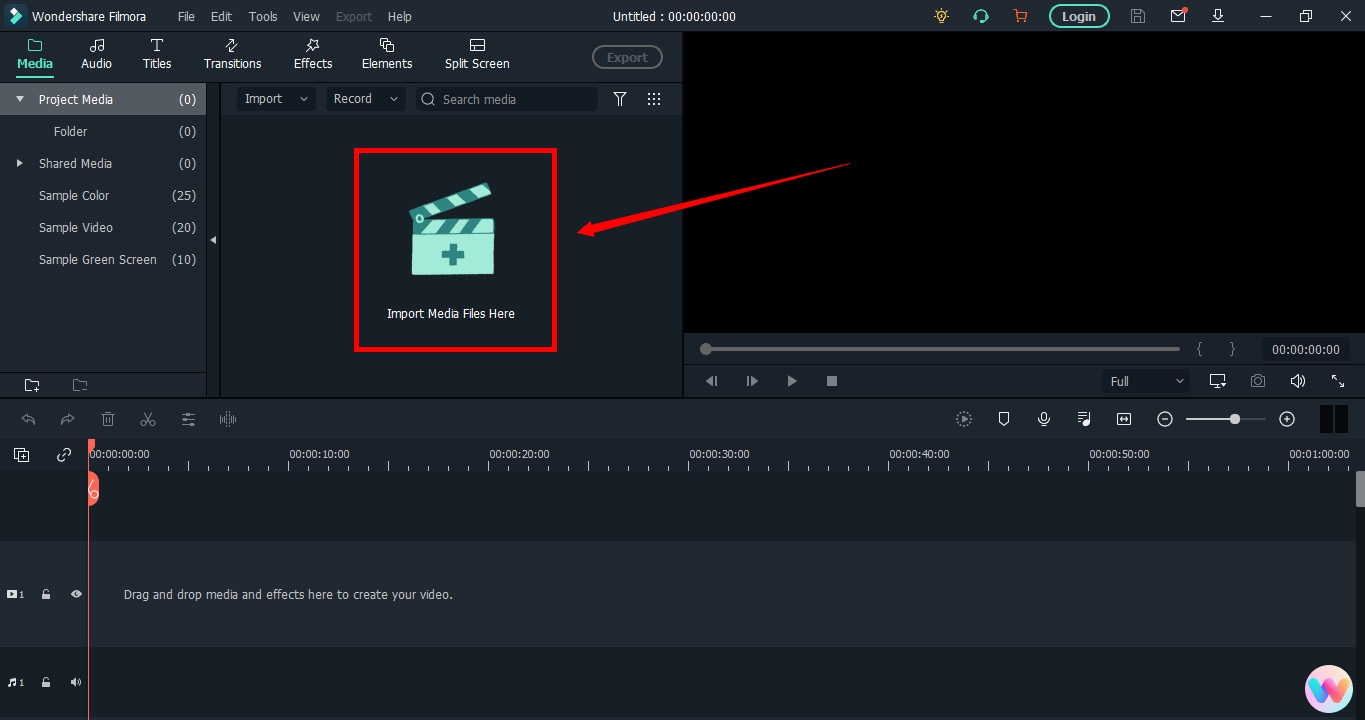
It will open a new window screen on your computer to select the video from the directory. Find the clip you want to import and cut. Use your mouse to select it and click the “Open” button.
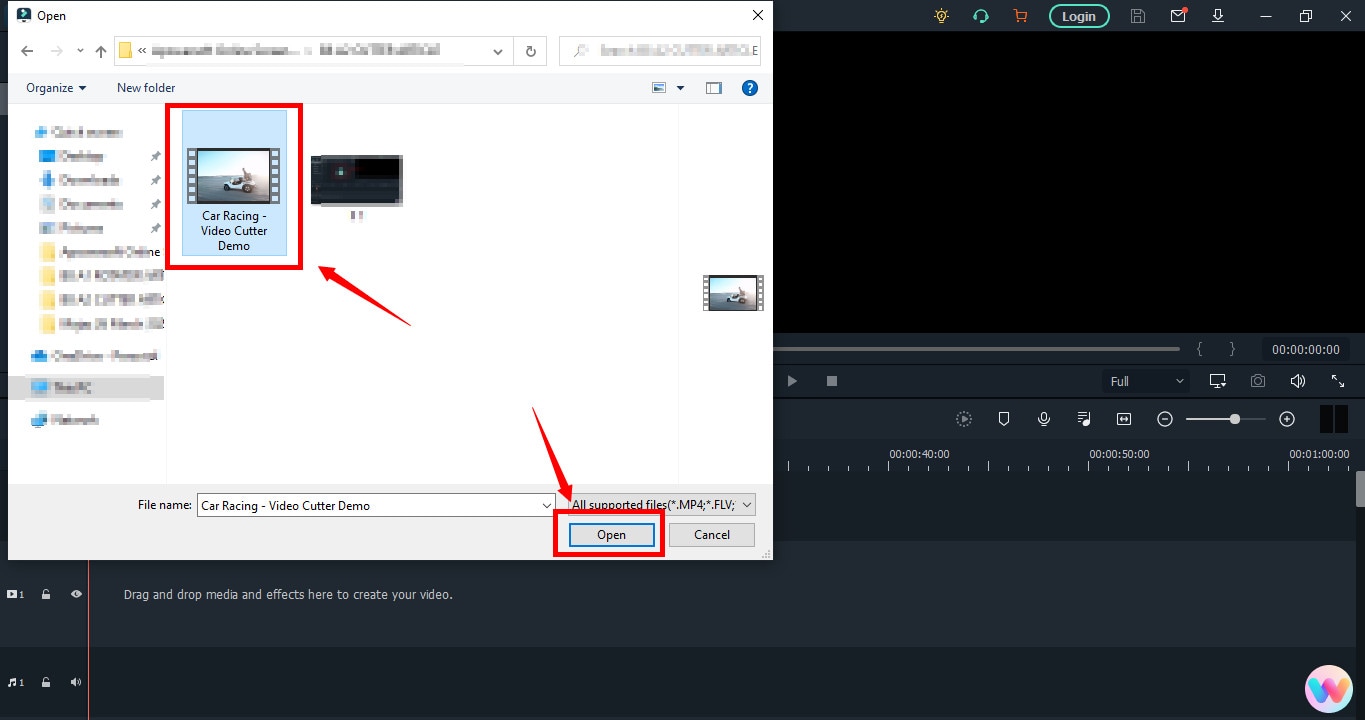
The video will be loaded in the “Media” folder of Filmora. The clip’s thumbnail should be visible to assure you have done everything correctly.
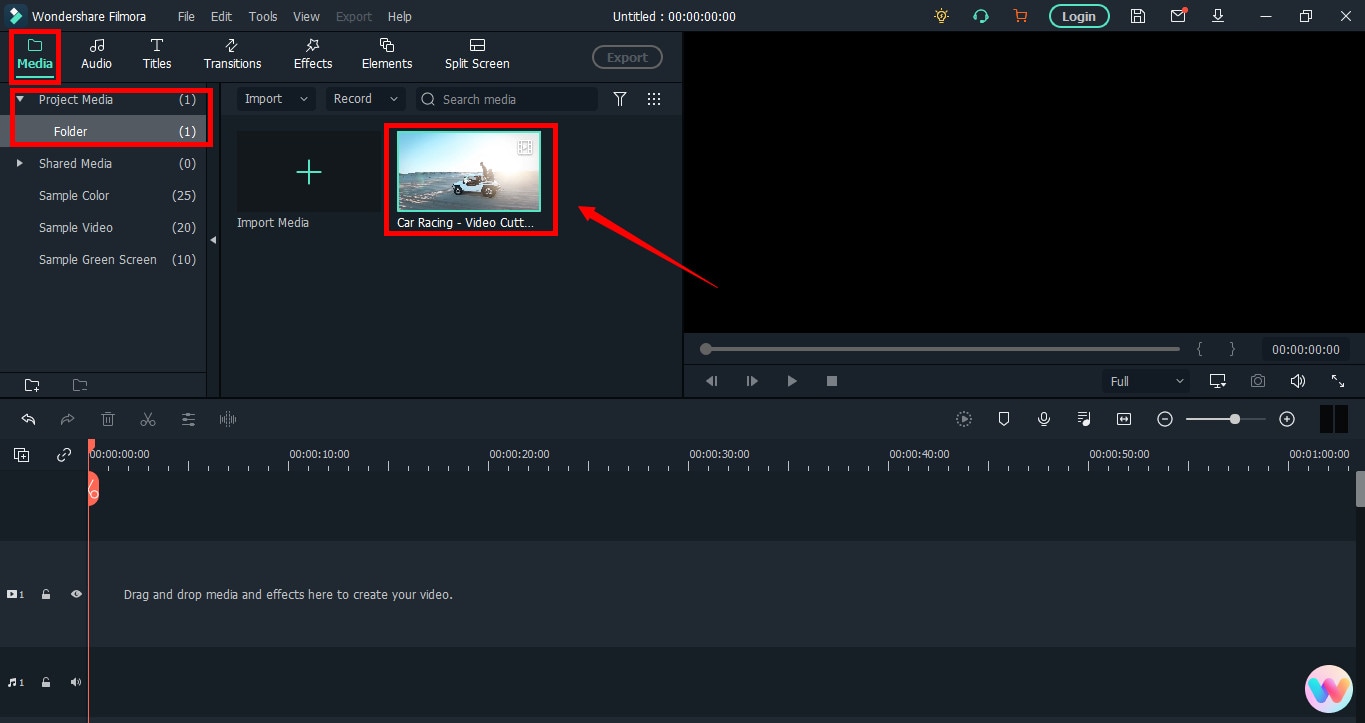
If you can see that, let’s go to the next step.
Step 3: Drag and Drop Video to Filmora’s Timeline
Select the video in the media folder by clicking over it once. Now, without leaving the hold of the left button of your mouse, slide the video down to the track in the timeline.
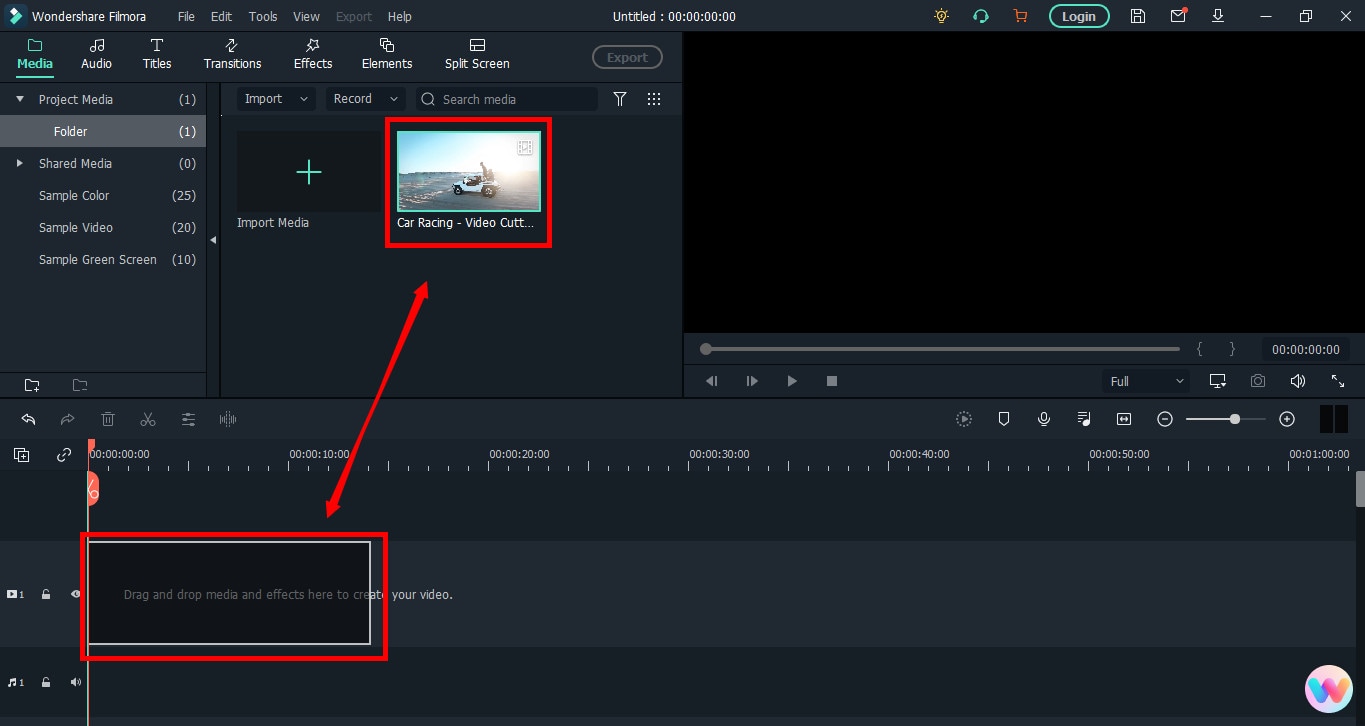
After that, a message will pop up, asking about your preference for the project settings. It is recommended to choose the “Match to Media” option unless you’re an experienced video editor who knows how to play with the resolution and frame rates.
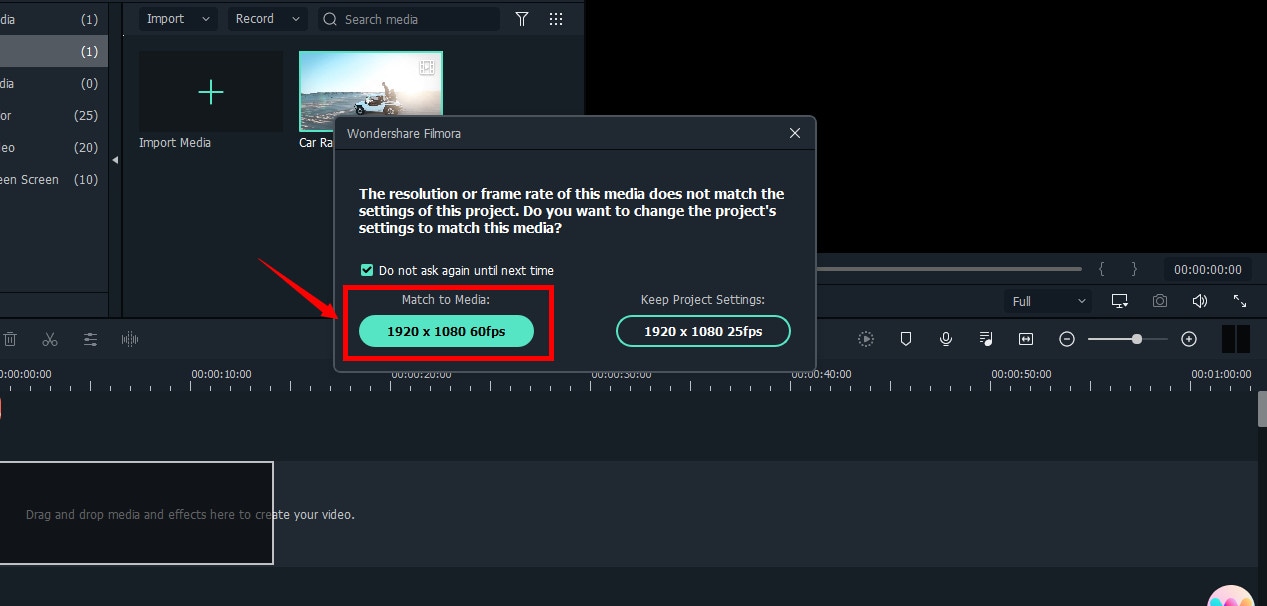
You will see the video on the timeline with its preview on the “Preview Screen” on the right side of the interface.
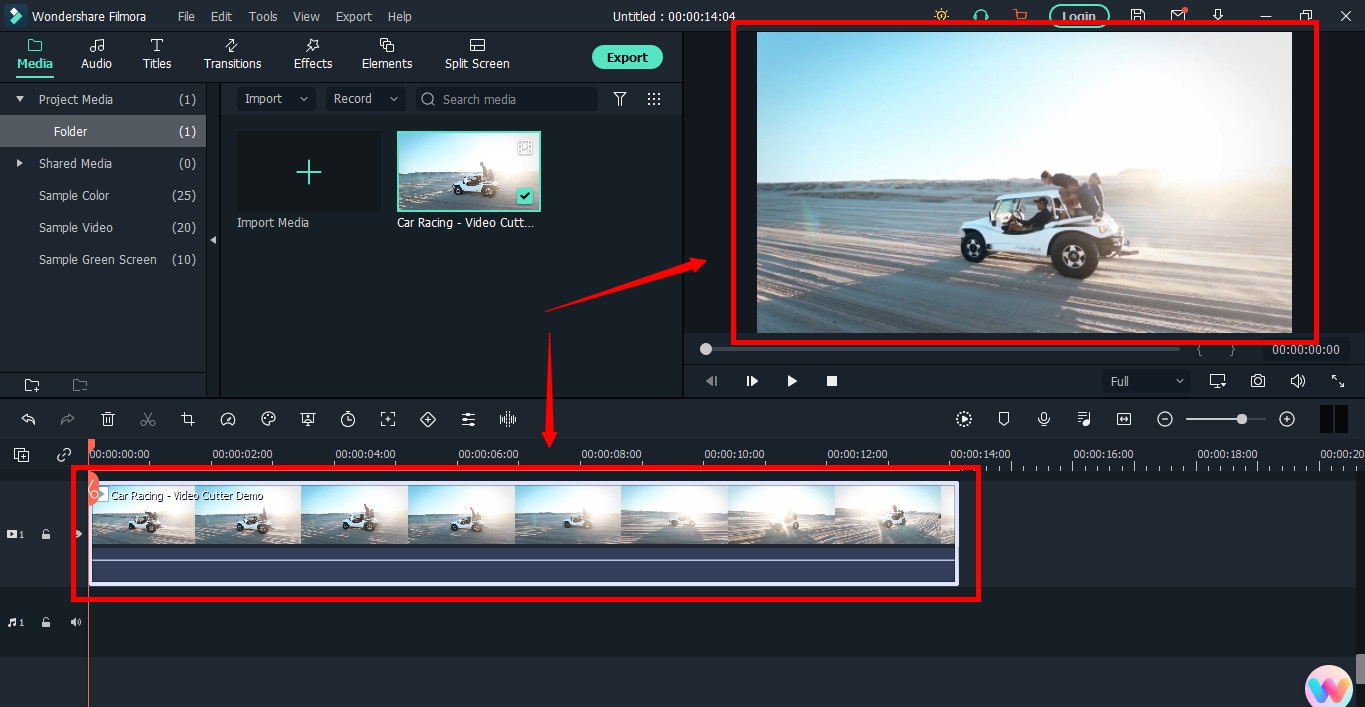
Step 4: Cutting Your Video in Filmora
Here comes the core step you have been waiting for. But before you go any further, you need to know about the “Playhead.”
Playhead is an orange-reddish marker you can find on the timeline.
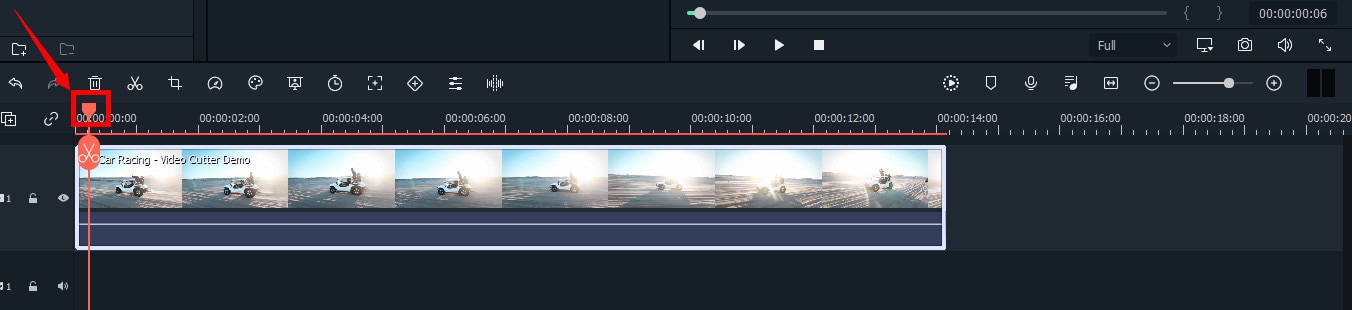
It has an important role in cutting your videos.
So, move the playhead to your desired frame and click on the “scissor” icon to make the “starting” cut.
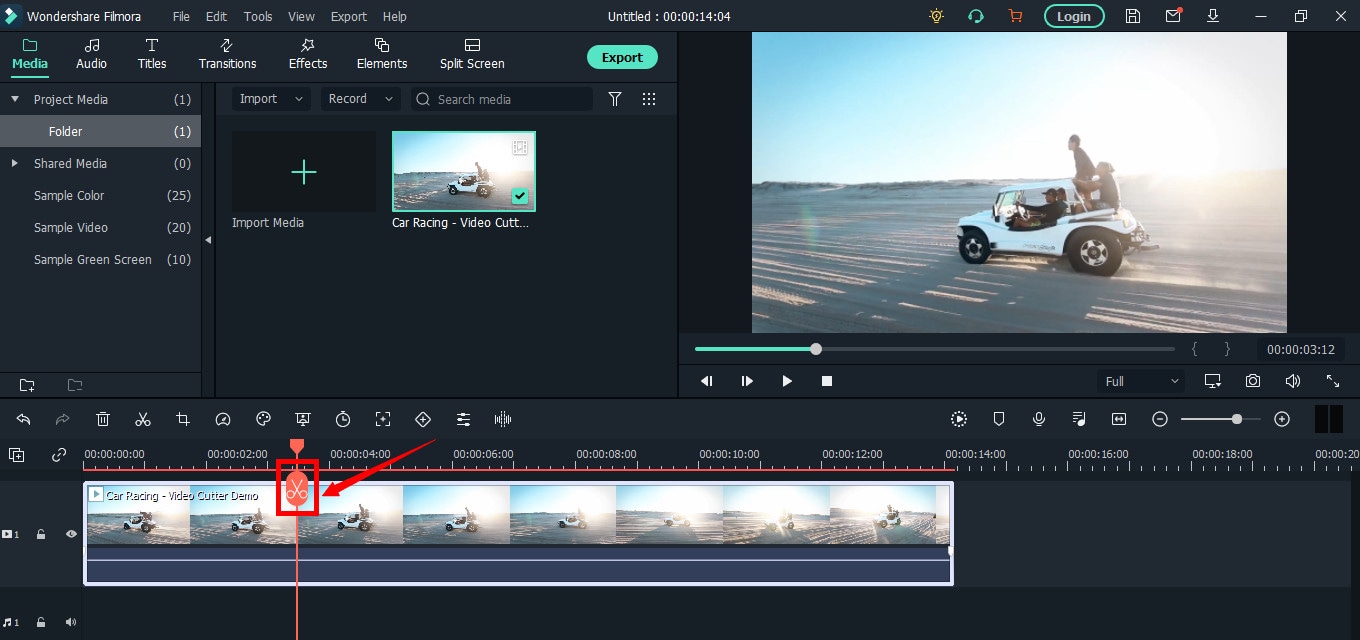
As soon as you do it, you will see that the single clip is now divided into two parts similar to this image.
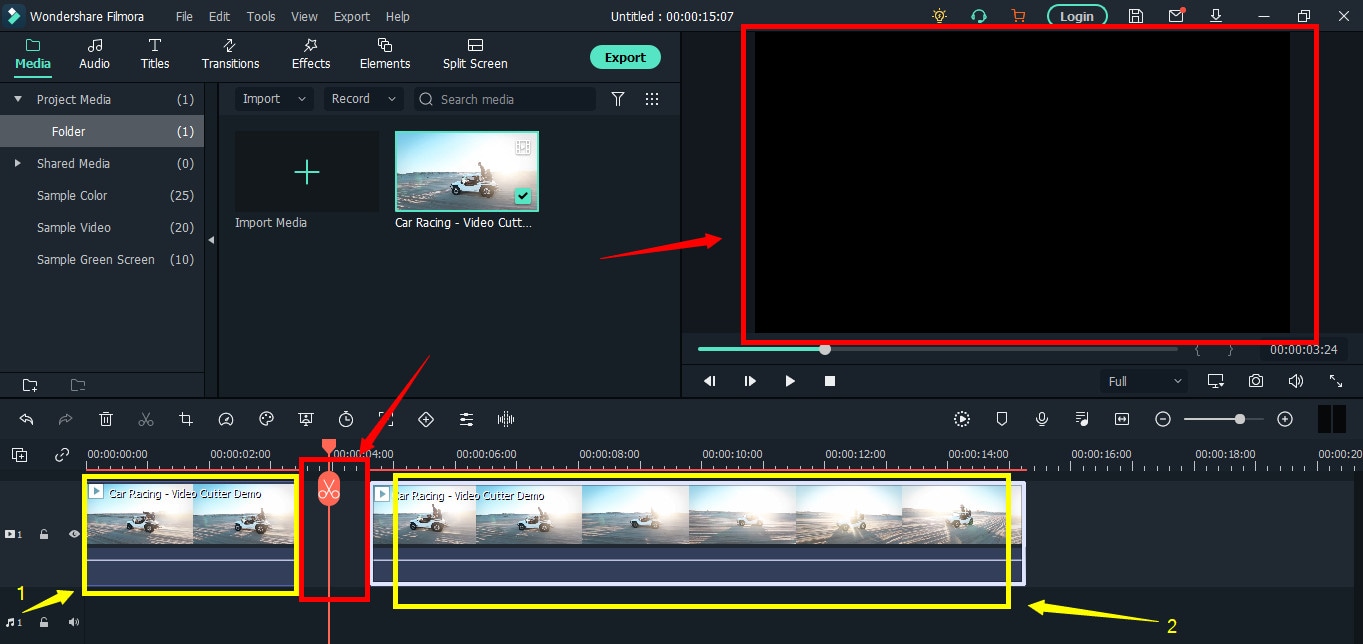
The “Red” marked area in the above screenshot ensures a gap between the clips on the timeline. The “Yellow” arrows confirm two separate clips of the same video.
Place the two clips together as seen in this “Green” area.
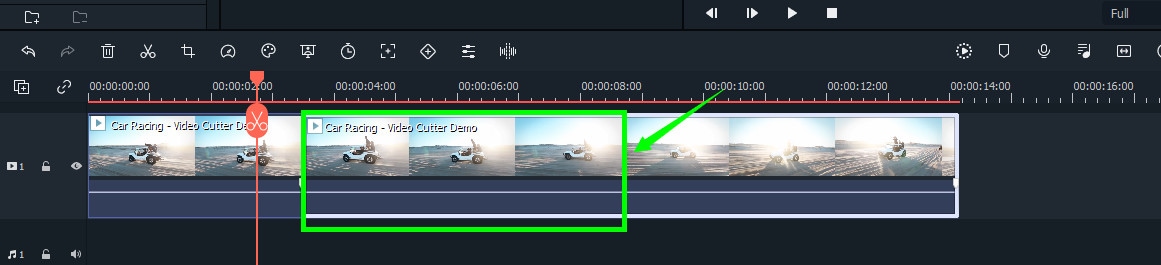
And place the playhead anywhere on the clip. And click on the “scissor” icon once again to make the “ending” cut (second cut).
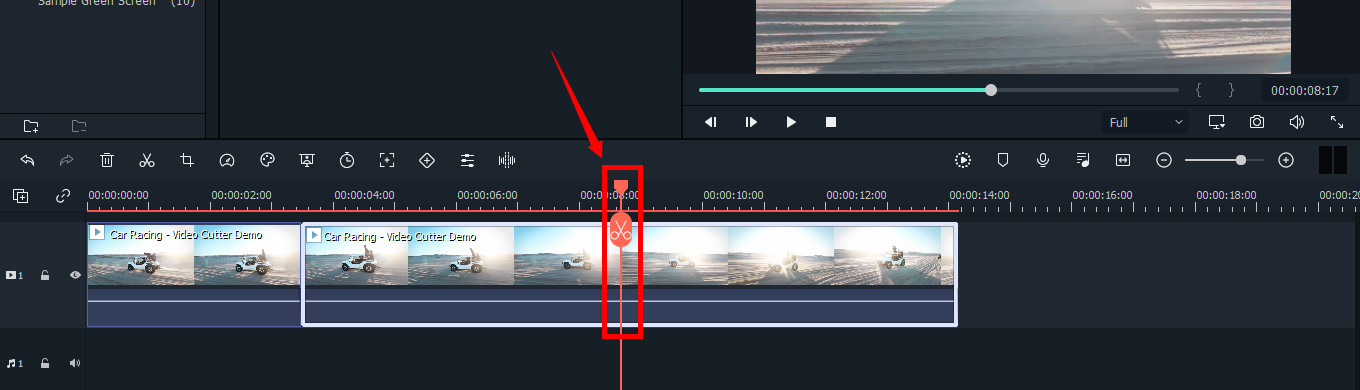
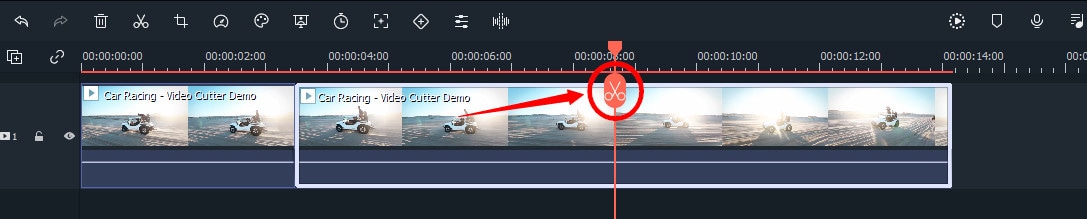
If done correctly, there should be three clips now of the same video, as you can observe in this screenshot.
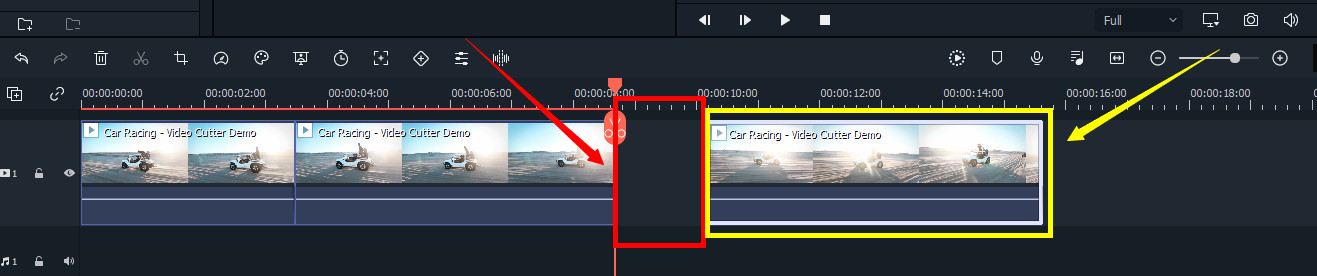
Again, the “Red” area in the above photo indicates the gap, and the “Yellow” area ensures a third segment of the video.
Note: The gaps you can see in the divided clips are made intentionally for understanding. Practically, Filmora doesn’t move the clip or make gaps in between after you have made the cuts.
Keep in mind that there are three clips on the timeline. Now, if you want to remove the second clip from the video, you need to select that portion first by clicking on it.
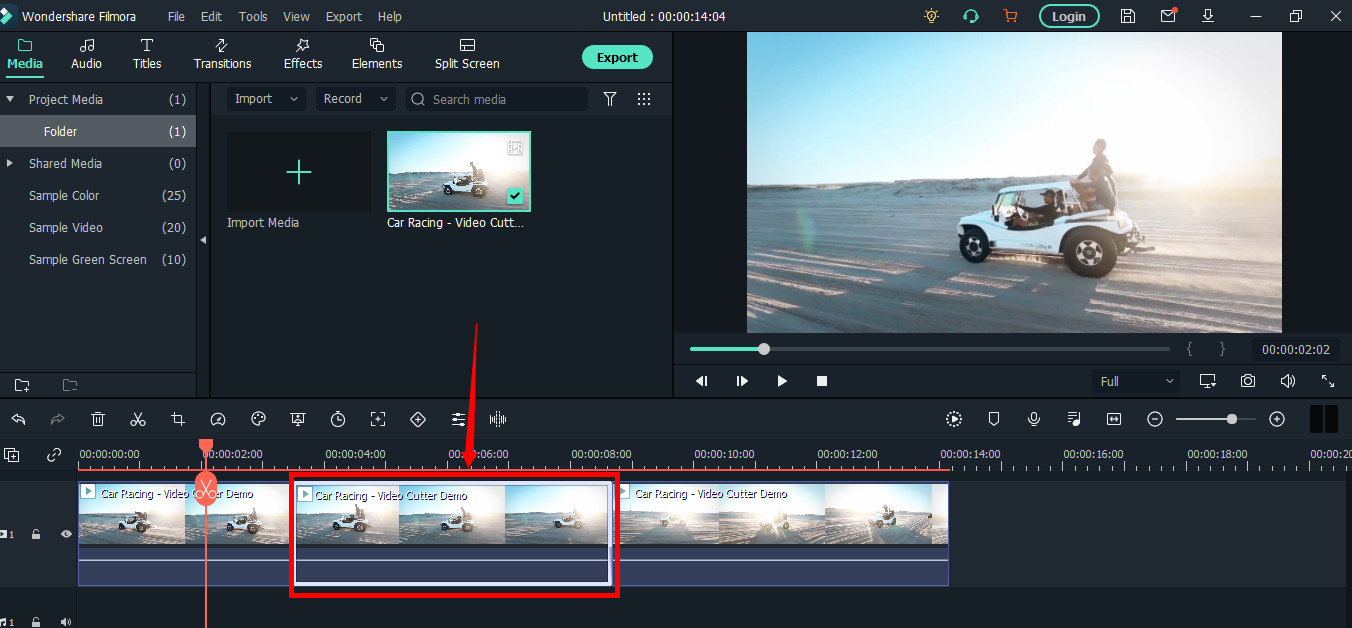
Then, right-click on the mouse and choose “Cut” from the menu.
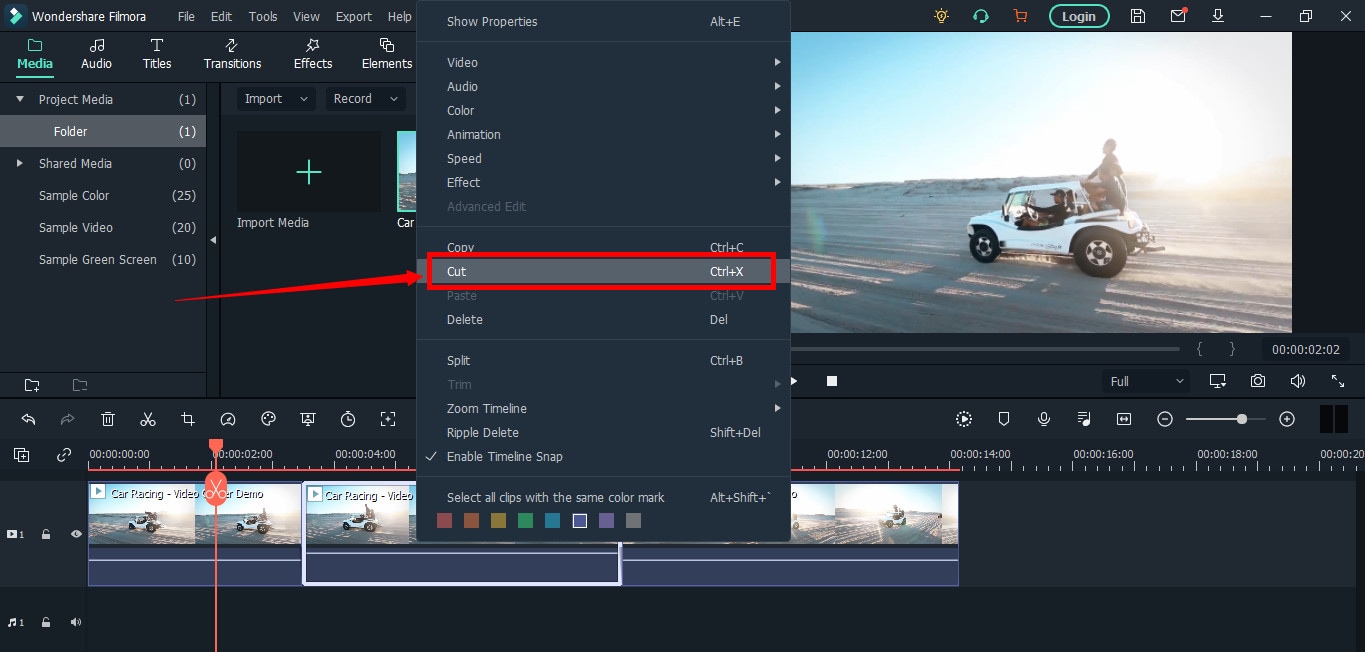
Within a semi-second, the selected portion will be removed from the timeline. And you will be able to see the remaining parts of the video. Now, pull the second clip using your mouse and place it at the end of the first clip without leaving a gap in between.
Then, click the “Play” button under the preview screen to see the results.
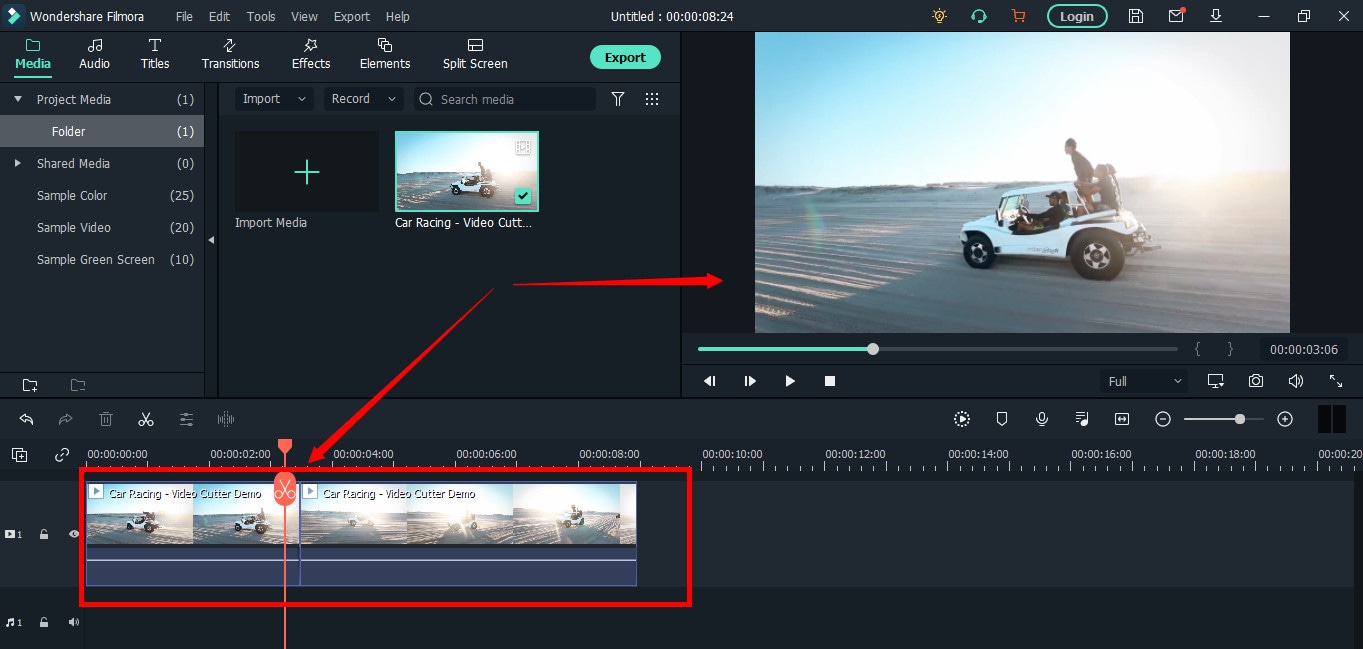
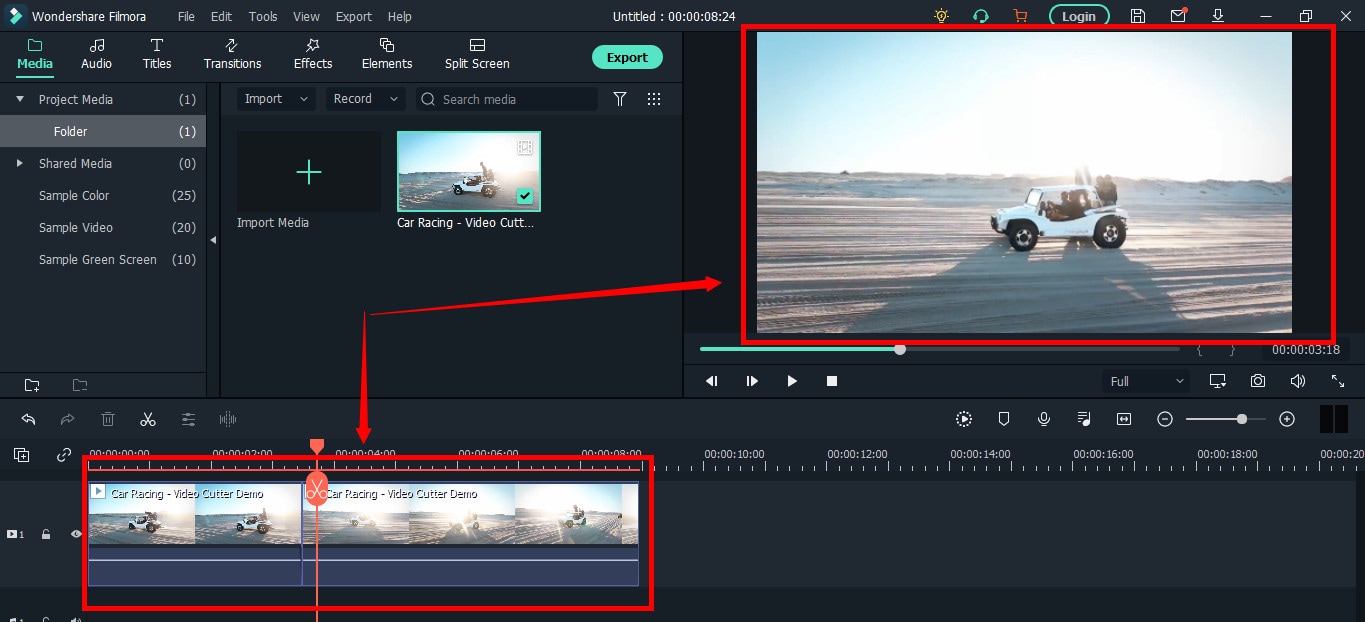
You can see in the above two screenshots that there’s a jump between the scenes due to cuts, confirming that video has been cut significantly.
Step 5: Trimming Your Video in Filmora
Remember that cutting and trimming in Filmora are two different things. Trimming allows you to remove a particular video part from visibility without deleting the portion.
So feel free to skip this step if you’re happy learning the cutting technique. But if you’re interested in trimming, here’s how you do it.
Take your mouse cursor at the beginning or end of the clip you want to trim. Keep holding the clip’s corner and slide the mouse back or front to trim the part
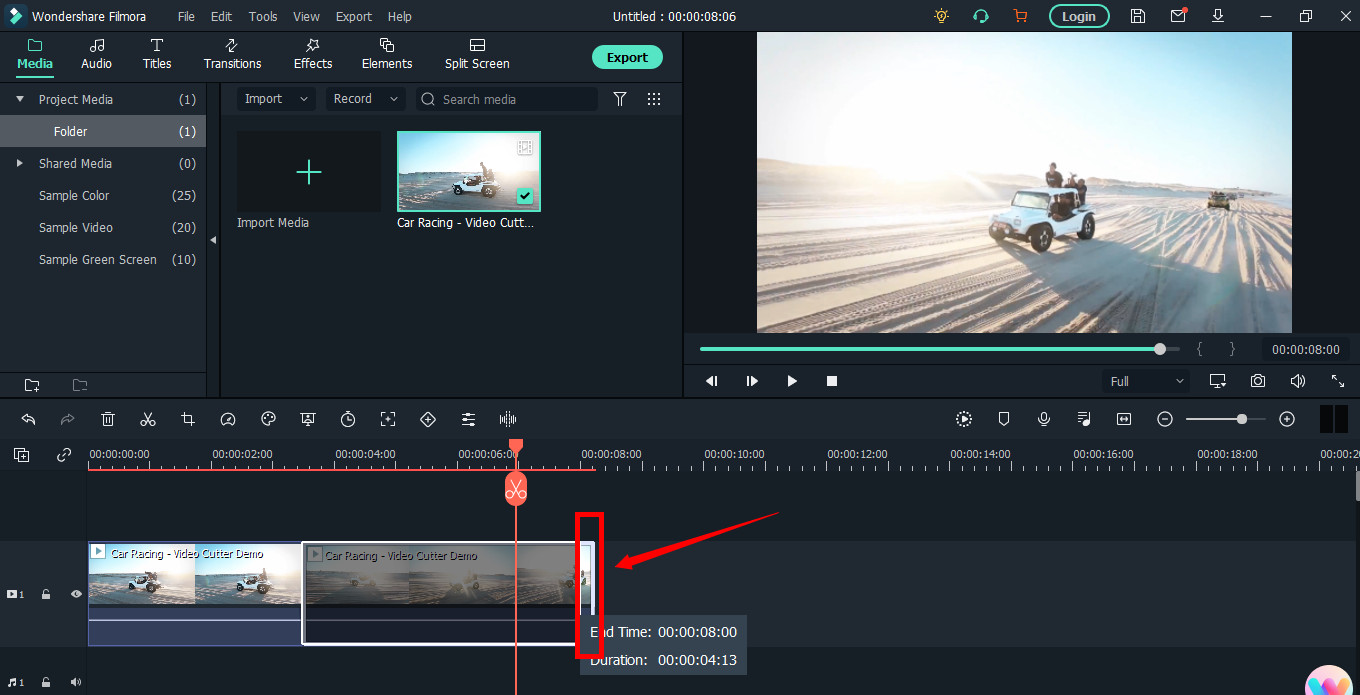
Note: Since the trim tool doesn’t delete the video, the final project based on trimming will be of a larger size. Therefore, it is advised to cut videos rather than trimming for fast rendering, better results, and small video size.
Step 6: Save Project and Export Your Cut/Trimmed AVI Video
Choose “Save Project” from the “File” menu.
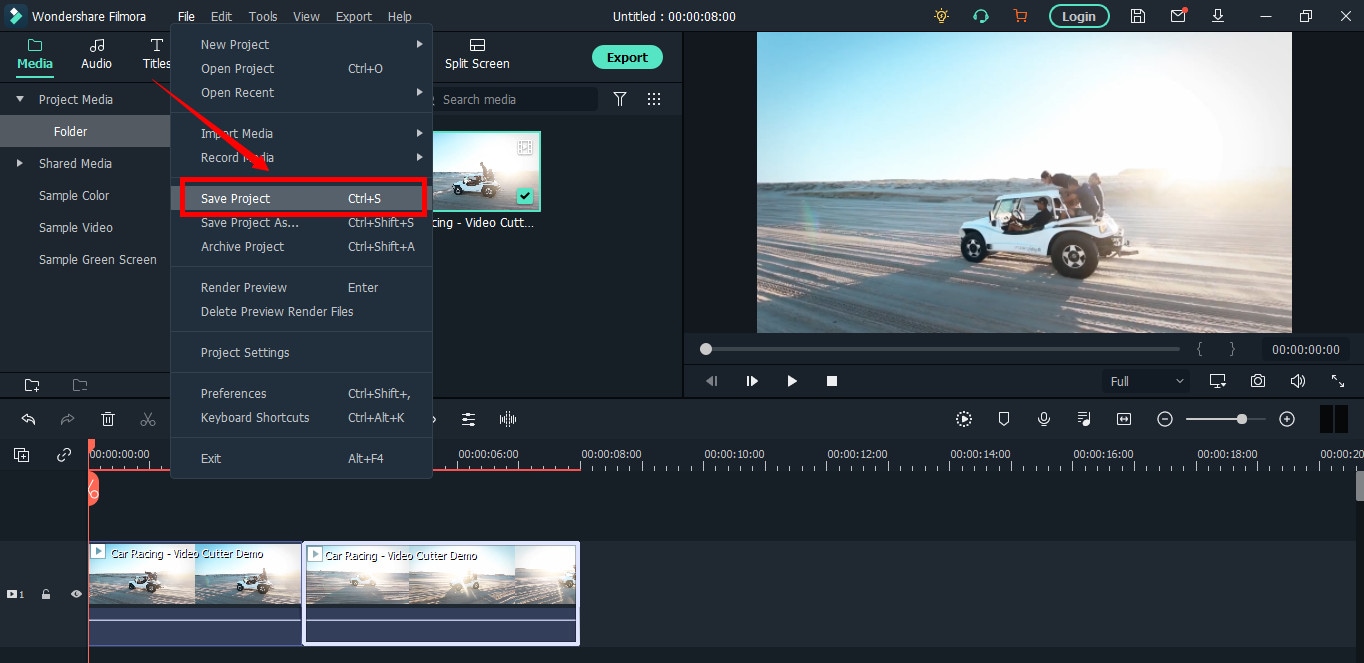
Select the directory to save the project, rename the new video, and click the “Save” button.

Click on the “Export” button to save the video in AVI or any other video format of your choice on your computer.
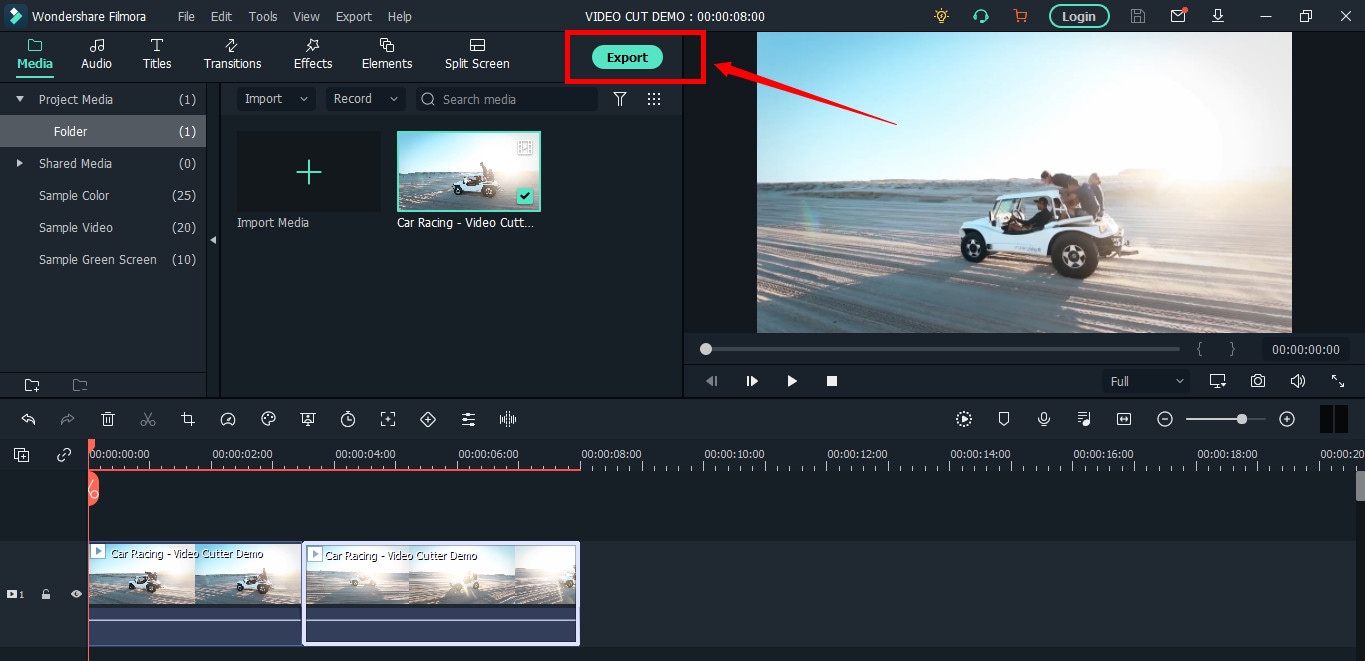
Part 2: Top 3 Free AVI Video Cutter on Windows
As a Windows user, finding an excellent video cutter is relatively easy. However, not all software permits importing AVI videos. In the same way, some video trimmers come at a price. So if you really don’t want to pay and enjoy cutting your AVI files, try using these three video cutting tools.
Microsoft Photos (Windows 10)
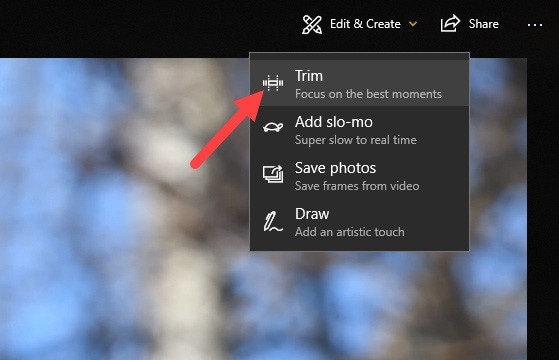
Microsoft Photos or Photo App is a free photo viewer and editor with your Windows 10. It offers incredible photo editing and enhancement along with different tools for organizing and editing videos in a very friendly way. Likewise, you can create drawings over the videos and add 3D effects and background music to your clips.
You can also trim AVI videos with Microsoft Photos quickly. All you need to do is open your clip with the Photo App, choose the “Trim” option, select a portion of the video you want to trim, and go ahead.
That’s it!
Features
- Quick video trimming
- Cool text effects
- 3D library and effects
- It has a clear interface
- You can find and tag people’s faces
- The program has 15+ filters for editing
- Motion tracking option for drawing on videos
- Allows you to view and organize your files easily
Pros
- Microsoft Photos is free for Windows users
- It automatically creates albums
- The program has a touch-friendly interface
- You can integrate your OneDrive with the software
Cons
- Lacks before and after view
- Not included in older Windows versions
- It doesn’t support selective focus or panorama stitching
Handbrake
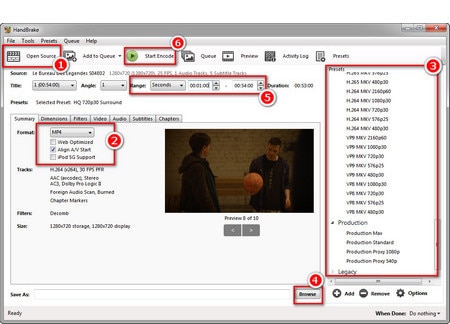
Handbrake is best-known for its video transcoding traits. Unlike typical video editors, this open-source tool includes limited options to rip Blu-rays and DVDs. Moreover, you can mix the 5.1 soundtracks and convert them to stereo to make the audio compatible with your TV speakers.
But the exciting thing about Handbrake is that you can use this software on your macOS 10.13 or later versions to cut AVI videos for free. However, it’s a bit technical process, as there’s no timeline to help you trim or make cuts on the clips directly with the help of your mouse.
You are required to mention a time range (seconds, minutes, or hours) to keep a specific part of the video while the software removes the non-ranged parts of the clip. For instance, you have a video of 10 seconds. You start the range from 5 seconds and end it at 10 seconds. So, the first four seconds of the video will be cut from the entire clip.
Features
- Video cutting, cropping, and resizing
- Low-quality and old video restoration
- Video conversion from any format to MKV or MP4
Pros
- Handbrake is free
- You can convert batch videos with ease
- It supports MAC, Windows, and Linux OS
- Allows you to import video files in all major formats
- The software comes with various video conversion presets
Cons
- Handbrake is not a user-friendly tool
- The video file output is limited to two formats (MKV and MP4) only
Gihosoft Video Cutter
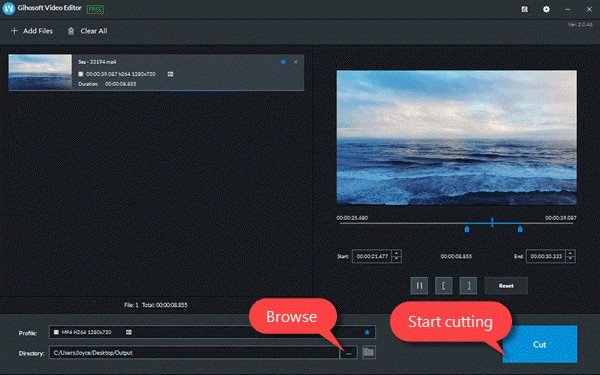
Gihosoft is a clean, free, lossless video cutter on your Windows PC. It’s a simple tool that helps you cut video files into various output formats. So be it AVI, MPEG, or any other file, with Gihosoft, everything becomes handy.
Another fascinating fact about this software is that it allows you to cut videos in three simple steps without losing the quality. So right after installing the program, you simply need to import your file, choose the start and end time, and click the “Cut” button to remove the part of the video.
Features
- Fast video and audio cutting
- Easy drag and drop audio/video files
- It supports most audio and video formats
Pros
- Free for both Windows and MAC operating systems
- The cutter saves video in original quality
Cons
- It does not include basic video editing features
Part 3: Top 3 Free AVI Video Cutter on MAC
Are you looking for a great AVI video cutter for your MAC? Sadly, you have limited product choices as compared to Windows users. But to ensure you don’t waste time looking for a suitable tool, here’s a list of three AVI video cutting programs you can use on your Macintosh.
iMovie
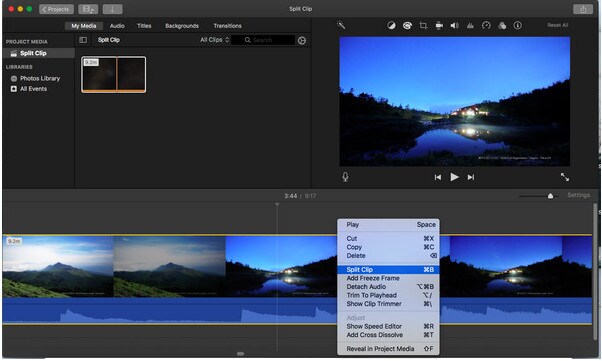
The first and foremost recommended software for free video cutting on MAC is Apple’s own tool, iMovie . It is a built-in program that comes with your system, so there is no need to spend extra on a video editor. iMovie allows you to browse and import most video files, including AVI, right from your computer. Also, this tool is equipped with multiple functions, such as audio editing, video quality enhancement, and much more.
This MAC’s video editor is ideal for beginners. Many home users and small business owners find this tool extremely simple, as they don’t like to be confused with complex features. So, if you want to make cuts to your video clips, start working on iMovie. And within a few clicks, you can trim or cut your videos for free.
Features
- Video cutting and trimming
- Cropping and rotation
- Effects and transitions
- Built-in themes
- HD and 4K video support
- Movie sharing
- Audio adjustments
- Chroma screen controls
- Character tracking
Pros
- Free to use for MAC users
- Clean timeline
- One-click video cutting and trimming
- Easy-to-remember keyboard shortcuts
- Direct share projects to your social media, like YouTube
Cons
- It takes a lot of time to export videos
- iMovie needs high HDD storage space
VideoPad by NCH

VideoPad by NCH is a beginner-level video editor with all the basic features. The software is specifically designed for home movie makers. That is why VideoPad is easy to understand and use.
VideoPad is entirely free of cost for non-commercial purposes, but it has limited features. On the other hand, if you want to enjoy full traits, you can purchase the tool.
VideoPad supports video files, including AVI, WMV, MPEG, MOV, MP4, ASF, and XviD. Likewise, you can also burn movies to Blu-ray, DVD, HD-DVD, or CD. And most importantly, you can easily cut or trim AVI videos on your MAC, as the software is available on both MAC and Windows systems.
Features
- Audio tools
- Video rotation
- Video sharing
- Visual effects
- Video transitions
- 3D Video editing
- Color correction
- Overlays and texts
- Video optimization
- Great plugin support
- Direct video uploading
- Multiple video resolutions
- Video cutting and trimming
- Files exportation to various devices
- Stereoscopic conversion from 2D to 3D
Pros
- You can use the basic tools for free
- Allows 360-degree video production
- It supports a wide range of video formats
- Compatible with MAC and Windows computers
Cons
- The auto speech feature performs poorly
- The free version has annoying notifications
Xilisoft Video Cutter
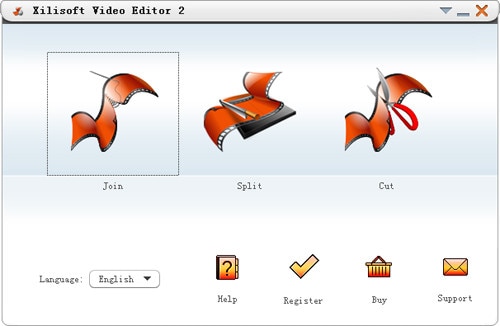
Xilisoft Video Cutter is the simplest tool to cut videos on MAC. This software has a straightforward option to cut the clip after importing it to the timeline. The program is fast and has a user-friendly interface.
Moreover, you can polish your videos by merging multiple clips or increasing the video quality once you’re done with the cutting process. At the same time, this video cutter allows you to import all video formats, including XviD, DivX, MOV, FLV, MP4, MPEG-4/, MKV, MPEG, WMV, and AVI.
Features
- Video joining
- Support multiple output video formats, including HD
Pros
- Easy video cutting and merging
- It doesn’t require a large storage space
- Extremely uncomplicated interface
- Real-time preview to make better cuts
- Available on both MAC and Windows systems
Cons
- The trial version is free to use but limits you from enjoying extra features
Part 4: Top 3 Free AVI Video Cutter on Android
After capturing nice videos with your Android mobile phone, you may need to cut unnecessary scenes to make your clips look professional. While there are numerous Android cutters, not all support the AVI format. So below, you will find the 3 best AVI video cutters for Android, which are free to use.
Quick – Video Editor & Maker
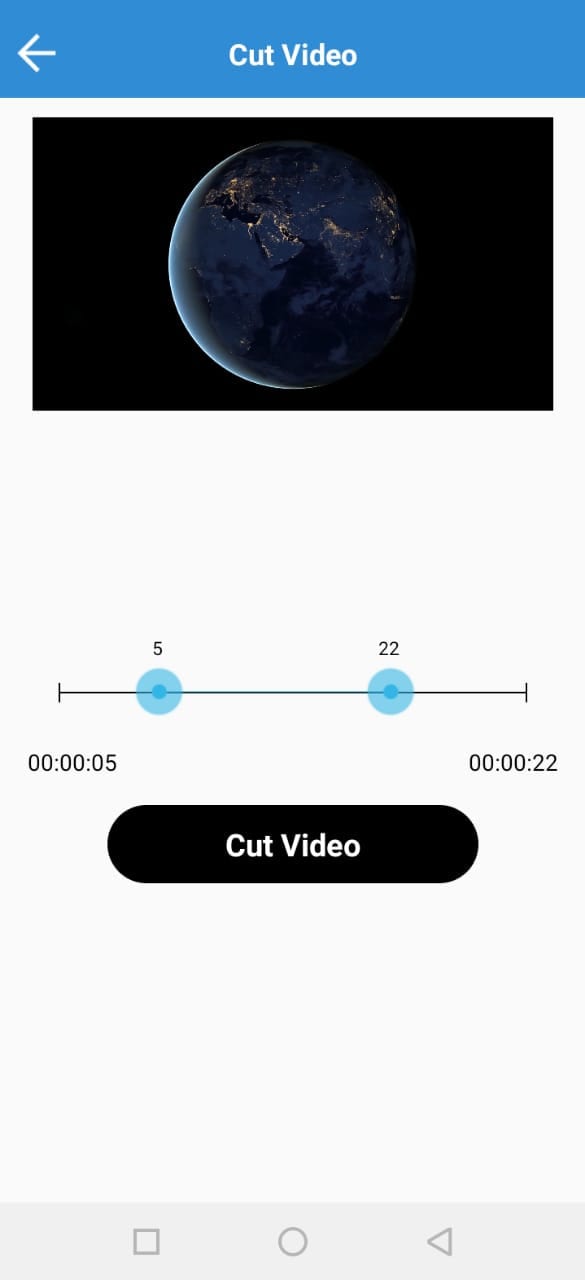
Quick – Video Editor & Maker is a free video editor with PRO results. Many photographers and vloggers love using this app to cut clips immediately. Furthermore, the application offers a wide range of options to assure you don’t have to look to any other tool to rotate or compress video. Quick – Video Editor & Maker lets you import videos in all major formats, including AVI, MPEG, WMA, and more.
Features
- Video cutting, fading, and rotation
- Speed control tools
- Conversion from video to GIF
Pros
- Free app
- Simple interface
Cons
- Lack of updates
- Some users complain about app crash
Funimate Video Editor & Maker
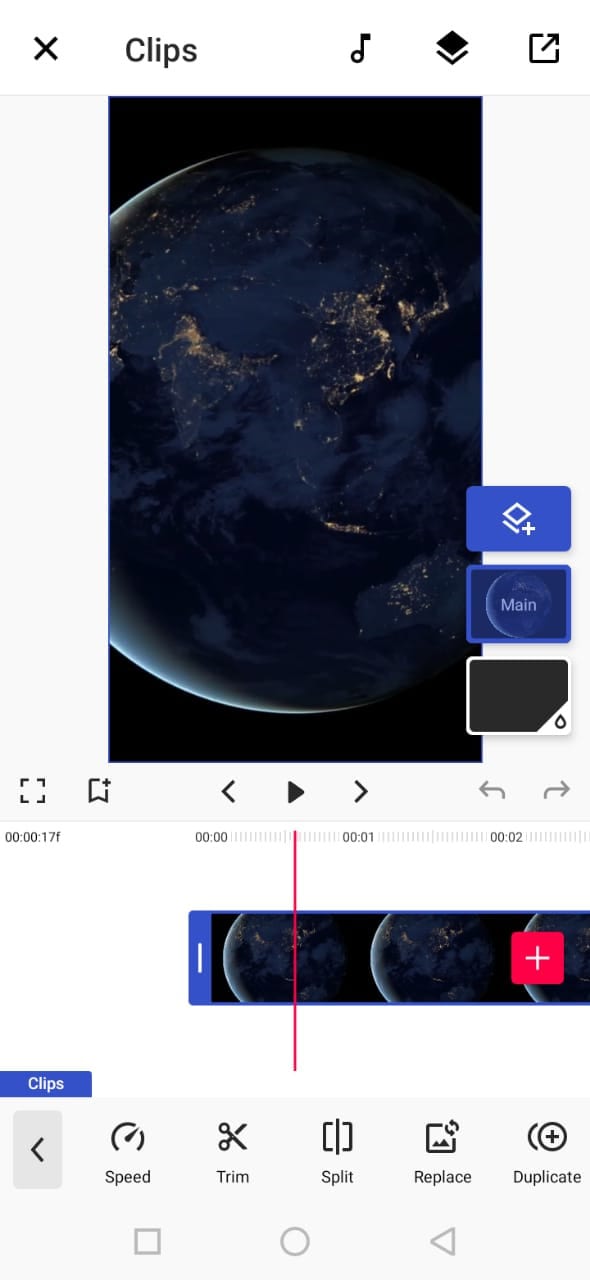
If you want to make some professional-grade video edits quickly, you are welcome to download and use Funimate Video Editor & Maker on your Android device. It’s a free tool to cut videos. It has an easy procedure, and you can cut AVI videos in a few seconds.
Plus, you can use the app to add custom animations, effects, and many other exciting elements. You can share your makes on social media like TikTok, Instagram, and other platforms. Contrarily, the app itself is a community with millions of Funimate-users who share their creations daily. You can also join or watch videos from other creators to learn more about new techniques and trends in video editing.
Features
- Video trimming and splitting
- Animation and cropping
- Filters and AI effects
- Speed adjustment
- Keyframing and video merging
Pros
- Free Android application with several editing tools
- Easy trimming, splitting, and cropping
- Aspect ratio, border, and color customization
- Direct social media sharing
Cons
- Free users cannot use templates
- The free version stamps watermarks on each project
Part 5: Top 3 Free AVI Video Cutter on iPhone
No wonder iPhone’s camera captures high-quality videos. But the problem begins when there’s no free app to cut AVI videos. So if you’re recording great spots, but deep inside, you really want to remove some parts, then these 3 free AVI video cutters will work smoothly on your iPhone.
Cut, Trim, Split Video Editor
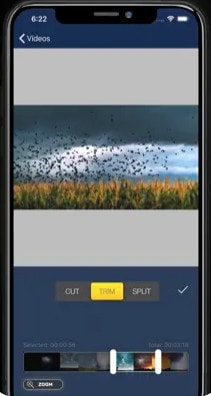
Download Cut, Trim, Split Video Editor on your iPhone to delete/cut unwanted portions of your video clips. The tool is also best for trimming iPhone-recorded clips without messing with the frames. Or, if you just want to split the video into multiple parts for your next WhatsApp status, this iPhone app can do that job for you.
The app supports multiple video file types, including MOV, MP4, AVI, MPEG, MPEG-2, and 3GPP
Features
- Easy trimming and cutting video clips
- Splitting big-sized videos into two smaller clips
- Import video from file-sharing platforms, like iCloud, using Wi-Fi
Pros
- Free app for fast video cutting and sharing
- Simple UI interface
Cons
- The free version shows advertisements
Splice - Video Editor & Maker
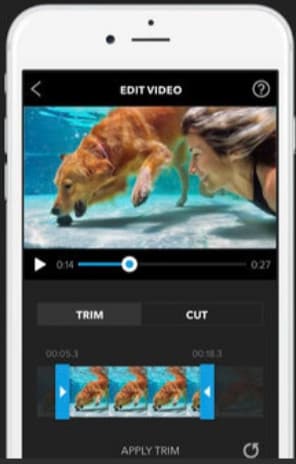
Splice is an extraordinary video editor that makes it easy to make fully customized and professional videos from your iPhone. The app is also best for video cutting. Besides, it has many interesting features, which you can use from your device.
Features
- Cutting, trimming, and cropping your videos
- Exposure, saturation, and exposure adjustment
- Slow and fast motion with speed ramping option
- Video masking and overlay
- Color correction and text overlays
Pros
- Free basic features, such as video cutting
- iTunes integration
- Supports AVI video input
- User-friendly application
- Access to the music library
- Quick and simple social sharing
Cons
- Output videos require high mobile storage space
Part 6: Top 3 Free AVI Video Cutter Online
Don’t want to install video cutters on your MAC, Windows, smartphone, or any other device? No problem! You can use online video cutters and trimmers to split, cut, or trim your clips for free.
However, the problem still exists in online tools, as not all web-based editors allow importing AVI files. So to save your time and energy, you can directly go to the following online AVI cutters to complete your tasks.
Kapwing
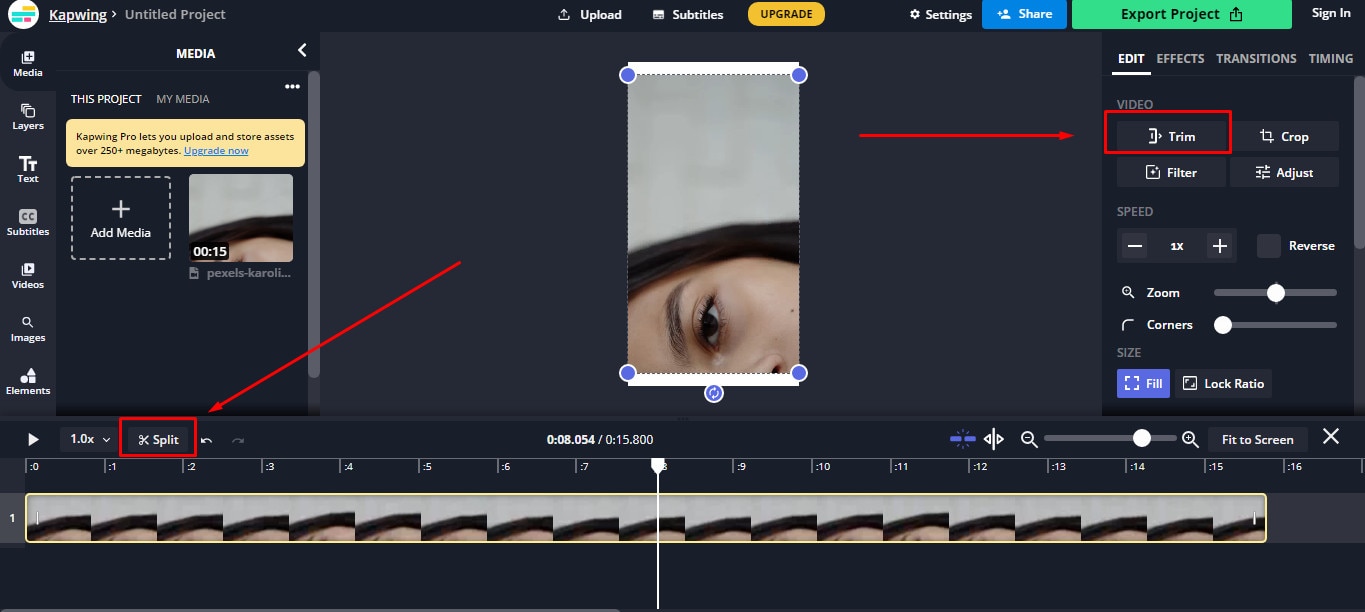
Kapwing is an online video editor best for casual creatives, such as Vloggers and YouTubers. You can use this web-based platform to cut your videos. Gladly, Kapwing supports all AVI incomings. You can upload your AVI video files to this platform and use its trim or split feature. To do that, you need to upload your AVI video and choose the “Trim” or “Split” tool to see the magic. Once done with the trimming process, you can explore Kapwing’s other incredible traits and apply them to your project.
Features
- Video splitting, trimming, and merging
- Audio capturing
- Speed adjustment
- Image and video library
- Text editing and overlay
- Auto-generated subtitles
- Several collaboration tools
- Video creation from scratch
- Templates, shapes, and emojis
- Simple drag-and-drop interface
- Video transitions, plugins, and elements
Pros
- Free online video trimmer
- User-friendly interface
- You can export 30-minutes long projects
- Allows you to export unlimited videos with a watermark
- One watermark-free video export is available each month
Cons
- Cannot export long videos with a free account
- Only 10 minutes transcription limit is available for free users
- You need to purchase a monthly or annual subscription to remove the watermark from multiple videos
Clideo
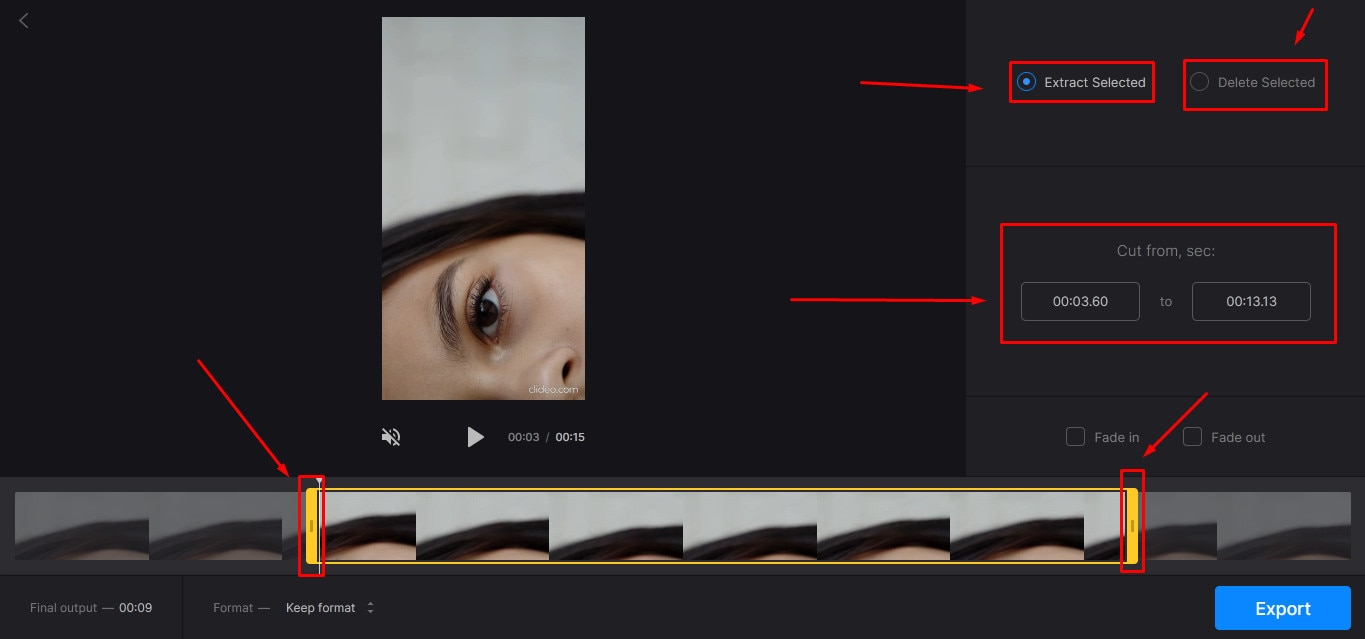
Clideo is not just a video cutter but an online solution to all your video editing problems. The tool is super popular, with 4 million+ users a month. And why not? This is one of those web-based platforms that allow AVI video files to be imported and exported without converting them into any other formats.
Nevertheless, if you’re only looking for video cutting options, this tool makes your life easy. Simply upload your video, and select the portion of it by setting start and end times. Choose whether you want to delete or extract the selected part from the clip, and hit the “Export” button.
And within a few moments, you can enjoy a trimmed video clip. And if you plan to be more creative, you can look for other Clideo features to make videos more fascinating.
Features
- Video combining and cutting
- Resize and crop clips
- Compress your videos
- Add text and subtitles
- Add music to your video files
- Filters and color correction tools
- Audio mute, cutting, and muting
- Video rotation, flipping, and speed adjustment
Pros
- Basic tools can be used for free
- Best for beginners and intermediate users
- Ideal for AVI videos and also supports other video formats
Cons
- You cannot use the free version regularly
Aspose
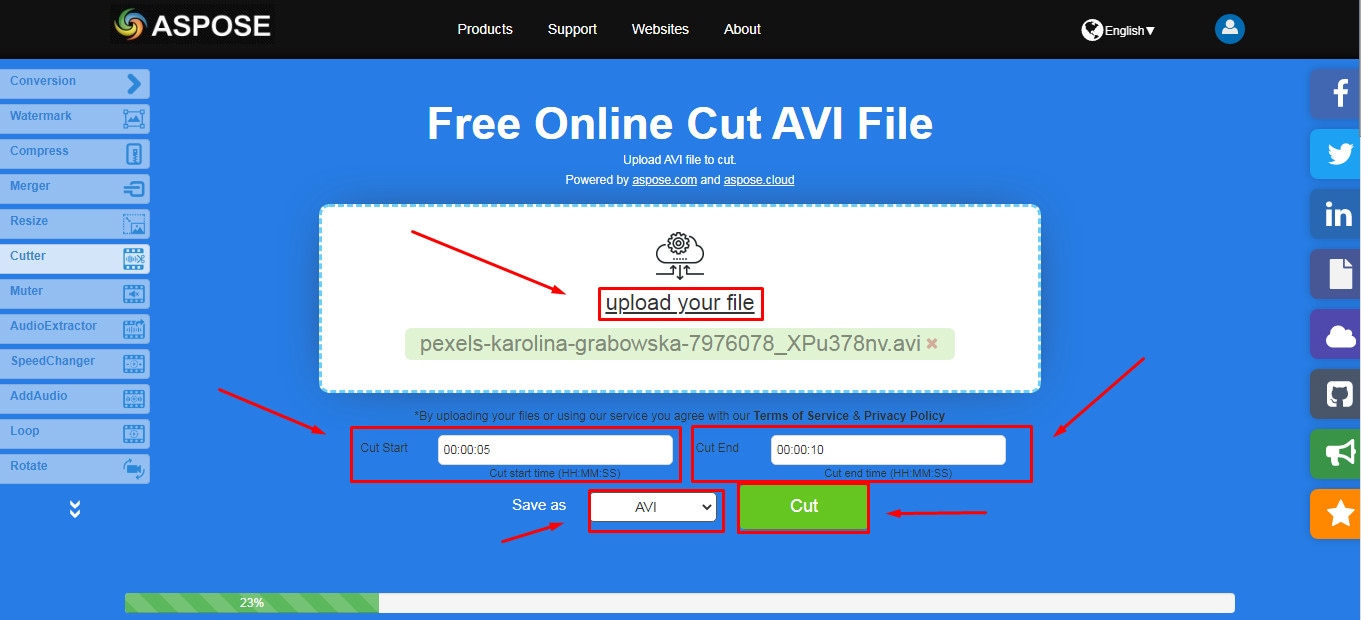
Aspose is a free web-based application to cut clips. You can use this tool on any operating system. It supports all major video file formats, including AVI, MKV, MOV, MP4, FLV, WMV, WEBM, and GIF. Additionally, you can use Aspose for various other reasons, such as audio extraction, video resizing, and more.
Features
- Video cutting and compressing
- Looping, rotation, and video merging
- Adding watermarks on videos
- Sound muting
- Speed change and audio addition
Pros
- Aspose is a free online tool
- It offers straightforward options to cut and edit videos
Cons
- No color correction option
- Slow video cutting process
- Lacks timeline and other valuable features
Part 7: Bottom Line
Tired of finding AVI cutters? Relax and try these top 16 AVI video cutters for Windows, MAC, iPhone, Android, and online. Almost all these tools are free to use and are extremely handy. On the other hand, if you want to cut and trim videos professionally, download Filmora and follow the step-by-step guide in this article for making clean cuts.
Part 8: FAQs
Q1. How do I trim an AVI video?
To trim an AVI video file, ensure that the software or tool you use supports AVI input. Generally, you need to upload or import a clip on the program, select the portion of the video, and apply the cut/trim feature to make it happen.
Q2. Which is the best online video cutter?
Kapwing and Clideo are the two best online video cutters you can use for free. Both web-based tools also allow you to cut your AVI videos.
Q3. Which is the best video cutter and joiner software?
Filmora, iMovie, and Kapwing are some of the best video cutters and joiner tools. These video editors are also free to use and come with different features.
Q4. How do I trim an AVI file in Windows 10?
Trimming an AVI video file in Windows 10 is very simple. Launch the Microsoft Photos (Photo App) application on your computer, add clip, and select the “Trim” tool to trim a specific video part.
Q5. How can I cut a video on my computer for free?
MAC and Windows users can download Filmora to cut videos for free. Filmora also offers a wide range of other features to make your clips exciting. Contrarily, Windows users can use the built-in Photo App in Windows 10 or download Gihosoft or Handbrake software to cut clips. Likewise, MAC users can download VideoPad, Xilisoft Video Cutter, or iMovie for free.
With the growing fame of video-sharing and social media applications like Twitter, Instagram, and TikTok, the demand for simple and fast video cutting and trimming tools has dramatically increased. Nowadays, you don’t have to play with complex video editing tools to produce high-quality videos.
Thanks to several user-friendly editing software to make things easy for everybody. However, finding the right programs to trim/cut videos is still challenging, especially in AVI format.
But, guess what? These top 16 AVI video cutters for Windows, MAC, Android, iPhone, and online will make video cutting and trimming fun, especially when you learn to do it using Filmora.
In this Article
Part 1: Best AVI Video Cutter to Trim/Cut AVI Video on Windows and MAC – Filmora Video Cutter [with steps}
Part 2: Top 3 Free AVI Video Cutter on Windows
Part 3: Top 3 Free AVI Video Cutter on MAC
Part 4: Top 3 Free AVI Video Cutter on Android
Part 5: Top 3 Free AVI Video Cutter on iPhone
Part 6: Top 3 Free AVI Video Cutter Online
Part 7: Bottom Line
Part 8: FAQs
Part 1: Best AVI Video Cutter to Trim/Cut AVI Video on Windows and MAC – Filmora Video Cutter [with steps]
Filmora by Wondershare is a star video editor with outstanding outcomes. Whether you have a MAC or Windows PC, you can download Filmora regardless of your operating system. The program best serves those who intend to make high-quality videos. The software provides editing support for all video formats, including AVI.
Although Filmora is an affordable editor with tons of audio and video editing options, you can still download the software for free and create projects if watermarks don’t bother you. Moreover, you can count this tool’s capabilities in cropping, resizing, and Chroma screen support. But that’s not the only sweet fruit.
In fact, Filmora is equipped with many jaw-dropping features, including preset templates, auto beat sync, split-screen, speed ramping, motion tracking, keyframing, creative transitions, titles, filters, and much more. And the best part is, you can learn and understand Filmora in no time. That’s why the program is loved and supported by all types of users.
So does Filmora helps cut and trim AVI videos? Yes! It does if you follow these steps correctly.
Step 1: Download Filmora Video Editor
First, download Filmora Video Editor by choosing your operating system, as seen in the screenshot below.
Run the setup and let it finish without any pause or break.
Step 2: Import Your Video to Filmora Video Editor
Importing your AVI video is a very simple process. Just click on the “Film Clip” icon.
It will open a new window screen on your computer to select the video from the directory. Find the clip you want to import and cut. Use your mouse to select it and click the “Open” button.
The video will be loaded in the “Media” folder of Filmora. The clip’s thumbnail should be visible to assure you have done everything correctly.
If you can see that, let’s go to the next step.
Step 3: Drag and Drop Video to Filmora’s Timeline
Select the video in the media folder by clicking over it once. Now, without leaving the hold of the left button of your mouse, slide the video down to the track in the timeline.
After that, a message will pop up, asking about your preference for the project settings. It is recommended to choose the “Match to Media” option unless you’re an experienced video editor who knows how to play with the resolution and frame rates.
You will see the video on the timeline with its preview on the “Preview Screen” on the right side of the interface.
Step 4: Cutting Your Video in Filmora
Here comes the core step you have been waiting for. But before you go any further, you need to know about the “Playhead.”
Playhead is an orange-reddish marker you can find on the timeline.
It has an important role in cutting your videos.
So, move the playhead to your desired frame and click on the “scissor” icon to make the “starting” cut.
As soon as you do it, you will see that the single clip is now divided into two parts similar to this image.
The “Red” marked area in the above screenshot ensures a gap between the clips on the timeline. The “Yellow” arrows confirm two separate clips of the same video.
Place the two clips together as seen in this “Green” area.
And place the playhead anywhere on the clip. And click on the “scissor” icon once again to make the “ending” cut (second cut).
If done correctly, there should be three clips now of the same video, as you can observe in this screenshot.
Again, the “Red” area in the above photo indicates the gap, and the “Yellow” area ensures a third segment of the video.
Note: The gaps you can see in the divided clips are made intentionally for understanding. Practically, Filmora doesn’t move the clip or make gaps in between after you have made the cuts.
Keep in mind that there are three clips on the timeline. Now, if you want to remove the second clip from the video, you need to select that portion first by clicking on it.
Then, right-click on the mouse and choose “Cut” from the menu.
Within a semi-second, the selected portion will be removed from the timeline. And you will be able to see the remaining parts of the video. Now, pull the second clip using your mouse and place it at the end of the first clip without leaving a gap in between.
Then, click the “Play” button under the preview screen to see the results.
You can see in the above two screenshots that there’s a jump between the scenes due to cuts, confirming that video has been cut significantly.
Step 5: Trimming Your Video in Filmora
Remember that cutting and trimming in Filmora are two different things. Trimming allows you to remove a particular video part from visibility without deleting the portion.
So feel free to skip this step if you’re happy learning the cutting technique. But if you’re interested in trimming, here’s how you do it.
Take your mouse cursor at the beginning or end of the clip you want to trim. Keep holding the clip’s corner and slide the mouse back or front to trim the part
Note: Since the trim tool doesn’t delete the video, the final project based on trimming will be of a larger size. Therefore, it is advised to cut videos rather than trimming for fast rendering, better results, and small video size.
Step 6: Save Project and Export Your Cut/Trimmed AVI Video
Choose “Save Project” from the “File” menu.
Select the directory to save the project, rename the new video, and click the “Save” button.
Click on the “Export” button to save the video in AVI or any other video format of your choice on your computer.
Part 2: Top 3 Free AVI Video Cutter on Windows
As a Windows user, finding an excellent video cutter is relatively easy. However, not all software permits importing AVI videos. In the same way, some video trimmers come at a price. So if you really don’t want to pay and enjoy cutting your AVI files, try using these three video cutting tools.
Microsoft Photos (Windows 10)
Microsoft Photos or Photo App is a free photo viewer and editor with your Windows 10. It offers incredible photo editing and enhancement along with different tools for organizing and editing videos in a very friendly way. Likewise, you can create drawings over the videos and add 3D effects and background music to your clips.
You can also trim AVI videos with Microsoft Photos quickly. All you need to do is open your clip with the Photo App, choose the “Trim” option, select a portion of the video you want to trim, and go ahead.
That’s it!
Features
- Quick video trimming
- Cool text effects
- 3D library and effects
- It has a clear interface
- You can find and tag people’s faces
- The program has 15+ filters for editing
- Motion tracking option for drawing on videos
- Allows you to view and organize your files easily
Pros
- Microsoft Photos is free for Windows users
- It automatically creates albums
- The program has a touch-friendly interface
- You can integrate your OneDrive with the software
Cons
- Lacks before and after view
- Not included in older Windows versions
- It doesn’t support selective focus or panorama stitching
Handbrake
Handbrake is best-known for its video transcoding traits. Unlike typical video editors, this open-source tool includes limited options to rip Blu-rays and DVDs. Moreover, you can mix the 5.1 soundtracks and convert them to stereo to make the audio compatible with your TV speakers.
But the exciting thing about Handbrake is that you can use this software on your macOS 10.13 or later versions to cut AVI videos for free. However, it’s a bit technical process, as there’s no timeline to help you trim or make cuts on the clips directly with the help of your mouse.
You are required to mention a time range (seconds, minutes, or hours) to keep a specific part of the video while the software removes the non-ranged parts of the clip. For instance, you have a video of 10 seconds. You start the range from 5 seconds and end it at 10 seconds. So, the first four seconds of the video will be cut from the entire clip.
Features
- Video cutting, cropping, and resizing
- Low-quality and old video restoration
- Video conversion from any format to MKV or MP4
Pros
- Handbrake is free
- You can convert batch videos with ease
- It supports MAC, Windows, and Linux OS
- Allows you to import video files in all major formats
- The software comes with various video conversion presets
Cons
- Handbrake is not a user-friendly tool
- The video file output is limited to two formats (MKV and MP4) only
Gihosoft Video Cutter
Gihosoft is a clean, free, lossless video cutter on your Windows PC. It’s a simple tool that helps you cut video files into various output formats. So be it AVI, MPEG, or any other file, with Gihosoft, everything becomes handy.
Another fascinating fact about this software is that it allows you to cut videos in three simple steps without losing the quality. So right after installing the program, you simply need to import your file, choose the start and end time, and click the “Cut” button to remove the part of the video.
Features
- Fast video and audio cutting
- Easy drag and drop audio/video files
- It supports most audio and video formats
Pros
- Free for both Windows and MAC operating systems
- The cutter saves video in original quality
Cons
- It does not include basic video editing features
Part 3: Top 3 Free AVI Video Cutter on MAC
Are you looking for a great AVI video cutter for your MAC? Sadly, you have limited product choices as compared to Windows users. But to ensure you don’t waste time looking for a suitable tool, here’s a list of three AVI video cutting programs you can use on your Macintosh.
iMovie
The first and foremost recommended software for free video cutting on MAC is Apple’s own tool, iMovie . It is a built-in program that comes with your system, so there is no need to spend extra on a video editor. iMovie allows you to browse and import most video files, including AVI, right from your computer. Also, this tool is equipped with multiple functions, such as audio editing, video quality enhancement, and much more.
This MAC’s video editor is ideal for beginners. Many home users and small business owners find this tool extremely simple, as they don’t like to be confused with complex features. So, if you want to make cuts to your video clips, start working on iMovie. And within a few clicks, you can trim or cut your videos for free.
Features
- Video cutting and trimming
- Cropping and rotation
- Effects and transitions
- Built-in themes
- HD and 4K video support
- Movie sharing
- Audio adjustments
- Chroma screen controls
- Character tracking
Pros
- Free to use for MAC users
- Clean timeline
- One-click video cutting and trimming
- Easy-to-remember keyboard shortcuts
- Direct share projects to your social media, like YouTube
Cons
- It takes a lot of time to export videos
- iMovie needs high HDD storage space
VideoPad by NCH
VideoPad by NCH is a beginner-level video editor with all the basic features. The software is specifically designed for home movie makers. That is why VideoPad is easy to understand and use.
VideoPad is entirely free of cost for non-commercial purposes, but it has limited features. On the other hand, if you want to enjoy full traits, you can purchase the tool.
VideoPad supports video files, including AVI, WMV, MPEG, MOV, MP4, ASF, and XviD. Likewise, you can also burn movies to Blu-ray, DVD, HD-DVD, or CD. And most importantly, you can easily cut or trim AVI videos on your MAC, as the software is available on both MAC and Windows systems.
Features
- Audio tools
- Video rotation
- Video sharing
- Visual effects
- Video transitions
- 3D Video editing
- Color correction
- Overlays and texts
- Video optimization
- Great plugin support
- Direct video uploading
- Multiple video resolutions
- Video cutting and trimming
- Files exportation to various devices
- Stereoscopic conversion from 2D to 3D
Pros
- You can use the basic tools for free
- Allows 360-degree video production
- It supports a wide range of video formats
- Compatible with MAC and Windows computers
Cons
- The auto speech feature performs poorly
- The free version has annoying notifications
Xilisoft Video Cutter
Xilisoft Video Cutter is the simplest tool to cut videos on MAC. This software has a straightforward option to cut the clip after importing it to the timeline. The program is fast and has a user-friendly interface.
Moreover, you can polish your videos by merging multiple clips or increasing the video quality once you’re done with the cutting process. At the same time, this video cutter allows you to import all video formats, including XviD, DivX, MOV, FLV, MP4, MPEG-4/, MKV, MPEG, WMV, and AVI.
Features
- Video joining
- Support multiple output video formats, including HD
Pros
- Easy video cutting and merging
- It doesn’t require a large storage space
- Extremely uncomplicated interface
- Real-time preview to make better cuts
- Available on both MAC and Windows systems
Cons
- The trial version is free to use but limits you from enjoying extra features
Part 4: Top 3 Free AVI Video Cutter on Android
After capturing nice videos with your Android mobile phone, you may need to cut unnecessary scenes to make your clips look professional. While there are numerous Android cutters, not all support the AVI format. So below, you will find the 3 best AVI video cutters for Android, which are free to use.
Quick – Video Editor & Maker
Quick – Video Editor & Maker is a free video editor with PRO results. Many photographers and vloggers love using this app to cut clips immediately. Furthermore, the application offers a wide range of options to assure you don’t have to look to any other tool to rotate or compress video. Quick – Video Editor & Maker lets you import videos in all major formats, including AVI, MPEG, WMA, and more.
Features
- Video cutting, fading, and rotation
- Speed control tools
- Conversion from video to GIF
Pros
- Free app
- Simple interface
Cons
- Lack of updates
- Some users complain about app crash
Funimate Video Editor & Maker
If you want to make some professional-grade video edits quickly, you are welcome to download and use Funimate Video Editor & Maker on your Android device. It’s a free tool to cut videos. It has an easy procedure, and you can cut AVI videos in a few seconds.
Plus, you can use the app to add custom animations, effects, and many other exciting elements. You can share your makes on social media like TikTok, Instagram, and other platforms. Contrarily, the app itself is a community with millions of Funimate-users who share their creations daily. You can also join or watch videos from other creators to learn more about new techniques and trends in video editing.
Features
- Video trimming and splitting
- Animation and cropping
- Filters and AI effects
- Speed adjustment
- Keyframing and video merging
Pros
- Free Android application with several editing tools
- Easy trimming, splitting, and cropping
- Aspect ratio, border, and color customization
- Direct social media sharing
Cons
- Free users cannot use templates
- The free version stamps watermarks on each project
Part 5: Top 3 Free AVI Video Cutter on iPhone
No wonder iPhone’s camera captures high-quality videos. But the problem begins when there’s no free app to cut AVI videos. So if you’re recording great spots, but deep inside, you really want to remove some parts, then these 3 free AVI video cutters will work smoothly on your iPhone.
Cut, Trim, Split Video Editor
Download Cut, Trim, Split Video Editor on your iPhone to delete/cut unwanted portions of your video clips. The tool is also best for trimming iPhone-recorded clips without messing with the frames. Or, if you just want to split the video into multiple parts for your next WhatsApp status, this iPhone app can do that job for you.
The app supports multiple video file types, including MOV, MP4, AVI, MPEG, MPEG-2, and 3GPP
Features
- Easy trimming and cutting video clips
- Splitting big-sized videos into two smaller clips
- Import video from file-sharing platforms, like iCloud, using Wi-Fi
Pros
- Free app for fast video cutting and sharing
- Simple UI interface
Cons
- The free version shows advertisements
Splice - Video Editor & Maker
Splice is an extraordinary video editor that makes it easy to make fully customized and professional videos from your iPhone. The app is also best for video cutting. Besides, it has many interesting features, which you can use from your device.
Features
- Cutting, trimming, and cropping your videos
- Exposure, saturation, and exposure adjustment
- Slow and fast motion with speed ramping option
- Video masking and overlay
- Color correction and text overlays
Pros
- Free basic features, such as video cutting
- iTunes integration
- Supports AVI video input
- User-friendly application
- Access to the music library
- Quick and simple social sharing
Cons
- Output videos require high mobile storage space
Part 6: Top 3 Free AVI Video Cutter Online
Don’t want to install video cutters on your MAC, Windows, smartphone, or any other device? No problem! You can use online video cutters and trimmers to split, cut, or trim your clips for free.
However, the problem still exists in online tools, as not all web-based editors allow importing AVI files. So to save your time and energy, you can directly go to the following online AVI cutters to complete your tasks.
Kapwing
Kapwing is an online video editor best for casual creatives, such as Vloggers and YouTubers. You can use this web-based platform to cut your videos. Gladly, Kapwing supports all AVI incomings. You can upload your AVI video files to this platform and use its trim or split feature. To do that, you need to upload your AVI video and choose the “Trim” or “Split” tool to see the magic. Once done with the trimming process, you can explore Kapwing’s other incredible traits and apply them to your project.
Features
- Video splitting, trimming, and merging
- Audio capturing
- Speed adjustment
- Image and video library
- Text editing and overlay
- Auto-generated subtitles
- Several collaboration tools
- Video creation from scratch
- Templates, shapes, and emojis
- Simple drag-and-drop interface
- Video transitions, plugins, and elements
Pros
- Free online video trimmer
- User-friendly interface
- You can export 30-minutes long projects
- Allows you to export unlimited videos with a watermark
- One watermark-free video export is available each month
Cons
- Cannot export long videos with a free account
- Only 10 minutes transcription limit is available for free users
- You need to purchase a monthly or annual subscription to remove the watermark from multiple videos
Clideo
Clideo is not just a video cutter but an online solution to all your video editing problems. The tool is super popular, with 4 million+ users a month. And why not? This is one of those web-based platforms that allow AVI video files to be imported and exported without converting them into any other formats.
Nevertheless, if you’re only looking for video cutting options, this tool makes your life easy. Simply upload your video, and select the portion of it by setting start and end times. Choose whether you want to delete or extract the selected part from the clip, and hit the “Export” button.
And within a few moments, you can enjoy a trimmed video clip. And if you plan to be more creative, you can look for other Clideo features to make videos more fascinating.
Features
- Video combining and cutting
- Resize and crop clips
- Compress your videos
- Add text and subtitles
- Add music to your video files
- Filters and color correction tools
- Audio mute, cutting, and muting
- Video rotation, flipping, and speed adjustment
Pros
- Basic tools can be used for free
- Best for beginners and intermediate users
- Ideal for AVI videos and also supports other video formats
Cons
- You cannot use the free version regularly
Aspose
Aspose is a free web-based application to cut clips. You can use this tool on any operating system. It supports all major video file formats, including AVI, MKV, MOV, MP4, FLV, WMV, WEBM, and GIF. Additionally, you can use Aspose for various other reasons, such as audio extraction, video resizing, and more.
Features
- Video cutting and compressing
- Looping, rotation, and video merging
- Adding watermarks on videos
- Sound muting
- Speed change and audio addition
Pros
- Aspose is a free online tool
- It offers straightforward options to cut and edit videos
Cons
- No color correction option
- Slow video cutting process
- Lacks timeline and other valuable features
Part 7: Bottom Line
Tired of finding AVI cutters? Relax and try these top 16 AVI video cutters for Windows, MAC, iPhone, Android, and online. Almost all these tools are free to use and are extremely handy. On the other hand, if you want to cut and trim videos professionally, download Filmora and follow the step-by-step guide in this article for making clean cuts.
Part 8: FAQs
Q1. How do I trim an AVI video?
To trim an AVI video file, ensure that the software or tool you use supports AVI input. Generally, you need to upload or import a clip on the program, select the portion of the video, and apply the cut/trim feature to make it happen.
Q2. Which is the best online video cutter?
Kapwing and Clideo are the two best online video cutters you can use for free. Both web-based tools also allow you to cut your AVI videos.
Q3. Which is the best video cutter and joiner software?
Filmora, iMovie, and Kapwing are some of the best video cutters and joiner tools. These video editors are also free to use and come with different features.
Q4. How do I trim an AVI file in Windows 10?
Trimming an AVI video file in Windows 10 is very simple. Launch the Microsoft Photos (Photo App) application on your computer, add clip, and select the “Trim” tool to trim a specific video part.
Q5. How can I cut a video on my computer for free?
MAC and Windows users can download Filmora to cut videos for free. Filmora also offers a wide range of other features to make your clips exciting. Contrarily, Windows users can use the built-in Photo App in Windows 10 or download Gihosoft or Handbrake software to cut clips. Likewise, MAC users can download VideoPad, Xilisoft Video Cutter, or iMovie for free.
Best Zero-Cost Video Editors for Side-by-Side Videos [Online & Offline]
Best Split Screen Video Editor [Online & Offline]
Ollie Mattison
Mar 27, 2024• Proven solutions
The effect that comes up after adding two or more screens in a single frame is called split screen, and the tool that enables the users to do this is a split screen video editor. These split screens have significant importance in post-production tasks. That said, the following sections discuss about the tools that enable you to create split screen videos, and explain the process of doing so.
As mentioned above, the split screen effect lets you add two or more screens in a single frame. When multiple activities occur at the same time but at different locations, they all can be shown on one screen by placing their corresponding footages side-by-side or in any other arrangement that the split screen video maker allows.
Best Split Screen Video Editing Software for Windows and Mac [Free & Paid]
After understanding what split screen is, it becomes both obvious and mandatory to know about some of the most used split screen video editor applications, and how they help you in adding the effect to your movies. Following is a list of a couple of such programs:
1. iMovie
A proprietary of Apple, iMovie is available for both iOS and macOS, and is absolutely free of cost. Even though the tool lacks some advanced options for fine editing, it still offers a good platform to those planning their career in post-production industry. With simple UI, it is easy to learn iMovie.
The step-by-step instructions given below explain how to use iMovie to add split screen effect to your videos:
Step 1: Add Footages to iMovie
After importing the footages to the Media Bin in iMovie, drag the first one to the Timeline, and then drag the second one above the first layer.
Step 2: Select the Split Screen Effect
Select the top video layer in the Timeline, and choose Split Screen from the screen type drop-down list at the top.
Step 3: Select Split Screen Preset
Choose a position for the selected layer from the Position drop-down list at the top, and use the Slide slider to adjust the speed of the appearance of the footage.
Pros
- iMovie is free to download and use
- The program is available for both macOS and iOS
Cons
- Allows only up to two videos to be used in split screen
You can get iMovie from here: https://www.apple.com/in/imovie/
2. Wondershare Filmora Editor
One of the most robust apps that is compared with post-production applications like Adobe Premiere Pro and Final Cut Pro X, Wondershare Filmora is also a video editor that helps split screen easily. The software is available for Windows and Mac computers, and provides prompt technical support to its consumers. Although Filmora that packed with more advanced tools is also available, most of the times Filmora serves the purpose pretty well.
You can learn how to add split screen effect in Wondershare Filmora by following the steps given below:
Step 1: Import Footages to Filmora
Launch Wondershare Filmora, click anywhere inside the Media window in the upper-left section, and import all the videos you want to use to create the split screen effect.
Step 2: Choose a Split Screen Preset
Click Split Screen from the standard toolbar at the top, click and drag your preferred preset to the Timeline, and then extend the duration of the effect in the Timeline by dragging its handle.
Step 3: Add Videos to Split Screen

Click ADVANCED from the bottom-right area of the Media pane, on the Advanced Split Screen Edit box, drag the first video from the left pane, and drop it on your preferred section in the right. Repeat the process to add all the other videos to their corresponding sections. Adjust their time of appearance by dragging their thumbnail in the Timeline of the box, and click OK.
Pros
- Wondershare Filmora is lightweight and is less resource intensive
- Allows as many as 6 videos to be added to create split screen effect
- Has 30+ split screen presets
Cons
- A couple of windows are required to be opened while working with split screen
3 . VSDC
VSDC is a free and efficient split screen video maker. In fact, the program is a full-fledged post-production application that can be used to edit the videos to prepare industry-standard clips for presentations, broadcasting, and commercial and private distribution. The best thing about VSDC is, it is absolutely free of cost, and doesn’t add any watermarks to the output files.
The instructions given below explain how to use the split screen feature in VSDC:
Step 1: Add Video Footages
Click Add object from the standard toolbar at the top, click Video, and select and add the first footage to the preview window. Repeat the process to add more video(s) as needed.
Step 2: Add Split Screen Effect
Grab any of the side handles of the video you added last, and drag it inward to reduce its size proportionally. Repeat the process to reduce the size of the other video(s) that is/are now revealed from beneath the one you just adjusted in order to create the split screen effect.
Pros
- Absolutely free to use
- Allows practically unlimited number of footages to be added to create the split screen videos
Cons
- No presets for automatic video positioning are available for split screen effect
You can get VSDC free video editor from here: http://www.videosoftdev.com/
4. Shotcut
A free and opensource editing tool, Shotcut can also be used as a split screen video maker to produce industry-standard movies and documentaries. Shotcut is available for FreeBSD, Windows, Linux, and macOS, and comes in both x64 and x86 variants. Being a free program, Shotcut doesn’t require any activation or registration.
The procedure that follows explains how to use Shortcut as a free split screen video editor:
Step 1: Add Clips to the Timeline
Import the footages to the Shotcut’s media bin, drag one of the clips from the bin to the Timeline at the bottom, and then press Ctrl + I on your keyboard to add more video tracks. You can press this shortcut key for another couple of times depending on the number films you want to use for the split screen effect. Next, drag each film from the bin to their corresponding tracks. Note: Make sure NOT to place all the clips on the same track, and that each of them is on a different, its own, video layer.
Step 2: Adjust the First Video
Select the last video you added to the Timeline (it should be the topmost track), click Filters from above the Timeline, click the + button from the upper-left corner, click Size and Position from the list that appears next, and select the clip’s position from the Preset drop-down list.
Step 3: Adjust Other Videos
Select the second video in the Timeline and repeat the process to set its position, and do the same for all other footages that you added in order to create the split screen effect.
Pros
- Available for FreeBSD, Windows, Linux, and macOS platforms
- If using presets, as many as 4 videos can be added for split screen effect
Cons
- Working with split screen manually may require practice and some calculations to position the clips on the screen correctly
You can get Shotcut from here: https://shotcut.org/
5. Lightworks
Used by the professionals to edit and prepare movies like Pulp Fiction, The Cure, L.A. Confidential, Bruce Almighty, The Wolf of Wall Street, etc., Lightworks is, in true means, a complete and full-fledged post-production application to create industry-standard outputs. The main reason for the app’s wide userbase is that it is a cross-platform software that is available for Linux, Mac, and Windows computers.
To use Lightworks as split screen video maker, you can follow the instructions given below:
Step 1: Add Tracks in Timeline
After importing the clips to Lightworks, leave them in the Media Bin for now, right-click anywhere in the Timeline at the bottom, go to Tracks, click Add multiple, and from the Number to add drop-down list, choose the number of tracks you want to add to the Timeline. Click Add to confirm the changes.
Step 2: Disable Auto Sync
Right-click anywhere in the Timeline, and click to deselect Auto track sync.
Step 3: Add Clips to Timeline
Drag the clips from the Media Bin to the Timeline. Make sure to place each footage on a different track, and that all the tracks are on top of each other. Optionally, right-click the audio that was added along with the clips, and click Remove from the context menu. Use this method to remove all the audios or leave the one you want to have. Note: Removing the audio tracks ensures that they do not overlap during the playback.
Step 4: Enable Split Screen
Click VFX from above the preview window, click the + (Add new effects) icon from the top of the left pane, select the DVE category from the upper-right corner of the left pane, scroll down the left pane to the Split-screen Presets section, and double-click your preferred split screen preset to add the effect to the participating clips.
Pros
- Even the free variant has split screen feature
- A complete post-production tool that doesn’t require any other program for finalizing the things
Cons
- Not many split screen presets are available
Download Lightworks free version from here: https://www.lwks.com/
6. Adobe Premiere Pro
One of the most appreciated and widely used post-production applications for Windows and Mac computers, Adobe Premiere Pro has been professionals’ first choice when it comes to video editing, irrespective of the fact that it has a steep learning curve, and is also a resource intensive software to work with.
The steps below explain how to use Adobe Premiere Pro as a split screen video maker:
Step 1: Add Videos to Timeline
After importing the clips to the Project window, drag each of them to the Timeline, and place them in their separate tracks one above the other.
Step 2: Position and Crop
Select the topmost video track in the Timeline, go to Effect Controls panel from the top of the upper-left pane, and use the Position slider to position the video to your preferred area of the screen. Repeat this process for all the clips in the Timeline you want to add to split screen.
Step 3: Crop the Clips
Search for the Crop effect in the Effects pane present at the lower-left corner, drag and drop the effect on each of the clips in the timeline, and use the Crop slider in the Effect Controls pane to crop the videos as needed. Optionally use the keyframes to add sliding animations to give more professional look to the split screen effect.
Pros
- Most robust and efficient video editing tool
- Allows practically unlimited number of videos to be used for split screen
Cons
- Requires subscription that needs to be renewed regularly
For more details about making split screen with Pr, check How to create a split screen in Premiere Pro
7. Final Cut Pro X
Available only for Mac computers at the time of this writing, Final Cut Pro X or FCPX gives tough competition to Adobe Premiere Pro. Since Apple devices are famous for their speedy processing, professionals any day prefer FCPX over Adobe Premiere Pro if they own a Mac PC running macOS.
You can use FCPX as split screen video maker by following the steps given below:
Step 1: Place Footages in the Timeline
As mentioned earlier, add the clips on top of each other on separate tracks in the Timeline of FCPX.
Step 2: Position and Crop
Select the first clip in the Timeline, from the Transform section of the Video Inspector pane in the right, use the Position slider to move the clip to your preferred side of the screen, and use the sliders from the Crop section to crop the footage to adjust the portion of interest. Repeat the process for the other video tracks as well to get your desired split screen effect in Final Cut Pro X.
Pros
- Offers quick and easy way to add split screen effect
- Allows practically unlimited number of videos to be used for split screen
Cons
- Doesn’t have any particular preset for split screen effect
You may also like: How to create a PIP video with Final Cut Pro X
Best Free Online Split Screen Video Editors
Apart from the desktop programs discussed above, there are a couple of web tools that can be used as split screen video maker online free. Two of the most used ones are introduced below:
1. Kapwing Collage Maker
Although Kapwing offers several other online tools like video resizer, meme generator, slideshow maker, etc., the solution that can be considered split screen video editor is Kapwing Collage Maker. This web app allows you to select a template to get started, and the rest of the process is simple.
The following steps explain how to create a split screen video with Kapwing:
Step 1: Add Clips to Preset
Go to the https://www.kapwing.com/collage link, click to select your preferred split screen preset, click REPLACE on one of the segments of the split screen on the next page, and select and upload the first video. Next, click REPLACE on the other segment(s), and select and upload the other videos as well.
Step 2: Reposition and Publish
Click and drag each of the added clips to reposition them on the screen, use the other tools to crop and adjust the videos as needed, and click Publish from the top-right corner. Note: Optionally you can click Timeline from the top of the preview window, adjust the timings and other settings as needed on the next page, and click Done. After this, you can go ahead and hit Publish to create the split screen effect out of the uploaded videos.
Pros
- Free to use
- Allows as many as 4 videos to create split screen effect
Cons
- Requires you to register and sign in to remove the watermark from the output file
2. WeVideo
Yet another split screen video maker online free solution, WeVideo offers almost desktop program-like experience while creating split screen effects. Even though all the subscription plans that the vendor offers are chargeable, the Education plan can be tried for 30 days for free, post which the teachers are required to pay to continue using the web tool.
The following steps explain how to get split screen effect with WeVideo:
Step 1: Import Videos
Visit https://www.wevideo.com and on the main window, click Video from under the Create a new section at the top, select a layout on the Let’s get started box, and click START EDITING from the bottom right corner. Next, click ADD in the My media window in the upper-left section, click BROWSE TO SELECT on the Import media box, and add the videos you want to use in the split screen effect.
Step 2: Add Clips to Timeline
As explained earlier, drag the videos from the My media pane and drop them in the Timeline. Make sure to place every video in its separate layer, and that all the layers are on top of each other.
Step 3: Create Split Screen Effect
Select any clip in the Timeline, and click the Open clip editor icon from the upper-left area of the track. On the next page, use the Scale slider to reduce the size of the selected clip, and from the preview window in the right, drag to reposition the video to your preferred location on the screen. Click SAVE CHANGES from the bottom of the left pane to confirm the settings. Repeat the process for the second clip in the Timeline to resize and reposition it on the screen. Click FINISH from the upper-right corner, on the next box, enter a name for the video in the available field, click SET, choose your preferred settings on the next page, and click EXPORT from the bottom-right corner to produce the split screen video.
Pros
- Free to use
- Allows multiple videos to be used for split screen
Cons
- Paid subscription is needed to remove watermark from the outputs
FAQs About Split Screen Video Editors
Why you should use split screen effect in video?
There are a couple of reasons you may want to use split screen effect in your video. Some of the most common uses include:
- Showing multiple actions by the same or different characters at the same time, without changing the screen
- Comparing multiple objects or picture quality. This can be done only when the entities in question are placed side-by-side
- Making your video look more professional
- Showing different effects on the same screen
Can I create a split screen video with Windows Movie Maker or Windows 10 Photos app?
No, you cannot. Although these tools enable you to resize the videos, since they don’t allow multi-tracked Timelines, no video clips can be placed one above the other which is an essential part for any split screen video maker to create the effect. However, as discussed above, there are several post-production tools, offline and online, that allow you to make split screen videos easily and without any cost.
Conclusion
Split screen video editor tools are both paid and free. Regardless of the program you use to create the effect, the output files always look more professional and informative. Furthermore, things become way simpler if the split screen video maker has simple UI, is less resource intensive, and is easy to use as it is the case with Wondershare Filmora.
Ollie Mattison
Ollie Mattison is a writer and a lover of all things video.
Follow @Ollie Mattison
Ollie Mattison
Mar 27, 2024• Proven solutions
The effect that comes up after adding two or more screens in a single frame is called split screen, and the tool that enables the users to do this is a split screen video editor. These split screens have significant importance in post-production tasks. That said, the following sections discuss about the tools that enable you to create split screen videos, and explain the process of doing so.
As mentioned above, the split screen effect lets you add two or more screens in a single frame. When multiple activities occur at the same time but at different locations, they all can be shown on one screen by placing their corresponding footages side-by-side or in any other arrangement that the split screen video maker allows.
Best Split Screen Video Editing Software for Windows and Mac [Free & Paid]
After understanding what split screen is, it becomes both obvious and mandatory to know about some of the most used split screen video editor applications, and how they help you in adding the effect to your movies. Following is a list of a couple of such programs:
1. iMovie
A proprietary of Apple, iMovie is available for both iOS and macOS, and is absolutely free of cost. Even though the tool lacks some advanced options for fine editing, it still offers a good platform to those planning their career in post-production industry. With simple UI, it is easy to learn iMovie.
The step-by-step instructions given below explain how to use iMovie to add split screen effect to your videos:
Step 1: Add Footages to iMovie
After importing the footages to the Media Bin in iMovie, drag the first one to the Timeline, and then drag the second one above the first layer.
Step 2: Select the Split Screen Effect
Select the top video layer in the Timeline, and choose Split Screen from the screen type drop-down list at the top.
Step 3: Select Split Screen Preset
Choose a position for the selected layer from the Position drop-down list at the top, and use the Slide slider to adjust the speed of the appearance of the footage.
Pros
- iMovie is free to download and use
- The program is available for both macOS and iOS
Cons
- Allows only up to two videos to be used in split screen
You can get iMovie from here: https://www.apple.com/in/imovie/
2. Wondershare Filmora Editor
One of the most robust apps that is compared with post-production applications like Adobe Premiere Pro and Final Cut Pro X, Wondershare Filmora is also a video editor that helps split screen easily. The software is available for Windows and Mac computers, and provides prompt technical support to its consumers. Although Filmora that packed with more advanced tools is also available, most of the times Filmora serves the purpose pretty well.
You can learn how to add split screen effect in Wondershare Filmora by following the steps given below:
Step 1: Import Footages to Filmora
Launch Wondershare Filmora, click anywhere inside the Media window in the upper-left section, and import all the videos you want to use to create the split screen effect.
Step 2: Choose a Split Screen Preset
Click Split Screen from the standard toolbar at the top, click and drag your preferred preset to the Timeline, and then extend the duration of the effect in the Timeline by dragging its handle.
Step 3: Add Videos to Split Screen
Click ADVANCED from the bottom-right area of the Media pane, on the Advanced Split Screen Edit box, drag the first video from the left pane, and drop it on your preferred section in the right. Repeat the process to add all the other videos to their corresponding sections. Adjust their time of appearance by dragging their thumbnail in the Timeline of the box, and click OK.
Pros
- Wondershare Filmora is lightweight and is less resource intensive
- Allows as many as 6 videos to be added to create split screen effect
- Has 30+ split screen presets
Cons
- A couple of windows are required to be opened while working with split screen
3 . VSDC
VSDC is a free and efficient split screen video maker. In fact, the program is a full-fledged post-production application that can be used to edit the videos to prepare industry-standard clips for presentations, broadcasting, and commercial and private distribution. The best thing about VSDC is, it is absolutely free of cost, and doesn’t add any watermarks to the output files.
The instructions given below explain how to use the split screen feature in VSDC:
Step 1: Add Video Footages
Click Add object from the standard toolbar at the top, click Video, and select and add the first footage to the preview window. Repeat the process to add more video(s) as needed.
Step 2: Add Split Screen Effect
Grab any of the side handles of the video you added last, and drag it inward to reduce its size proportionally. Repeat the process to reduce the size of the other video(s) that is/are now revealed from beneath the one you just adjusted in order to create the split screen effect.
Pros
- Absolutely free to use
- Allows practically unlimited number of footages to be added to create the split screen videos
Cons
- No presets for automatic video positioning are available for split screen effect
You can get VSDC free video editor from here: http://www.videosoftdev.com/
4. Shotcut
A free and opensource editing tool, Shotcut can also be used as a split screen video maker to produce industry-standard movies and documentaries. Shotcut is available for FreeBSD, Windows, Linux, and macOS, and comes in both x64 and x86 variants. Being a free program, Shotcut doesn’t require any activation or registration.
The procedure that follows explains how to use Shortcut as a free split screen video editor:
Step 1: Add Clips to the Timeline
Import the footages to the Shotcut’s media bin, drag one of the clips from the bin to the Timeline at the bottom, and then press Ctrl + I on your keyboard to add more video tracks. You can press this shortcut key for another couple of times depending on the number films you want to use for the split screen effect. Next, drag each film from the bin to their corresponding tracks. Note: Make sure NOT to place all the clips on the same track, and that each of them is on a different, its own, video layer.
Step 2: Adjust the First Video
Select the last video you added to the Timeline (it should be the topmost track), click Filters from above the Timeline, click the + button from the upper-left corner, click Size and Position from the list that appears next, and select the clip’s position from the Preset drop-down list.
Step 3: Adjust Other Videos
Select the second video in the Timeline and repeat the process to set its position, and do the same for all other footages that you added in order to create the split screen effect.
Pros
- Available for FreeBSD, Windows, Linux, and macOS platforms
- If using presets, as many as 4 videos can be added for split screen effect
Cons
- Working with split screen manually may require practice and some calculations to position the clips on the screen correctly
You can get Shotcut from here: https://shotcut.org/
5. Lightworks
Used by the professionals to edit and prepare movies like Pulp Fiction, The Cure, L.A. Confidential, Bruce Almighty, The Wolf of Wall Street, etc., Lightworks is, in true means, a complete and full-fledged post-production application to create industry-standard outputs. The main reason for the app’s wide userbase is that it is a cross-platform software that is available for Linux, Mac, and Windows computers.
To use Lightworks as split screen video maker, you can follow the instructions given below:
Step 1: Add Tracks in Timeline
After importing the clips to Lightworks, leave them in the Media Bin for now, right-click anywhere in the Timeline at the bottom, go to Tracks, click Add multiple, and from the Number to add drop-down list, choose the number of tracks you want to add to the Timeline. Click Add to confirm the changes.
Step 2: Disable Auto Sync
Right-click anywhere in the Timeline, and click to deselect Auto track sync.
Step 3: Add Clips to Timeline
Drag the clips from the Media Bin to the Timeline. Make sure to place each footage on a different track, and that all the tracks are on top of each other. Optionally, right-click the audio that was added along with the clips, and click Remove from the context menu. Use this method to remove all the audios or leave the one you want to have. Note: Removing the audio tracks ensures that they do not overlap during the playback.
Step 4: Enable Split Screen
Click VFX from above the preview window, click the + (Add new effects) icon from the top of the left pane, select the DVE category from the upper-right corner of the left pane, scroll down the left pane to the Split-screen Presets section, and double-click your preferred split screen preset to add the effect to the participating clips.
Pros
- Even the free variant has split screen feature
- A complete post-production tool that doesn’t require any other program for finalizing the things
Cons
- Not many split screen presets are available
Download Lightworks free version from here: https://www.lwks.com/
6. Adobe Premiere Pro
One of the most appreciated and widely used post-production applications for Windows and Mac computers, Adobe Premiere Pro has been professionals’ first choice when it comes to video editing, irrespective of the fact that it has a steep learning curve, and is also a resource intensive software to work with.
The steps below explain how to use Adobe Premiere Pro as a split screen video maker:
Step 1: Add Videos to Timeline
After importing the clips to the Project window, drag each of them to the Timeline, and place them in their separate tracks one above the other.
Step 2: Position and Crop
Select the topmost video track in the Timeline, go to Effect Controls panel from the top of the upper-left pane, and use the Position slider to position the video to your preferred area of the screen. Repeat this process for all the clips in the Timeline you want to add to split screen.
Step 3: Crop the Clips
Search for the Crop effect in the Effects pane present at the lower-left corner, drag and drop the effect on each of the clips in the timeline, and use the Crop slider in the Effect Controls pane to crop the videos as needed. Optionally use the keyframes to add sliding animations to give more professional look to the split screen effect.
Pros
- Most robust and efficient video editing tool
- Allows practically unlimited number of videos to be used for split screen
Cons
- Requires subscription that needs to be renewed regularly
For more details about making split screen with Pr, check How to create a split screen in Premiere Pro
7. Final Cut Pro X
Available only for Mac computers at the time of this writing, Final Cut Pro X or FCPX gives tough competition to Adobe Premiere Pro. Since Apple devices are famous for their speedy processing, professionals any day prefer FCPX over Adobe Premiere Pro if they own a Mac PC running macOS.
You can use FCPX as split screen video maker by following the steps given below:
Step 1: Place Footages in the Timeline
As mentioned earlier, add the clips on top of each other on separate tracks in the Timeline of FCPX.
Step 2: Position and Crop
Select the first clip in the Timeline, from the Transform section of the Video Inspector pane in the right, use the Position slider to move the clip to your preferred side of the screen, and use the sliders from the Crop section to crop the footage to adjust the portion of interest. Repeat the process for the other video tracks as well to get your desired split screen effect in Final Cut Pro X.
Pros
- Offers quick and easy way to add split screen effect
- Allows practically unlimited number of videos to be used for split screen
Cons
- Doesn’t have any particular preset for split screen effect
You may also like: How to create a PIP video with Final Cut Pro X
Best Free Online Split Screen Video Editors
Apart from the desktop programs discussed above, there are a couple of web tools that can be used as split screen video maker online free. Two of the most used ones are introduced below:
1. Kapwing Collage Maker
Although Kapwing offers several other online tools like video resizer, meme generator, slideshow maker, etc., the solution that can be considered split screen video editor is Kapwing Collage Maker. This web app allows you to select a template to get started, and the rest of the process is simple.
The following steps explain how to create a split screen video with Kapwing:
Step 1: Add Clips to Preset
Go to the https://www.kapwing.com/collage link, click to select your preferred split screen preset, click REPLACE on one of the segments of the split screen on the next page, and select and upload the first video. Next, click REPLACE on the other segment(s), and select and upload the other videos as well.
Step 2: Reposition and Publish
Click and drag each of the added clips to reposition them on the screen, use the other tools to crop and adjust the videos as needed, and click Publish from the top-right corner. Note: Optionally you can click Timeline from the top of the preview window, adjust the timings and other settings as needed on the next page, and click Done. After this, you can go ahead and hit Publish to create the split screen effect out of the uploaded videos.
Pros
- Free to use
- Allows as many as 4 videos to create split screen effect
Cons
- Requires you to register and sign in to remove the watermark from the output file
2. WeVideo
Yet another split screen video maker online free solution, WeVideo offers almost desktop program-like experience while creating split screen effects. Even though all the subscription plans that the vendor offers are chargeable, the Education plan can be tried for 30 days for free, post which the teachers are required to pay to continue using the web tool.
The following steps explain how to get split screen effect with WeVideo:
Step 1: Import Videos
Visit https://www.wevideo.com and on the main window, click Video from under the Create a new section at the top, select a layout on the Let’s get started box, and click START EDITING from the bottom right corner. Next, click ADD in the My media window in the upper-left section, click BROWSE TO SELECT on the Import media box, and add the videos you want to use in the split screen effect.
Step 2: Add Clips to Timeline
As explained earlier, drag the videos from the My media pane and drop them in the Timeline. Make sure to place every video in its separate layer, and that all the layers are on top of each other.
Step 3: Create Split Screen Effect
Select any clip in the Timeline, and click the Open clip editor icon from the upper-left area of the track. On the next page, use the Scale slider to reduce the size of the selected clip, and from the preview window in the right, drag to reposition the video to your preferred location on the screen. Click SAVE CHANGES from the bottom of the left pane to confirm the settings. Repeat the process for the second clip in the Timeline to resize and reposition it on the screen. Click FINISH from the upper-right corner, on the next box, enter a name for the video in the available field, click SET, choose your preferred settings on the next page, and click EXPORT from the bottom-right corner to produce the split screen video.
Pros
- Free to use
- Allows multiple videos to be used for split screen
Cons
- Paid subscription is needed to remove watermark from the outputs
FAQs About Split Screen Video Editors
Why you should use split screen effect in video?
There are a couple of reasons you may want to use split screen effect in your video. Some of the most common uses include:
- Showing multiple actions by the same or different characters at the same time, without changing the screen
- Comparing multiple objects or picture quality. This can be done only when the entities in question are placed side-by-side
- Making your video look more professional
- Showing different effects on the same screen
Can I create a split screen video with Windows Movie Maker or Windows 10 Photos app?
No, you cannot. Although these tools enable you to resize the videos, since they don’t allow multi-tracked Timelines, no video clips can be placed one above the other which is an essential part for any split screen video maker to create the effect. However, as discussed above, there are several post-production tools, offline and online, that allow you to make split screen videos easily and without any cost.
Conclusion
Split screen video editor tools are both paid and free. Regardless of the program you use to create the effect, the output files always look more professional and informative. Furthermore, things become way simpler if the split screen video maker has simple UI, is less resource intensive, and is easy to use as it is the case with Wondershare Filmora.
Ollie Mattison
Ollie Mattison is a writer and a lover of all things video.
Follow @Ollie Mattison
Also read:
- Updated In 2024, The Top Free MOD Video Editors You Need to Try
- New Leading Web-Based Trailer Production Tools for 2024
- Updated Top Free Video Editing Apps with Special Effects for iOS and Android for 2024
- In 2024, Cutting the Cord TiVo vs Comcast - A Comprehensive DVR Comparison
- New Top iMovie Replacements for Windows 10 Free and Paid Options for 2024
- New 2024 Approved Unlock Custom Aspect Ratios in Final Cut Pro Expert Techniques Revealed
- New Mastering the 16X9 Ratio 5 Expert Calculator Hacks
- New Video Editing Software Face-Off Sony Vegas vs Adobe Premiere Pro 2023 Edition for 2024
- Updated 2024 Approved Beyond Chrome OS How to Run Windows and Mac Video Editing Software on Your Chromebook
- 2024 Approved From SD to HD A Guide to Understanding Video Pixel Size
- Updated Take Your Videos to the Next Level Free Sound Effects for Final Cut Pro for 2024
- New 2024 Approved Top-Rated Online Video Editors Compatible with Chromebook
- Updated In 2024, Flip Video Clips in Final Cut Pro A 4-Step Guide for Beginners
- Time Lapse Made Easy 2 Proven Methods for Creating Breathtaking Videos
- In 2024, Final Cut Pro Essentials Reversing Video Clips in Minutes
- In 2024, Reduce MPEG2 File Size A Guide to Using VirtualDub
- New 2024 Approved Hands-On with AVS Video Editor A 2023 Review
- In 2024, Maximize Your Click-Through Rate YouTube Thumbnail Optimization Techniques
- Unlock the Power of Screen Recording A Filmora Scrn Tutorial
- Updated 2024 Approved Using the Right GoPro Editor on Mac Is Essential. Wondershare Filmora X Lets You Edit Videos Like a Pro without Making Things Complicated
- New 2024 Approved Easy Video Merging Made Possible Top Alternative Tools
- Updated 2024 Approved Intro Makers Compared Top 10 Free and Paid Solutions
- New 2024 Approved FCPX Essential Edits A Step-by-Step Guide to L-Cuts and J-Cuts
- The Ultimate List of Online Video Reversal Software
- Updated The Visual Difference How Aspect Ratio Impacts Your YouTube Videos Style
- In 2024, Say Goodbye to Shaky Footage Top Video Stabilizers
- Top 10 Vlogging Apps for Editing on the Go for 2024
- Updated 2024 Approved The Ultimate Guide to MTS Video Editing Top 5 Software
- New Shaky Footage? No Problem! Adobe Premiere Pro Stabilization Guide
- Updated 2024 Approved Transform Your Canon Footage A Comprehensive Guide to Video Editing
- How to Recover Deleted Notes from iPhone 15 Plus? | Stellar
- In 2024, Basic Knowledge About WMV Format and Best WMV Video Editor
- Reasons for Samsung Galaxy A14 5G Stuck on Boot Screen and Ways To Fix Them | Dr.fone
- New How To Translate Videos in Tamil for a Wider Reach for 2024
- In 2024, How to Migrate Android Data From Poco C65 to New Android Phone? | Dr.fone
- How to Downgrade Apple iPhone 11 to an Older Version? | Dr.fone
- New 2024 Approved Unleash Your Game Top Gaming Intro Makers
- In 2024, How Can Vivo S18 ProMirror Share to PC? | Dr.fone
- In 2024, The Best iSpoofer Alternative to Try On HTC U23 | Dr.fone
- In 2024, How to Fix Pokemon Go Route Not Working On Lava Yuva 3? | Dr.fone
- Top 5 Tracking Apps to Track Motorola Moto G13 without Them Knowing | Dr.fone
- In 2024, Complete Review & Guide to Techeligible FRP Bypass and More For Xiaomi Redmi Note 12 Pro+ 5G
- How to Screen Mirroring Honor X7b? | Dr.fone
- How can I get more stardust in pokemon go On Motorola Defy 2? | Dr.fone
- How to Transfer Music from Oppo Reno 11 5G to iPod | Dr.fone
- 2024 Approved The Ultimate Guide to Video Resumes 4 Best Makers with Free Templates
- In 2024, How to Use Life360 on Windows PC For Vivo V30? | Dr.fone
- Top-Notch Solutions for Disabled Apple ID On Apple iPhone 14 Making It Possible
- Is pgsharp legal when you are playing pokemon On Tecno Spark Go (2023)? | Dr.fone
- How to Find iSpoofer Pro Activation Key On Apple iPhone 6s? | Dr.fone
- In 2024, Top 10 Best Spy Watches For your Apple iPhone 6s Plus | Dr.fone
- In 2024, How to Unlock iCloud Activation Lock and iCloud Account From iPhone 6s?
- In 2024, Apple ID is Greyed Out From Apple iPhone 11 How to Bypass?
- How To Change Your Apple ID Password On your Apple iPhone X | Dr.fone
- In 2024, How to Screen Mirroring Nokia G22 to PC? | Dr.fone
- In 2024, How to Use Pokémon Emerald Master Ball Cheat On Vivo S17 | Dr.fone
- Unlock Your Boost Mobile iPhone 15 Pro Before the Plan Expires
- What is the best Pokemon for pokemon pvp ranking On Honor Magic 6 Lite? | Dr.fone
- In 2024, Everything You Need to Know about Lock Screen Settings on your Poco M6 5G
- How to Check Distance and Radius on Google Maps For your Oppo Find X7 | Dr.fone
- Title: New 2024 Approved Photo and Video Collage Software Top Picks for Online Creators
- Author: Charlotte
- Created at : 2024-04-29 06:41:04
- Updated at : 2024-04-30 06:41:04
- Link: https://smart-video-creator.techidaily.com/new-2024-approved-photo-and-video-collage-software-top-picks-for-online-creators/
- License: This work is licensed under CC BY-NC-SA 4.0.
