
:max_bytes(150000):strip_icc():format(webp)/how-to-increase-internet-speed-5181475-b6fd84098c634a04a6934302184c5b1b.jpg)
New Cut, Color, and Create Top Video Editing Software for Vloggers
Cut, Color, and Create: Top Video Editing Software for Vloggers
Best 10 Vlog Video Editing Software [Free & Paid]

Ollie Mattison
Mar 27, 2024• Proven solutions
Nowadays, more and more people are tending to share their life with short videos on social media platforms such as YouTube, Facebook, Instagram TV and Vimeo. Consequently, aspiring and accomplished vloggers must have at least basic video editing tools at their disposal that enable them to produce captivating visual content which grabs the audience’s attention.
If you’re curious about what software vloggers use, what is the best video editing software for vlogging, or which video editor to choose for YouTube vlog videos, you will get some clues based on the information below.
We’ve researched the internet and picked up the top 10 best video editing software for vlogging, which allows to record as well as edit videos easily for vlogs.
- Part 1: Best Free Vlog Video Editing Software for Beginners
- Part 2: Advanced Vlog Video Editing Software Products on Mac & PC Computers for semi-pros and pros
- Part 3: How to Edit Vlog Videos [Video Tutorial: take travel vlog video as an example]
Best Free & Paid Vlog Editing Software for Vloggers on YT/FB/Ins/Vimeo in 2024
Besides shooting with a goodvlogging camera , the post-production process is very important to your vlogging as well. The complexity of the videos you intend to produce should be one of the first things you consider when choosing vlog video editing software. For instance, if you don’t have a lot of experience in the field and you’d just like to piece a few clips together, then there is no reason to spend extensive amounts of money on professional video editing software.
For Win 7 or later (64-bit)
 Secure Download
For macOS 10.12 or later
Secure Download
Here we’ve sorted out some of the best video editing software for vloggers available on the market depending on your skills and experience level. Some of them are totally free to use, while some still provide unlimited free trial version such as Filmora. You can identify with one which is right for your needs after trying. But at first, let’s have a look at some of the free vlog editing options novice and advanced video editors have at their disposal.
Part 1: Best Free Vlog Video Editing Software for Beginners
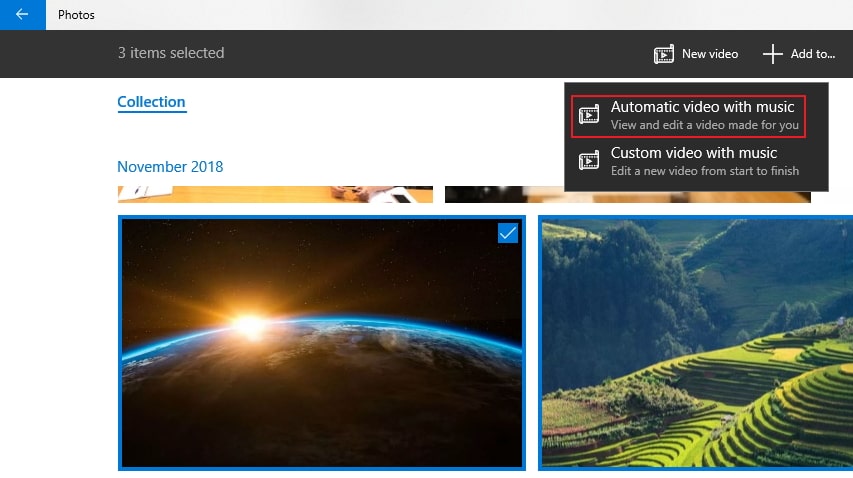
1. Windows Built-in Movie Maker for Windows 7 and Photos app for Windows 10
Price: Free
Compatibility: Windows OS
Windows Movie Maker used to be bundled with the Windows operating system and has been assisting amateurs for a very long time. It features the drag-n-drop functions and offers almost all the classic video editing functions including trim, rotate, split, combine as well as adding music track, filters, and themes. The windows movie maker is simple yet the function is limited. After you editing one or two vlog videos with it, you will find that.
However, Windows Movie Maker has been discontinued, and it is no longer available for download, but if you are using an older version of the Windows 7 operating system, you can still edit your videos with this iconic PC-based software. The newcomers to the world of vlogging can use this software to put several video clips together or to perform basic video editing actions like cutting or trimming. Windows Movie Maker never had much to offer to skilled video editors, so if you take vlogging seriously, you won’t spend too much time editing your videos with it. Check our Picks of theBest Free Video Editing Software for Windows in 2020 >>

The latest news, Microsoft will stop supporting Windows 7 in January 2020. If you’re looking for some video editing software designed for Windows10, check some of the best movie makers for Windows 10 . If you’ve already updated and run to Windows10, you can also use the in-built Windows10 Photos app. The Photos app in Windows 10 allows you to pick up a theme, soundtrack to make a video easily. One of the interesting features of Photos is that you can choose a star and then it will create a video which focused on that person with videos and pics of your media collection. Learn more details about how to edit videos in the Photos app with Story Remix
What we like:
Totally free for windows users and the automatic video creation feature is interesting
What we don’t like:
Video Editing Features are limited
Only for Windows users
2. iMovie
Price: Free
Compatibility: MacOS and iOS
iMovie is a free video editing software for vloggers who using Mac to edit vidoes. It is equipped with an array of fantastic and practical video editing features, iMovie is an idea video editing tool for anyone. Comes with every new iMac, it’s free of charge and provides a wide range of effects and tools sets, thus it’s always considered as an essential tool for any Mac user to enhance their vologs.
Despite a somewhat limited scope of video editing features iMovie provides, the software is still powerful enough to enable you to edit footage captured in resolutions up to 4K . Additionally, you can create titles , apply visual effects and filters to video clips, or even record your own voiceovers. iMovie’s file sharing capabilities are perfectly suited for vlogging as you can upload a video to your YouTube channel or Facebook account directly from the software.
What we like:
Totally free for Mac users and you can also use it on iPhone or iPad to edit vlog videos
What we don’t like:
Limited features and effects
Only for Mac or iOS users
3. VSDC Free Video Editor
Price: Free
Compatibility: Windows
This non-linear editor seems to be a perfect solution for both established and aspiring vloggers because it offers a lot of video editing tools that are incredibly easy to use. Moreover, the software supports nearly all common image andvideo file formats , which means that you can record your vlog entries with any digital camera. The best part is that VSDC enables its users to export videos in HD and 4K resolutions directly to YouTube. The only downside is that you can only install this vlog editor on a PC computer.
What we like:
Anyone without previous knowledge can use this tool
What we don’t like:
Sometimes errors appear when opening the software
4. GoPro Quik Desktop app
Price: Free
Compatibility: Windows and MacOS
If you’re traveling around the world and spend a lot of time on the road shooting videos with a GoPro action camera, then you can try using the Quik desktop app to edit your vlog videos. The Quik video editor is perfectly optimized for editing footage captured with different models of GoPro cameras, but the amount of video editing options the app provides can be a bit underwhelming for professionals. This is a great option if the laptop you carry with you on your journeys doesn’t have enough processing power to run a more powerful video editing software. However, if you rarely use GoPro cameras to record your footage, then this video editing app won’t have a lot to offer you.
What we like:
It offers cloud storage
What we don’t like:
Some good features are paid and expensive
5. DaVinci Resolve
Price: Free and premium version
Compatibility: Windows and MacOS
Tools like Filmora and Adobe Premiere are full of great features, but these blessings come with a price. That’s why people love working on DaVinci, as most of its features are free. The good thing is that you can do all sorts of video editing using this software. While this editor is awesome for vlogs, it is already under significant usage in the Hollywood industry.
Although this software has a premium version with additional features, I have found everything I looked for in the free version. That includes color grading, animations, text, and effects. Moreover, it has a customizable and easy interface. But to be honest, you will find it a bit tricky at first. Also, you might need to watch some YouTube tutorials to get started with DaVinci Resolve.
What we like:
Complete video production tool with audio post-production options
What we don’t like:
4K video editing requires a premium version
6. VN Video Editor
Price: Free
Compatibility: iOS, Android, Mac, and Windows OS
Not many people have heard this name, but VN Video Editor is the best tool for cross-platform operating systems, including iOS and Android. You can also download this tool on your Mac and Windows.
Another fantastic thing about this software is that it’s free and doesn’t even leave a visible watermark on the edited stuff. Furthermore, it doesn’t demand any heavy system requirements whether you’re using it on a smartphone or computer.
You can use this tool on an Apple laptop or computer by downloading this tool from the Apps Store. However, the problem is that you can’t directly download VN Video Editor on your Windows PC. You have to go through a bit of struggle to use it on your system. First, you need to download BluesSacks and then search and install VN Video Editor through Google Play. Here’s a video for your reference.
So, is this struggle worth doing it? Let’s be realistic! I won’t tell you that you can edit an entire Christopher Nolan movie with it, but as a vlogging tool, this has almost everything you will need to make cool videos.
What we like:
No watermark and easy to use
What we don’t like
No direct download link
Not meant for professional editors
7. VideoPad
Price: Free and premium version
Compatibility: Mac and Windows OS
Despite being an old tool, VideoPad is still known to be an excellent pick if you’re looking for free editing software for vlogging. It has a simple interface and is extremely easy to use. Anyone with a bit of interest and knowledge can start editing videos without learning from tutorials.
In my experience, this software is almost similar to Filmora regarding easiness. However, compared to Filmora, it lacks some essential presets. Besides, the interface looks old. But it doesn’t mean that this tool lacks some modern traits.
Furthermore, the editor allows you to export videos in multiple formats, making it great for YouTube videos.
What we like:
The free version includes lots of exciting features
Affordable upgrade
What we don’t like:
Unable to export mp4 and limited audio tracks in free version
8. VideoProc Vlogger
Price: Free
Compatibility: Mac and Windows OS
VideoProc Vlogger is specially designed for vlogging. It is great for both beginners and professionals. It has an easy interface and options with lots of unique features, including 28 motion presets, pan & zoom, and motion cropping.
Likewise, you can also do color grading and color correction along with HSL color adjustment. In the same way, you can fix low light and overexposure and reduce noise.
A few more features of VideoProc Vlogger include fisheye removal, time-lapse, split screen, green screen, text addition, voice recording, audio extractor, and more.
What we like:
100% secure
Free tech – support
Video tutorials available
What we don’t like:
Minor issues with clips splitting
Part 2: Best Vlog Video Editing Software Products for Semi-pros & pros
1. Wondershare Filmora
Price: $79.99 for a perpetual license
Compatibility: Windows and MacOS
This vlog software is easy to edit videos for all creators. Both skilled video editing professionals and vlogging enthusiasts can use Filmora equally effectively to produce captivating videos. With its ability to record both Webcam and desktop screen, and voiceover directly and upload to YouTube and Vimeo social media platform, it has become one of the best solutions for Vloggers to edit their videos. Filmora is an easily mastered tool that enables users to join, cut, split, rotate, crop clips within clicks.


Besides a rich filter gallery and an impressive collection of royalty-free music , the Filmora’s latest update brings improved color correction and audio features. You can add up to a hundred video and audio tracks to the timeline and take full advantage of the software’s compositing capabilities.
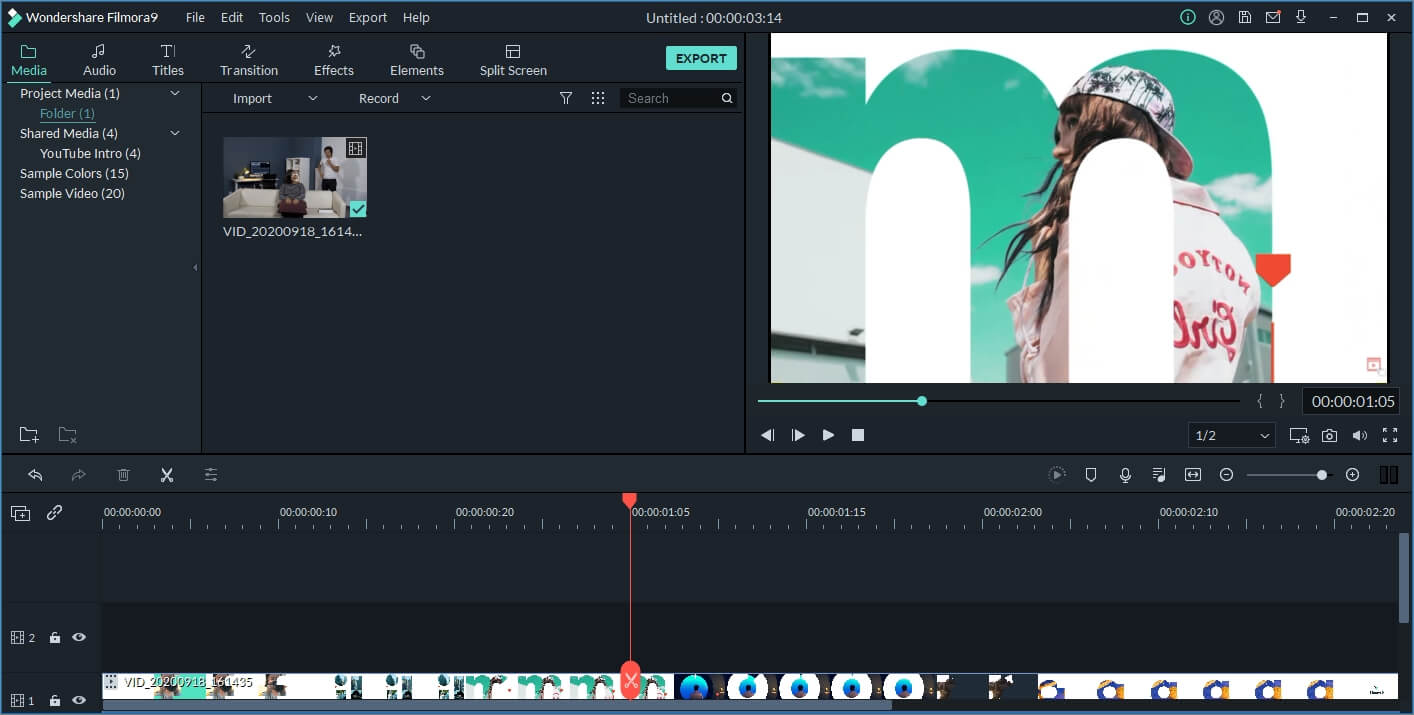
It also stocks a list of filters and options to add extra touches to your video. Vloggers can easily add annotations to their videos , create a PIP effect, or even stabilize shaky footage . The software’s file-sharing capabilities, as well as the fast rendering speeds, make it one of the best vlog video editors in 2020. What’s more, it offers you a lot of fashion and beautiful effects for Game, Beauty, Education, Travel, etc. It is now PC & Mac Cross-compatible, which means you can edit the Projects on either Operating system.
What we like:
Remove background noise easily
Record Voiceover, desktop, webcam simultaneously and change speed easily
Plenty Filters, Overlays, Effects (really important for vloggers)
Intuitive Interface & Easy to Use
What we don’t like:
Need to pay to remove the watermark
2. Lightworks
Price: Free version available $24.99 per month
Compatibility: Windows, Linus, and MacOS
Even the free version of this professional video editor offers the option to export 720p HD videos to Vimeo or YouTube. Furthermore, advanced Multicam editing features, as well as a rich effects library, make Lightwork an excellent choice for vlog editing even if you don’t want to purchase one of the available subscription plans. Vloggers who choose to purchase a monthly or an annual subscription have a much wider range of options at their disposal, so it is best to try the free version of Lightworks before you decide if you want to use it to edit your vlog entries on a constant basis.
What we like:
Proper support forum to get guidance
What we don’t like:
Some users find the interface extremely difficult
3. Adobe Premiere Pro
Price: $20.99 per month, as a single app
Compatibility: Windows and MacOS
Adobe Premiere is one of the best video editing apps ever created, if not the best, so if you’re looking for a reliable video editor with plenty of advanced video editing features, this is probably your best choice. The seemingly endless collection of tools, visual effects, and animation features will ensure that each video you edit in Adobe Premiere Pro meets the highest professional standards.

Vloggers in need of a powerful video editing app that is capable of performing even the most demanding video editing tasks will benefit from purchasing Adobe Premiere Pro as a single app or as a part of some other Creative Cloud plan.
It also supports manythird-party plug-ins for additional features. Please note that there is a 30-day limited trial period, so if you edit vlog videos with it, please remember to check before the trial expired, otherwise you can’t access the software anymore. And there will be a watermark in the free trial version as well.
What we like:
Gives you more controls over vlog footage
What we don’t like:
Expensive
Need some editing experience to handle it
4. Final Cut Pro:
Price: $299.99
Compatibility: MacOS
Over the course of the last couple of decades, Final Cut Pro has become one of the most frequently used video editing software packages in the film industry. That’s why it is hardly surprising that the Final Cut’s latest update is among the best vlog video editors you can use in 2020. A broad spectrum of video editing options grants you the creative freedom to visualize any idea, regardless of how complex that idea may be. However, if you are new to Final Cut Pro, you will need a lot of practice in order to be able to utilize its capabilities entirely.

Final Cut Pro is a sophisticated video editing program for professionals . It offers different almost all the video editing features and options you can imagine, such as multi-cam synchronization support, batch sequence capture as well as third-party plug-in support. However, it’s one of the most expensive video editing software available on the market. So think twice before you make the final decision. But professional video editing software costs much ($299) and need more time to learn how to edit with it. Check the video editing tips with Final Cut Pro >>
What we like:
Plugins available which makes it powerful
What we don’t like:
Available on Mac computer only
Professional and not easy to start
5. MAGIX Movie Studio 2024
Price: $69.99 – $99.99 for a lifetime
Compatibility: Windows and MacOS
MAGIX Movie Studio has two versions – advanced editing and simple editing.
You can work on projects in advance editing by creating multiple effects and layers. This version also allows you to edit your 4K videos, color correct them, and make them more stunning. Similarly, it also permits you to apply the green screen effect. However, this is suitable for professionals and takes a lot of time to do job.
On the contrary, the simple editing version comes with essential features, which are also best for quick vlog editing. So if you’re in a hurry and need to upload videos to your channel daily, you can use the simple mode.
And let me add a few more great things which make MAGIX Movie Studio wonderful. For example, there are lots of add-ons available. It has big effects and tools library best for pro vloggers.
What we like:
Affordable pricing for the features it has
What we don’t like:
The software crashes sometimes
6. Camtasia
Price: $299.99 per year
Compatibility: Mac and Windows OS
Camtasia is another kid on the block that is suitable for vloggers. The tool serves best on projects, including how-to-videos, tutorials, and instructional videos.
Camtasia has all the basic features you may need to edit YouTube videos, including animations, motion graphics, and more. Additionally, it comes with a screen recorder and green-screen effects.
What we like:
Simple interface
What we don’t like:
Expensive
Slow video rendering
Part 3: How to Edit Vlog Videos in Filmora Vlog Editing Software [Video Tutorial & Detailed Steps]
The video tutorial below will show you how to edit a travel vlog with this vlog editing software. If you don’t have time to watch the video tutorial right now, you can check our brief guide [3 steps] of how to edit vlog videos in Filmora below.
Bonus: More and more people are making money with videos, want to know how? Check our YouTube monetarization guide about How to make money on YouTube .
1. Importing Vlog Videos
Click the Import option or select Import Media Files Here to navigate to import your vlog video materials. It allows you to import folders from disks or from your iPhone or camera even from your social media account.

Then drag and drop the vlog media to the timeline to edit.
2. Editing Vlog Footage
It provides all the basic editing features such as trimming, cutting, deleting, rotating and flipping, as well as advanced features such as video stabilization, color grading, background noise removing and green screen compositing and blending. We know that most vloggers need filters and transition, all these effects are available on Filmora Effects library and Transition library, and you can also click Filmstock

3. Export vlog footage and share to YouTube/Vimeo or Save
Click the Export button to enter the Export window, here you can choose to save the video to popular formats on your computer, or save to mobile devices such as iPhone, iPad, and Android phone, or to TVs as well. You can also upload the vlog video to YouTube and Vimeo directly.

You can also check the step-by-step tutorial aboutHow to edit videos to know more details .
Related: How to create amazing food vlog or family vlog ?
Conclusion
Above are our picks of the best video editing software for vloggers, some are designed for free for video editing novices, while after editing several vlog videos, you may need professional ones, so I also introduced some video editing software for professionals. Having the right equipment is much more important than having the most expensive equipment. So instead of simply buying the priciest video editing software, you can find on the market, you should choose a video editor that provides all the tools you’ll need to create a vlog. Which video editing software are you going to be using to edit your vlogs in 2020?
FAQs About Vlog Video Editing
1. What Video Editing Software Do Vloggers Use?
Vloggers use a wide range of video editors based on their needs. Beginners who need a free & straightforward editor for light editing typically go for editors such as iMovie, Windows 10 Photos, etc. But consumer and pro-level Vloggers opt for more capable alternatives like Filmora. Drag-n-drop actions handle most of the editing in Filmora. Thanks to this, applying transitions, effects & filters is a breeze. There is an extensive library of stock content which is crucial for vloggers. Trendy filters & effects, Action Cam tool combined with 4K support makes it a must-have for vloggers.
2. What Is the Best Vlog Editing Software for Windows Free?
Microsoft Photos is the best free video editor for Windows. It delivers a solid video editing package in a simple interface. Since it comes built-in with Windows, no additional hassle is necessary. Microsoft Photos can create automatic videos from your media library. The videos don’t always turn out great, but they save a lot of time which you can dedicate to vlogging. You can choose from six themes to automatically take care of your text, filters, and soundtrack. The filters also come in eleven flavors to spice up your video.
For Win 7 or later (64-bit)
Secure Download
For macOS 10.12 or later
Secure Download
If you prefer to record vlog and edit it on your phones, you can check our picks of the Best Vlog Editor Apps [iOS & Android] .
Ollie Mattison
Ollie Mattison is a writer and a lover of all things video.
Follow @Ollie Mattison
Ollie Mattison
Mar 27, 2024• Proven solutions
Nowadays, more and more people are tending to share their life with short videos on social media platforms such as YouTube, Facebook, Instagram TV and Vimeo. Consequently, aspiring and accomplished vloggers must have at least basic video editing tools at their disposal that enable them to produce captivating visual content which grabs the audience’s attention.
If you’re curious about what software vloggers use, what is the best video editing software for vlogging, or which video editor to choose for YouTube vlog videos, you will get some clues based on the information below.
We’ve researched the internet and picked up the top 10 best video editing software for vlogging, which allows to record as well as edit videos easily for vlogs.
- Part 1: Best Free Vlog Video Editing Software for Beginners
- Part 2: Advanced Vlog Video Editing Software Products on Mac & PC Computers for semi-pros and pros
- Part 3: How to Edit Vlog Videos [Video Tutorial: take travel vlog video as an example]
Best Free & Paid Vlog Editing Software for Vloggers on YT/FB/Ins/Vimeo in 2024
Besides shooting with a goodvlogging camera , the post-production process is very important to your vlogging as well. The complexity of the videos you intend to produce should be one of the first things you consider when choosing vlog video editing software. For instance, if you don’t have a lot of experience in the field and you’d just like to piece a few clips together, then there is no reason to spend extensive amounts of money on professional video editing software.
For Win 7 or later (64-bit)
Secure Download
For macOS 10.12 or later
Secure Download
Here we’ve sorted out some of the best video editing software for vloggers available on the market depending on your skills and experience level. Some of them are totally free to use, while some still provide unlimited free trial version such as Filmora. You can identify with one which is right for your needs after trying. But at first, let’s have a look at some of the free vlog editing options novice and advanced video editors have at their disposal.
Part 1: Best Free Vlog Video Editing Software for Beginners
1. Windows Built-in Movie Maker for Windows 7 and Photos app for Windows 10
Price: Free
Compatibility: Windows OS
Windows Movie Maker used to be bundled with the Windows operating system and has been assisting amateurs for a very long time. It features the drag-n-drop functions and offers almost all the classic video editing functions including trim, rotate, split, combine as well as adding music track, filters, and themes. The windows movie maker is simple yet the function is limited. After you editing one or two vlog videos with it, you will find that.
However, Windows Movie Maker has been discontinued, and it is no longer available for download, but if you are using an older version of the Windows 7 operating system, you can still edit your videos with this iconic PC-based software. The newcomers to the world of vlogging can use this software to put several video clips together or to perform basic video editing actions like cutting or trimming. Windows Movie Maker never had much to offer to skilled video editors, so if you take vlogging seriously, you won’t spend too much time editing your videos with it. Check our Picks of theBest Free Video Editing Software for Windows in 2020 >>
The latest news, Microsoft will stop supporting Windows 7 in January 2020. If you’re looking for some video editing software designed for Windows10, check some of the best movie makers for Windows 10 . If you’ve already updated and run to Windows10, you can also use the in-built Windows10 Photos app. The Photos app in Windows 10 allows you to pick up a theme, soundtrack to make a video easily. One of the interesting features of Photos is that you can choose a star and then it will create a video which focused on that person with videos and pics of your media collection. Learn more details about how to edit videos in the Photos app with Story Remix
What we like:
Totally free for windows users and the automatic video creation feature is interesting
What we don’t like:
Video Editing Features are limited
Only for Windows users
2. iMovie
Price: Free
Compatibility: MacOS and iOS
iMovie is a free video editing software for vloggers who using Mac to edit vidoes. It is equipped with an array of fantastic and practical video editing features, iMovie is an idea video editing tool for anyone. Comes with every new iMac, it’s free of charge and provides a wide range of effects and tools sets, thus it’s always considered as an essential tool for any Mac user to enhance their vologs.
Despite a somewhat limited scope of video editing features iMovie provides, the software is still powerful enough to enable you to edit footage captured in resolutions up to 4K . Additionally, you can create titles , apply visual effects and filters to video clips, or even record your own voiceovers. iMovie’s file sharing capabilities are perfectly suited for vlogging as you can upload a video to your YouTube channel or Facebook account directly from the software.
What we like:
Totally free for Mac users and you can also use it on iPhone or iPad to edit vlog videos
What we don’t like:
Limited features and effects
Only for Mac or iOS users
3. VSDC Free Video Editor
Price: Free
Compatibility: Windows
This non-linear editor seems to be a perfect solution for both established and aspiring vloggers because it offers a lot of video editing tools that are incredibly easy to use. Moreover, the software supports nearly all common image andvideo file formats , which means that you can record your vlog entries with any digital camera. The best part is that VSDC enables its users to export videos in HD and 4K resolutions directly to YouTube. The only downside is that you can only install this vlog editor on a PC computer.
What we like:
Anyone without previous knowledge can use this tool
What we don’t like:
Sometimes errors appear when opening the software
4. GoPro Quik Desktop app
Price: Free
Compatibility: Windows and MacOS
If you’re traveling around the world and spend a lot of time on the road shooting videos with a GoPro action camera, then you can try using the Quik desktop app to edit your vlog videos. The Quik video editor is perfectly optimized for editing footage captured with different models of GoPro cameras, but the amount of video editing options the app provides can be a bit underwhelming for professionals. This is a great option if the laptop you carry with you on your journeys doesn’t have enough processing power to run a more powerful video editing software. However, if you rarely use GoPro cameras to record your footage, then this video editing app won’t have a lot to offer you.
What we like:
It offers cloud storage
What we don’t like:
Some good features are paid and expensive
5. DaVinci Resolve
Price: Free and premium version
Compatibility: Windows and MacOS
Tools like Filmora and Adobe Premiere are full of great features, but these blessings come with a price. That’s why people love working on DaVinci, as most of its features are free. The good thing is that you can do all sorts of video editing using this software. While this editor is awesome for vlogs, it is already under significant usage in the Hollywood industry.
Although this software has a premium version with additional features, I have found everything I looked for in the free version. That includes color grading, animations, text, and effects. Moreover, it has a customizable and easy interface. But to be honest, you will find it a bit tricky at first. Also, you might need to watch some YouTube tutorials to get started with DaVinci Resolve.
What we like:
Complete video production tool with audio post-production options
What we don’t like:
4K video editing requires a premium version
6. VN Video Editor
Price: Free
Compatibility: iOS, Android, Mac, and Windows OS
Not many people have heard this name, but VN Video Editor is the best tool for cross-platform operating systems, including iOS and Android. You can also download this tool on your Mac and Windows.
Another fantastic thing about this software is that it’s free and doesn’t even leave a visible watermark on the edited stuff. Furthermore, it doesn’t demand any heavy system requirements whether you’re using it on a smartphone or computer.
You can use this tool on an Apple laptop or computer by downloading this tool from the Apps Store. However, the problem is that you can’t directly download VN Video Editor on your Windows PC. You have to go through a bit of struggle to use it on your system. First, you need to download BluesSacks and then search and install VN Video Editor through Google Play. Here’s a video for your reference.
So, is this struggle worth doing it? Let’s be realistic! I won’t tell you that you can edit an entire Christopher Nolan movie with it, but as a vlogging tool, this has almost everything you will need to make cool videos.
What we like:
No watermark and easy to use
What we don’t like
No direct download link
Not meant for professional editors
7. VideoPad
Price: Free and premium version
Compatibility: Mac and Windows OS
Despite being an old tool, VideoPad is still known to be an excellent pick if you’re looking for free editing software for vlogging. It has a simple interface and is extremely easy to use. Anyone with a bit of interest and knowledge can start editing videos without learning from tutorials.
In my experience, this software is almost similar to Filmora regarding easiness. However, compared to Filmora, it lacks some essential presets. Besides, the interface looks old. But it doesn’t mean that this tool lacks some modern traits.
Furthermore, the editor allows you to export videos in multiple formats, making it great for YouTube videos.
What we like:
The free version includes lots of exciting features
Affordable upgrade
What we don’t like:
Unable to export mp4 and limited audio tracks in free version
8. VideoProc Vlogger
Price: Free
Compatibility: Mac and Windows OS
VideoProc Vlogger is specially designed for vlogging. It is great for both beginners and professionals. It has an easy interface and options with lots of unique features, including 28 motion presets, pan & zoom, and motion cropping.
Likewise, you can also do color grading and color correction along with HSL color adjustment. In the same way, you can fix low light and overexposure and reduce noise.
A few more features of VideoProc Vlogger include fisheye removal, time-lapse, split screen, green screen, text addition, voice recording, audio extractor, and more.
What we like:
100% secure
Free tech – support
Video tutorials available
What we don’t like:
Minor issues with clips splitting
Part 2: Best Vlog Video Editing Software Products for Semi-pros & pros
1. Wondershare Filmora
Price: $79.99 for a perpetual license
Compatibility: Windows and MacOS
This vlog software is easy to edit videos for all creators. Both skilled video editing professionals and vlogging enthusiasts can use Filmora equally effectively to produce captivating videos. With its ability to record both Webcam and desktop screen, and voiceover directly and upload to YouTube and Vimeo social media platform, it has become one of the best solutions for Vloggers to edit their videos. Filmora is an easily mastered tool that enables users to join, cut, split, rotate, crop clips within clicks.
Besides a rich filter gallery and an impressive collection of royalty-free music , the Filmora’s latest update brings improved color correction and audio features. You can add up to a hundred video and audio tracks to the timeline and take full advantage of the software’s compositing capabilities.
It also stocks a list of filters and options to add extra touches to your video. Vloggers can easily add annotations to their videos , create a PIP effect, or even stabilize shaky footage . The software’s file-sharing capabilities, as well as the fast rendering speeds, make it one of the best vlog video editors in 2020. What’s more, it offers you a lot of fashion and beautiful effects for Game, Beauty, Education, Travel, etc. It is now PC & Mac Cross-compatible, which means you can edit the Projects on either Operating system.
What we like:
Remove background noise easily
Record Voiceover, desktop, webcam simultaneously and change speed easily
Plenty Filters, Overlays, Effects (really important for vloggers)
Intuitive Interface & Easy to Use
What we don’t like:
Need to pay to remove the watermark
2. Lightworks
Price: Free version available $24.99 per month
Compatibility: Windows, Linus, and MacOS
Even the free version of this professional video editor offers the option to export 720p HD videos to Vimeo or YouTube. Furthermore, advanced Multicam editing features, as well as a rich effects library, make Lightwork an excellent choice for vlog editing even if you don’t want to purchase one of the available subscription plans. Vloggers who choose to purchase a monthly or an annual subscription have a much wider range of options at their disposal, so it is best to try the free version of Lightworks before you decide if you want to use it to edit your vlog entries on a constant basis.
What we like:
Proper support forum to get guidance
What we don’t like:
Some users find the interface extremely difficult
3. Adobe Premiere Pro
Price: $20.99 per month, as a single app
Compatibility: Windows and MacOS
Adobe Premiere is one of the best video editing apps ever created, if not the best, so if you’re looking for a reliable video editor with plenty of advanced video editing features, this is probably your best choice. The seemingly endless collection of tools, visual effects, and animation features will ensure that each video you edit in Adobe Premiere Pro meets the highest professional standards.
Vloggers in need of a powerful video editing app that is capable of performing even the most demanding video editing tasks will benefit from purchasing Adobe Premiere Pro as a single app or as a part of some other Creative Cloud plan.
It also supports manythird-party plug-ins for additional features. Please note that there is a 30-day limited trial period, so if you edit vlog videos with it, please remember to check before the trial expired, otherwise you can’t access the software anymore. And there will be a watermark in the free trial version as well.
What we like:
Gives you more controls over vlog footage
What we don’t like:
Expensive
Need some editing experience to handle it
4. Final Cut Pro:
Price: $299.99
Compatibility: MacOS
Over the course of the last couple of decades, Final Cut Pro has become one of the most frequently used video editing software packages in the film industry. That’s why it is hardly surprising that the Final Cut’s latest update is among the best vlog video editors you can use in 2020. A broad spectrum of video editing options grants you the creative freedom to visualize any idea, regardless of how complex that idea may be. However, if you are new to Final Cut Pro, you will need a lot of practice in order to be able to utilize its capabilities entirely.
Final Cut Pro is a sophisticated video editing program for professionals . It offers different almost all the video editing features and options you can imagine, such as multi-cam synchronization support, batch sequence capture as well as third-party plug-in support. However, it’s one of the most expensive video editing software available on the market. So think twice before you make the final decision. But professional video editing software costs much ($299) and need more time to learn how to edit with it. Check the video editing tips with Final Cut Pro >>
What we like:
Plugins available which makes it powerful
What we don’t like:
Available on Mac computer only
Professional and not easy to start
5. MAGIX Movie Studio 2024
Price: $69.99 – $99.99 for a lifetime
Compatibility: Windows and MacOS
MAGIX Movie Studio has two versions – advanced editing and simple editing.
You can work on projects in advance editing by creating multiple effects and layers. This version also allows you to edit your 4K videos, color correct them, and make them more stunning. Similarly, it also permits you to apply the green screen effect. However, this is suitable for professionals and takes a lot of time to do job.
On the contrary, the simple editing version comes with essential features, which are also best for quick vlog editing. So if you’re in a hurry and need to upload videos to your channel daily, you can use the simple mode.
And let me add a few more great things which make MAGIX Movie Studio wonderful. For example, there are lots of add-ons available. It has big effects and tools library best for pro vloggers.
What we like:
Affordable pricing for the features it has
What we don’t like:
The software crashes sometimes
6. Camtasia
Price: $299.99 per year
Compatibility: Mac and Windows OS
Camtasia is another kid on the block that is suitable for vloggers. The tool serves best on projects, including how-to-videos, tutorials, and instructional videos.
Camtasia has all the basic features you may need to edit YouTube videos, including animations, motion graphics, and more. Additionally, it comes with a screen recorder and green-screen effects.
What we like:
Simple interface
What we don’t like:
Expensive
Slow video rendering
Part 3: How to Edit Vlog Videos in Filmora Vlog Editing Software [Video Tutorial & Detailed Steps]
The video tutorial below will show you how to edit a travel vlog with this vlog editing software. If you don’t have time to watch the video tutorial right now, you can check our brief guide [3 steps] of how to edit vlog videos in Filmora below.
Bonus: More and more people are making money with videos, want to know how? Check our YouTube monetarization guide about How to make money on YouTube .
1. Importing Vlog Videos
Click the Import option or select Import Media Files Here to navigate to import your vlog video materials. It allows you to import folders from disks or from your iPhone or camera even from your social media account.
Then drag and drop the vlog media to the timeline to edit.
2. Editing Vlog Footage
It provides all the basic editing features such as trimming, cutting, deleting, rotating and flipping, as well as advanced features such as video stabilization, color grading, background noise removing and green screen compositing and blending. We know that most vloggers need filters and transition, all these effects are available on Filmora Effects library and Transition library, and you can also click Filmstock
3. Export vlog footage and share to YouTube/Vimeo or Save
Click the Export button to enter the Export window, here you can choose to save the video to popular formats on your computer, or save to mobile devices such as iPhone, iPad, and Android phone, or to TVs as well. You can also upload the vlog video to YouTube and Vimeo directly.
You can also check the step-by-step tutorial aboutHow to edit videos to know more details .
Related: How to create amazing food vlog or family vlog ?
Conclusion
Above are our picks of the best video editing software for vloggers, some are designed for free for video editing novices, while after editing several vlog videos, you may need professional ones, so I also introduced some video editing software for professionals. Having the right equipment is much more important than having the most expensive equipment. So instead of simply buying the priciest video editing software, you can find on the market, you should choose a video editor that provides all the tools you’ll need to create a vlog. Which video editing software are you going to be using to edit your vlogs in 2020?
FAQs About Vlog Video Editing
1. What Video Editing Software Do Vloggers Use?
Vloggers use a wide range of video editors based on their needs. Beginners who need a free & straightforward editor for light editing typically go for editors such as iMovie, Windows 10 Photos, etc. But consumer and pro-level Vloggers opt for more capable alternatives like Filmora. Drag-n-drop actions handle most of the editing in Filmora. Thanks to this, applying transitions, effects & filters is a breeze. There is an extensive library of stock content which is crucial for vloggers. Trendy filters & effects, Action Cam tool combined with 4K support makes it a must-have for vloggers.
2. What Is the Best Vlog Editing Software for Windows Free?
Microsoft Photos is the best free video editor for Windows. It delivers a solid video editing package in a simple interface. Since it comes built-in with Windows, no additional hassle is necessary. Microsoft Photos can create automatic videos from your media library. The videos don’t always turn out great, but they save a lot of time which you can dedicate to vlogging. You can choose from six themes to automatically take care of your text, filters, and soundtrack. The filters also come in eleven flavors to spice up your video.
For Win 7 or later (64-bit)
Secure Download
For macOS 10.12 or later
Secure Download
If you prefer to record vlog and edit it on your phones, you can check our picks of the Best Vlog Editor Apps [iOS & Android] .
Ollie Mattison
Ollie Mattison is a writer and a lover of all things video.
Follow @Ollie Mattison
Mac Video Editing Made Easy with MKVtoolnix Software
MKVtoolnix for Mac: An Easy Editing Application for All Mac Users
Ollie Mattison
Mar 27, 2024• Proven solutions
MKVtoolnix is a very useful application that enables you to create, alter, split, join, and inspect MKV files. And thank goodness that it’s also available for Mac OS X. But to be frank, its interface comes on rather a difficult side and maybe too complex for novice users to interpret.
Then is there any good program similar to MKVtoolnix but comes more intuitive interface? Absolutely.
Wondershare Filmora for Mac is a professional video editing software with a rich number of features. This program provides nearly everything necessary for working with your MKV video files.
From basic video editings like Rotate, Trim, Crop, Flip, Split, Cut, etc. to advanced touchups like intro/credits, transitional effects, titles, visual filters, and more. Try this one-of-a-kind video editing tool now.
Check the video tutorial about how to edit videos on Mac first.
Download Mac Version ](https://tools.techidaily.com/wondershare/filmora/download/ )
1.Easy to use interface
When you install and launch this program, you’ll come to a very beautiful primary window that everyone can use, even for the first time.
Instead of a Read Me file, MKVtoolnix for Mac alternative provides an easy-to-follow video guide. Also, a media browser is offered, so that you can import files from your iTunes library, iMovie, etc. with ease. When you confront any trouble in use, just send your request to the support team directly from this program.

2. Broad format support
Just like MKVtoolnix for Mac, this alternative program also supports a vast array of video & audio formats.
For video files, including MKV, AVC, AVI, DRC, MP4, AVI, VOB, 3GP, MPG, MPEG, MOV, M2V, EVO, MKV, TS, TRP, M2TS, MTS, TP, DAT, WMV, MKV, DV, MOD, TOD, EVO, OGG, and more.
For audio files, it’s fully compatible with AC3, M4A, MP4, OGG, MP2, MP3, MKA, WAV, WMA, FLAC, etc.
This MKVtoolnix also supports picture formats like BMP, JPG, PNG, GIF, and more.
3. All necessary video editing tools
As an equivalent program to MKVtoolnix, this program helps you rip audio from video; split, rotate, trim video files; adjust brightness, contrast, and saturation, change aspect ratio; apply the special visual effect, and more.
The best part is all these video edits are based on Timeline, and you can edit frame by frame to ensure concise video editing. What’s more, the MKVtoolnix alternative for Mac provides a real-time preview window for the changes that you made.

4. Save to a variety of formats or burn to DVD
Different from MKVtoolnix that only renders MKV format, MKVtoolnix for Mac alternative enables you to save to all SD and HD formats.
In addition to high definition MKV video, you’re able to export HD MOV, HD MP4, HD WMV output, and even DVD video for playback on any standalone DVD player or TV.

More about MKVtoolnix for Mac
Apart from above-mentioned features, Wondershare Filmora (originally Wondershare Video Editor) for Mac also provides other useful tools you may need. Like touch up your videos with rich transitions, intros/credits, titles, sound effects, or produce professional video effects like Mosaic, Jump Cut, Close-up, and more.
Indeed, it’s a simple and fast MKVtoolnix for Mac that makes video editing in Mac never easier. Start now!
Download Mac Version ](https://tools.techidaily.com/wondershare/filmora/download/ )
Ollie Mattison
Ollie Mattison is a writer and a lover of all things video.
Follow @Ollie Mattison
Ollie Mattison
Mar 27, 2024• Proven solutions
MKVtoolnix is a very useful application that enables you to create, alter, split, join, and inspect MKV files. And thank goodness that it’s also available for Mac OS X. But to be frank, its interface comes on rather a difficult side and maybe too complex for novice users to interpret.
Then is there any good program similar to MKVtoolnix but comes more intuitive interface? Absolutely.
Wondershare Filmora for Mac is a professional video editing software with a rich number of features. This program provides nearly everything necessary for working with your MKV video files.
From basic video editings like Rotate, Trim, Crop, Flip, Split, Cut, etc. to advanced touchups like intro/credits, transitional effects, titles, visual filters, and more. Try this one-of-a-kind video editing tool now.
Check the video tutorial about how to edit videos on Mac first.
Download Mac Version ](https://tools.techidaily.com/wondershare/filmora/download/ )
1.Easy to use interface
When you install and launch this program, you’ll come to a very beautiful primary window that everyone can use, even for the first time.
Instead of a Read Me file, MKVtoolnix for Mac alternative provides an easy-to-follow video guide. Also, a media browser is offered, so that you can import files from your iTunes library, iMovie, etc. with ease. When you confront any trouble in use, just send your request to the support team directly from this program.
2. Broad format support
Just like MKVtoolnix for Mac, this alternative program also supports a vast array of video & audio formats.
For video files, including MKV, AVC, AVI, DRC, MP4, AVI, VOB, 3GP, MPG, MPEG, MOV, M2V, EVO, MKV, TS, TRP, M2TS, MTS, TP, DAT, WMV, MKV, DV, MOD, TOD, EVO, OGG, and more.
For audio files, it’s fully compatible with AC3, M4A, MP4, OGG, MP2, MP3, MKA, WAV, WMA, FLAC, etc.
This MKVtoolnix also supports picture formats like BMP, JPG, PNG, GIF, and more.
3. All necessary video editing tools
As an equivalent program to MKVtoolnix, this program helps you rip audio from video; split, rotate, trim video files; adjust brightness, contrast, and saturation, change aspect ratio; apply the special visual effect, and more.
The best part is all these video edits are based on Timeline, and you can edit frame by frame to ensure concise video editing. What’s more, the MKVtoolnix alternative for Mac provides a real-time preview window for the changes that you made.
4. Save to a variety of formats or burn to DVD
Different from MKVtoolnix that only renders MKV format, MKVtoolnix for Mac alternative enables you to save to all SD and HD formats.
In addition to high definition MKV video, you’re able to export HD MOV, HD MP4, HD WMV output, and even DVD video for playback on any standalone DVD player or TV.
More about MKVtoolnix for Mac
Apart from above-mentioned features, Wondershare Filmora (originally Wondershare Video Editor) for Mac also provides other useful tools you may need. Like touch up your videos with rich transitions, intros/credits, titles, sound effects, or produce professional video effects like Mosaic, Jump Cut, Close-up, and more.
Indeed, it’s a simple and fast MKVtoolnix for Mac that makes video editing in Mac never easier. Start now!
Download Mac Version ](https://tools.techidaily.com/wondershare/filmora/download/ )
Ollie Mattison
Ollie Mattison is a writer and a lover of all things video.
Follow @Ollie Mattison
Create Split Screen Videos for Free: Online and Offline Editor Reviews
Best Split Screen Video Editor [Online & Offline]
Ollie Mattison
Mar 27, 2024• Proven solutions
The effect that comes up after adding two or more screens in a single frame is called split screen, and the tool that enables the users to do this is a split screen video editor. These split screens have significant importance in post-production tasks. That said, the following sections discuss about the tools that enable you to create split screen videos, and explain the process of doing so.
As mentioned above, the split screen effect lets you add two or more screens in a single frame. When multiple activities occur at the same time but at different locations, they all can be shown on one screen by placing their corresponding footages side-by-side or in any other arrangement that the split screen video maker allows.
Best Split Screen Video Editing Software for Windows and Mac [Free & Paid]
After understanding what split screen is, it becomes both obvious and mandatory to know about some of the most used split screen video editor applications, and how they help you in adding the effect to your movies. Following is a list of a couple of such programs:
1. iMovie
A proprietary of Apple, iMovie is available for both iOS and macOS, and is absolutely free of cost. Even though the tool lacks some advanced options for fine editing, it still offers a good platform to those planning their career in post-production industry. With simple UI, it is easy to learn iMovie.
The step-by-step instructions given below explain how to use iMovie to add split screen effect to your videos:
Step 1: Add Footages to iMovie
After importing the footages to the Media Bin in iMovie, drag the first one to the Timeline, and then drag the second one above the first layer.
Step 2: Select the Split Screen Effect
Select the top video layer in the Timeline, and choose Split Screen from the screen type drop-down list at the top.
Step 3: Select Split Screen Preset
Choose a position for the selected layer from the Position drop-down list at the top, and use the Slide slider to adjust the speed of the appearance of the footage.
Pros
- iMovie is free to download and use
- The program is available for both macOS and iOS
Cons
- Allows only up to two videos to be used in split screen
You can get iMovie from here: https://www.apple.com/in/imovie/
2. Wondershare Filmora Editor
One of the most robust apps that is compared with post-production applications like Adobe Premiere Pro and Final Cut Pro X, Wondershare Filmora is also a video editor that helps split screen easily. The software is available for Windows and Mac computers, and provides prompt technical support to its consumers. Although Filmora that packed with more advanced tools is also available, most of the times Filmora serves the purpose pretty well.
You can learn how to add split screen effect in Wondershare Filmora by following the steps given below:
Step 1: Import Footages to Filmora
Launch Wondershare Filmora, click anywhere inside the Media window in the upper-left section, and import all the videos you want to use to create the split screen effect.
Step 2: Choose a Split Screen Preset
Click Split Screen from the standard toolbar at the top, click and drag your preferred preset to the Timeline, and then extend the duration of the effect in the Timeline by dragging its handle.
Step 3: Add Videos to Split Screen

Click ADVANCED from the bottom-right area of the Media pane, on the Advanced Split Screen Edit box, drag the first video from the left pane, and drop it on your preferred section in the right. Repeat the process to add all the other videos to their corresponding sections. Adjust their time of appearance by dragging their thumbnail in the Timeline of the box, and click OK.
Pros
- Wondershare Filmora is lightweight and is less resource intensive
- Allows as many as 6 videos to be added to create split screen effect
- Has 30+ split screen presets
Cons
- A couple of windows are required to be opened while working with split screen
3 . VSDC
VSDC is a free and efficient split screen video maker. In fact, the program is a full-fledged post-production application that can be used to edit the videos to prepare industry-standard clips for presentations, broadcasting, and commercial and private distribution. The best thing about VSDC is, it is absolutely free of cost, and doesn’t add any watermarks to the output files.
The instructions given below explain how to use the split screen feature in VSDC:
Step 1: Add Video Footages
Click Add object from the standard toolbar at the top, click Video, and select and add the first footage to the preview window. Repeat the process to add more video(s) as needed.
Step 2: Add Split Screen Effect
Grab any of the side handles of the video you added last, and drag it inward to reduce its size proportionally. Repeat the process to reduce the size of the other video(s) that is/are now revealed from beneath the one you just adjusted in order to create the split screen effect.
Pros
- Absolutely free to use
- Allows practically unlimited number of footages to be added to create the split screen videos
Cons
- No presets for automatic video positioning are available for split screen effect
You can get VSDC free video editor from here: http://www.videosoftdev.com/
4. Shotcut
A free and opensource editing tool, Shotcut can also be used as a split screen video maker to produce industry-standard movies and documentaries. Shotcut is available for FreeBSD, Windows, Linux, and macOS, and comes in both x64 and x86 variants. Being a free program, Shotcut doesn’t require any activation or registration.
The procedure that follows explains how to use Shortcut as a free split screen video editor:
Step 1: Add Clips to the Timeline
Import the footages to the Shotcut’s media bin, drag one of the clips from the bin to the Timeline at the bottom, and then press Ctrl + I on your keyboard to add more video tracks. You can press this shortcut key for another couple of times depending on the number films you want to use for the split screen effect. Next, drag each film from the bin to their corresponding tracks. Note: Make sure NOT to place all the clips on the same track, and that each of them is on a different, its own, video layer.
Step 2: Adjust the First Video
Select the last video you added to the Timeline (it should be the topmost track), click Filters from above the Timeline, click the + button from the upper-left corner, click Size and Position from the list that appears next, and select the clip’s position from the Preset drop-down list.
Step 3: Adjust Other Videos
Select the second video in the Timeline and repeat the process to set its position, and do the same for all other footages that you added in order to create the split screen effect.
Pros
- Available for FreeBSD, Windows, Linux, and macOS platforms
- If using presets, as many as 4 videos can be added for split screen effect
Cons
- Working with split screen manually may require practice and some calculations to position the clips on the screen correctly
You can get Shotcut from here: https://shotcut.org/
5. Lightworks
Used by the professionals to edit and prepare movies like Pulp Fiction, The Cure, L.A. Confidential, Bruce Almighty, The Wolf of Wall Street, etc., Lightworks is, in true means, a complete and full-fledged post-production application to create industry-standard outputs. The main reason for the app’s wide userbase is that it is a cross-platform software that is available for Linux, Mac, and Windows computers.
To use Lightworks as split screen video maker, you can follow the instructions given below:
Step 1: Add Tracks in Timeline
After importing the clips to Lightworks, leave them in the Media Bin for now, right-click anywhere in the Timeline at the bottom, go to Tracks, click Add multiple, and from the Number to add drop-down list, choose the number of tracks you want to add to the Timeline. Click Add to confirm the changes.
Step 2: Disable Auto Sync
Right-click anywhere in the Timeline, and click to deselect Auto track sync.
Step 3: Add Clips to Timeline
Drag the clips from the Media Bin to the Timeline. Make sure to place each footage on a different track, and that all the tracks are on top of each other. Optionally, right-click the audio that was added along with the clips, and click Remove from the context menu. Use this method to remove all the audios or leave the one you want to have. Note: Removing the audio tracks ensures that they do not overlap during the playback.
Step 4: Enable Split Screen
Click VFX from above the preview window, click the + (Add new effects) icon from the top of the left pane, select the DVE category from the upper-right corner of the left pane, scroll down the left pane to the Split-screen Presets section, and double-click your preferred split screen preset to add the effect to the participating clips.
Pros
- Even the free variant has split screen feature
- A complete post-production tool that doesn’t require any other program for finalizing the things
Cons
- Not many split screen presets are available
Download Lightworks free version from here: https://www.lwks.com/
6. Adobe Premiere Pro
One of the most appreciated and widely used post-production applications for Windows and Mac computers, Adobe Premiere Pro has been professionals’ first choice when it comes to video editing, irrespective of the fact that it has a steep learning curve, and is also a resource intensive software to work with.
The steps below explain how to use Adobe Premiere Pro as a split screen video maker:
Step 1: Add Videos to Timeline
After importing the clips to the Project window, drag each of them to the Timeline, and place them in their separate tracks one above the other.
Step 2: Position and Crop
Select the topmost video track in the Timeline, go to Effect Controls panel from the top of the upper-left pane, and use the Position slider to position the video to your preferred area of the screen. Repeat this process for all the clips in the Timeline you want to add to split screen.
Step 3: Crop the Clips
Search for the Crop effect in the Effects pane present at the lower-left corner, drag and drop the effect on each of the clips in the timeline, and use the Crop slider in the Effect Controls pane to crop the videos as needed. Optionally use the keyframes to add sliding animations to give more professional look to the split screen effect.
Pros
- Most robust and efficient video editing tool
- Allows practically unlimited number of videos to be used for split screen
Cons
- Requires subscription that needs to be renewed regularly
For more details about making split screen with Pr, check How to create a split screen in Premiere Pro
7. Final Cut Pro X
Available only for Mac computers at the time of this writing, Final Cut Pro X or FCPX gives tough competition to Adobe Premiere Pro. Since Apple devices are famous for their speedy processing, professionals any day prefer FCPX over Adobe Premiere Pro if they own a Mac PC running macOS.
You can use FCPX as split screen video maker by following the steps given below:
Step 1: Place Footages in the Timeline
As mentioned earlier, add the clips on top of each other on separate tracks in the Timeline of FCPX.
Step 2: Position and Crop
Select the first clip in the Timeline, from the Transform section of the Video Inspector pane in the right, use the Position slider to move the clip to your preferred side of the screen, and use the sliders from the Crop section to crop the footage to adjust the portion of interest. Repeat the process for the other video tracks as well to get your desired split screen effect in Final Cut Pro X.
Pros
- Offers quick and easy way to add split screen effect
- Allows practically unlimited number of videos to be used for split screen
Cons
- Doesn’t have any particular preset for split screen effect
You may also like: How to create a PIP video with Final Cut Pro X
Best Free Online Split Screen Video Editors
Apart from the desktop programs discussed above, there are a couple of web tools that can be used as split screen video maker online free. Two of the most used ones are introduced below:
1. Kapwing Collage Maker
Although Kapwing offers several other online tools like video resizer, meme generator, slideshow maker, etc., the solution that can be considered split screen video editor is Kapwing Collage Maker. This web app allows you to select a template to get started, and the rest of the process is simple.
The following steps explain how to create a split screen video with Kapwing:
Step 1: Add Clips to Preset
Go to the https://www.kapwing.com/collage link, click to select your preferred split screen preset, click REPLACE on one of the segments of the split screen on the next page, and select and upload the first video. Next, click REPLACE on the other segment(s), and select and upload the other videos as well.
Step 2: Reposition and Publish
Click and drag each of the added clips to reposition them on the screen, use the other tools to crop and adjust the videos as needed, and click Publish from the top-right corner. Note: Optionally you can click Timeline from the top of the preview window, adjust the timings and other settings as needed on the next page, and click Done. After this, you can go ahead and hit Publish to create the split screen effect out of the uploaded videos.
Pros
- Free to use
- Allows as many as 4 videos to create split screen effect
Cons
- Requires you to register and sign in to remove the watermark from the output file
2. WeVideo
Yet another split screen video maker online free solution, WeVideo offers almost desktop program-like experience while creating split screen effects. Even though all the subscription plans that the vendor offers are chargeable, the Education plan can be tried for 30 days for free, post which the teachers are required to pay to continue using the web tool.
The following steps explain how to get split screen effect with WeVideo:
Step 1: Import Videos
Visit https://www.wevideo.com and on the main window, click Video from under the Create a new section at the top, select a layout on the Let’s get started box, and click START EDITING from the bottom right corner. Next, click ADD in the My media window in the upper-left section, click BROWSE TO SELECT on the Import media box, and add the videos you want to use in the split screen effect.
Step 2: Add Clips to Timeline
As explained earlier, drag the videos from the My media pane and drop them in the Timeline. Make sure to place every video in its separate layer, and that all the layers are on top of each other.
Step 3: Create Split Screen Effect
Select any clip in the Timeline, and click the Open clip editor icon from the upper-left area of the track. On the next page, use the Scale slider to reduce the size of the selected clip, and from the preview window in the right, drag to reposition the video to your preferred location on the screen. Click SAVE CHANGES from the bottom of the left pane to confirm the settings. Repeat the process for the second clip in the Timeline to resize and reposition it on the screen. Click FINISH from the upper-right corner, on the next box, enter a name for the video in the available field, click SET, choose your preferred settings on the next page, and click EXPORT from the bottom-right corner to produce the split screen video.
Pros
- Free to use
- Allows multiple videos to be used for split screen
Cons
- Paid subscription is needed to remove watermark from the outputs
FAQs About Split Screen Video Editors
Why you should use split screen effect in video?
There are a couple of reasons you may want to use split screen effect in your video. Some of the most common uses include:
- Showing multiple actions by the same or different characters at the same time, without changing the screen
- Comparing multiple objects or picture quality. This can be done only when the entities in question are placed side-by-side
- Making your video look more professional
- Showing different effects on the same screen
Can I create a split screen video with Windows Movie Maker or Windows 10 Photos app?
No, you cannot. Although these tools enable you to resize the videos, since they don’t allow multi-tracked Timelines, no video clips can be placed one above the other which is an essential part for any split screen video maker to create the effect. However, as discussed above, there are several post-production tools, offline and online, that allow you to make split screen videos easily and without any cost.
Conclusion
Split screen video editor tools are both paid and free. Regardless of the program you use to create the effect, the output files always look more professional and informative. Furthermore, things become way simpler if the split screen video maker has simple UI, is less resource intensive, and is easy to use as it is the case with Wondershare Filmora.
Ollie Mattison
Ollie Mattison is a writer and a lover of all things video.
Follow @Ollie Mattison
Ollie Mattison
Mar 27, 2024• Proven solutions
The effect that comes up after adding two or more screens in a single frame is called split screen, and the tool that enables the users to do this is a split screen video editor. These split screens have significant importance in post-production tasks. That said, the following sections discuss about the tools that enable you to create split screen videos, and explain the process of doing so.
As mentioned above, the split screen effect lets you add two or more screens in a single frame. When multiple activities occur at the same time but at different locations, they all can be shown on one screen by placing their corresponding footages side-by-side or in any other arrangement that the split screen video maker allows.
Best Split Screen Video Editing Software for Windows and Mac [Free & Paid]
After understanding what split screen is, it becomes both obvious and mandatory to know about some of the most used split screen video editor applications, and how they help you in adding the effect to your movies. Following is a list of a couple of such programs:
1. iMovie
A proprietary of Apple, iMovie is available for both iOS and macOS, and is absolutely free of cost. Even though the tool lacks some advanced options for fine editing, it still offers a good platform to those planning their career in post-production industry. With simple UI, it is easy to learn iMovie.
The step-by-step instructions given below explain how to use iMovie to add split screen effect to your videos:
Step 1: Add Footages to iMovie
After importing the footages to the Media Bin in iMovie, drag the first one to the Timeline, and then drag the second one above the first layer.
Step 2: Select the Split Screen Effect
Select the top video layer in the Timeline, and choose Split Screen from the screen type drop-down list at the top.
Step 3: Select Split Screen Preset
Choose a position for the selected layer from the Position drop-down list at the top, and use the Slide slider to adjust the speed of the appearance of the footage.
Pros
- iMovie is free to download and use
- The program is available for both macOS and iOS
Cons
- Allows only up to two videos to be used in split screen
You can get iMovie from here: https://www.apple.com/in/imovie/
2. Wondershare Filmora Editor
One of the most robust apps that is compared with post-production applications like Adobe Premiere Pro and Final Cut Pro X, Wondershare Filmora is also a video editor that helps split screen easily. The software is available for Windows and Mac computers, and provides prompt technical support to its consumers. Although Filmora that packed with more advanced tools is also available, most of the times Filmora serves the purpose pretty well.
You can learn how to add split screen effect in Wondershare Filmora by following the steps given below:
Step 1: Import Footages to Filmora
Launch Wondershare Filmora, click anywhere inside the Media window in the upper-left section, and import all the videos you want to use to create the split screen effect.
Step 2: Choose a Split Screen Preset
Click Split Screen from the standard toolbar at the top, click and drag your preferred preset to the Timeline, and then extend the duration of the effect in the Timeline by dragging its handle.
Step 3: Add Videos to Split Screen
Click ADVANCED from the bottom-right area of the Media pane, on the Advanced Split Screen Edit box, drag the first video from the left pane, and drop it on your preferred section in the right. Repeat the process to add all the other videos to their corresponding sections. Adjust their time of appearance by dragging their thumbnail in the Timeline of the box, and click OK.
Pros
- Wondershare Filmora is lightweight and is less resource intensive
- Allows as many as 6 videos to be added to create split screen effect
- Has 30+ split screen presets
Cons
- A couple of windows are required to be opened while working with split screen
3 . VSDC
VSDC is a free and efficient split screen video maker. In fact, the program is a full-fledged post-production application that can be used to edit the videos to prepare industry-standard clips for presentations, broadcasting, and commercial and private distribution. The best thing about VSDC is, it is absolutely free of cost, and doesn’t add any watermarks to the output files.
The instructions given below explain how to use the split screen feature in VSDC:
Step 1: Add Video Footages
Click Add object from the standard toolbar at the top, click Video, and select and add the first footage to the preview window. Repeat the process to add more video(s) as needed.
Step 2: Add Split Screen Effect
Grab any of the side handles of the video you added last, and drag it inward to reduce its size proportionally. Repeat the process to reduce the size of the other video(s) that is/are now revealed from beneath the one you just adjusted in order to create the split screen effect.
Pros
- Absolutely free to use
- Allows practically unlimited number of footages to be added to create the split screen videos
Cons
- No presets for automatic video positioning are available for split screen effect
You can get VSDC free video editor from here: http://www.videosoftdev.com/
4. Shotcut
A free and opensource editing tool, Shotcut can also be used as a split screen video maker to produce industry-standard movies and documentaries. Shotcut is available for FreeBSD, Windows, Linux, and macOS, and comes in both x64 and x86 variants. Being a free program, Shotcut doesn’t require any activation or registration.
The procedure that follows explains how to use Shortcut as a free split screen video editor:
Step 1: Add Clips to the Timeline
Import the footages to the Shotcut’s media bin, drag one of the clips from the bin to the Timeline at the bottom, and then press Ctrl + I on your keyboard to add more video tracks. You can press this shortcut key for another couple of times depending on the number films you want to use for the split screen effect. Next, drag each film from the bin to their corresponding tracks. Note: Make sure NOT to place all the clips on the same track, and that each of them is on a different, its own, video layer.
Step 2: Adjust the First Video
Select the last video you added to the Timeline (it should be the topmost track), click Filters from above the Timeline, click the + button from the upper-left corner, click Size and Position from the list that appears next, and select the clip’s position from the Preset drop-down list.
Step 3: Adjust Other Videos
Select the second video in the Timeline and repeat the process to set its position, and do the same for all other footages that you added in order to create the split screen effect.
Pros
- Available for FreeBSD, Windows, Linux, and macOS platforms
- If using presets, as many as 4 videos can be added for split screen effect
Cons
- Working with split screen manually may require practice and some calculations to position the clips on the screen correctly
You can get Shotcut from here: https://shotcut.org/
5. Lightworks
Used by the professionals to edit and prepare movies like Pulp Fiction, The Cure, L.A. Confidential, Bruce Almighty, The Wolf of Wall Street, etc., Lightworks is, in true means, a complete and full-fledged post-production application to create industry-standard outputs. The main reason for the app’s wide userbase is that it is a cross-platform software that is available for Linux, Mac, and Windows computers.
To use Lightworks as split screen video maker, you can follow the instructions given below:
Step 1: Add Tracks in Timeline
After importing the clips to Lightworks, leave them in the Media Bin for now, right-click anywhere in the Timeline at the bottom, go to Tracks, click Add multiple, and from the Number to add drop-down list, choose the number of tracks you want to add to the Timeline. Click Add to confirm the changes.
Step 2: Disable Auto Sync
Right-click anywhere in the Timeline, and click to deselect Auto track sync.
Step 3: Add Clips to Timeline
Drag the clips from the Media Bin to the Timeline. Make sure to place each footage on a different track, and that all the tracks are on top of each other. Optionally, right-click the audio that was added along with the clips, and click Remove from the context menu. Use this method to remove all the audios or leave the one you want to have. Note: Removing the audio tracks ensures that they do not overlap during the playback.
Step 4: Enable Split Screen
Click VFX from above the preview window, click the + (Add new effects) icon from the top of the left pane, select the DVE category from the upper-right corner of the left pane, scroll down the left pane to the Split-screen Presets section, and double-click your preferred split screen preset to add the effect to the participating clips.
Pros
- Even the free variant has split screen feature
- A complete post-production tool that doesn’t require any other program for finalizing the things
Cons
- Not many split screen presets are available
Download Lightworks free version from here: https://www.lwks.com/
6. Adobe Premiere Pro
One of the most appreciated and widely used post-production applications for Windows and Mac computers, Adobe Premiere Pro has been professionals’ first choice when it comes to video editing, irrespective of the fact that it has a steep learning curve, and is also a resource intensive software to work with.
The steps below explain how to use Adobe Premiere Pro as a split screen video maker:
Step 1: Add Videos to Timeline
After importing the clips to the Project window, drag each of them to the Timeline, and place them in their separate tracks one above the other.
Step 2: Position and Crop
Select the topmost video track in the Timeline, go to Effect Controls panel from the top of the upper-left pane, and use the Position slider to position the video to your preferred area of the screen. Repeat this process for all the clips in the Timeline you want to add to split screen.
Step 3: Crop the Clips
Search for the Crop effect in the Effects pane present at the lower-left corner, drag and drop the effect on each of the clips in the timeline, and use the Crop slider in the Effect Controls pane to crop the videos as needed. Optionally use the keyframes to add sliding animations to give more professional look to the split screen effect.
Pros
- Most robust and efficient video editing tool
- Allows practically unlimited number of videos to be used for split screen
Cons
- Requires subscription that needs to be renewed regularly
For more details about making split screen with Pr, check How to create a split screen in Premiere Pro
7. Final Cut Pro X
Available only for Mac computers at the time of this writing, Final Cut Pro X or FCPX gives tough competition to Adobe Premiere Pro. Since Apple devices are famous for their speedy processing, professionals any day prefer FCPX over Adobe Premiere Pro if they own a Mac PC running macOS.
You can use FCPX as split screen video maker by following the steps given below:
Step 1: Place Footages in the Timeline
As mentioned earlier, add the clips on top of each other on separate tracks in the Timeline of FCPX.
Step 2: Position and Crop
Select the first clip in the Timeline, from the Transform section of the Video Inspector pane in the right, use the Position slider to move the clip to your preferred side of the screen, and use the sliders from the Crop section to crop the footage to adjust the portion of interest. Repeat the process for the other video tracks as well to get your desired split screen effect in Final Cut Pro X.
Pros
- Offers quick and easy way to add split screen effect
- Allows practically unlimited number of videos to be used for split screen
Cons
- Doesn’t have any particular preset for split screen effect
You may also like: How to create a PIP video with Final Cut Pro X
Best Free Online Split Screen Video Editors
Apart from the desktop programs discussed above, there are a couple of web tools that can be used as split screen video maker online free. Two of the most used ones are introduced below:
1. Kapwing Collage Maker
Although Kapwing offers several other online tools like video resizer, meme generator, slideshow maker, etc., the solution that can be considered split screen video editor is Kapwing Collage Maker. This web app allows you to select a template to get started, and the rest of the process is simple.
The following steps explain how to create a split screen video with Kapwing:
Step 1: Add Clips to Preset
Go to the https://www.kapwing.com/collage link, click to select your preferred split screen preset, click REPLACE on one of the segments of the split screen on the next page, and select and upload the first video. Next, click REPLACE on the other segment(s), and select and upload the other videos as well.
Step 2: Reposition and Publish
Click and drag each of the added clips to reposition them on the screen, use the other tools to crop and adjust the videos as needed, and click Publish from the top-right corner. Note: Optionally you can click Timeline from the top of the preview window, adjust the timings and other settings as needed on the next page, and click Done. After this, you can go ahead and hit Publish to create the split screen effect out of the uploaded videos.
Pros
- Free to use
- Allows as many as 4 videos to create split screen effect
Cons
- Requires you to register and sign in to remove the watermark from the output file
2. WeVideo
Yet another split screen video maker online free solution, WeVideo offers almost desktop program-like experience while creating split screen effects. Even though all the subscription plans that the vendor offers are chargeable, the Education plan can be tried for 30 days for free, post which the teachers are required to pay to continue using the web tool.
The following steps explain how to get split screen effect with WeVideo:
Step 1: Import Videos
Visit https://www.wevideo.com and on the main window, click Video from under the Create a new section at the top, select a layout on the Let’s get started box, and click START EDITING from the bottom right corner. Next, click ADD in the My media window in the upper-left section, click BROWSE TO SELECT on the Import media box, and add the videos you want to use in the split screen effect.
Step 2: Add Clips to Timeline
As explained earlier, drag the videos from the My media pane and drop them in the Timeline. Make sure to place every video in its separate layer, and that all the layers are on top of each other.
Step 3: Create Split Screen Effect
Select any clip in the Timeline, and click the Open clip editor icon from the upper-left area of the track. On the next page, use the Scale slider to reduce the size of the selected clip, and from the preview window in the right, drag to reposition the video to your preferred location on the screen. Click SAVE CHANGES from the bottom of the left pane to confirm the settings. Repeat the process for the second clip in the Timeline to resize and reposition it on the screen. Click FINISH from the upper-right corner, on the next box, enter a name for the video in the available field, click SET, choose your preferred settings on the next page, and click EXPORT from the bottom-right corner to produce the split screen video.
Pros
- Free to use
- Allows multiple videos to be used for split screen
Cons
- Paid subscription is needed to remove watermark from the outputs
FAQs About Split Screen Video Editors
Why you should use split screen effect in video?
There are a couple of reasons you may want to use split screen effect in your video. Some of the most common uses include:
- Showing multiple actions by the same or different characters at the same time, without changing the screen
- Comparing multiple objects or picture quality. This can be done only when the entities in question are placed side-by-side
- Making your video look more professional
- Showing different effects on the same screen
Can I create a split screen video with Windows Movie Maker or Windows 10 Photos app?
No, you cannot. Although these tools enable you to resize the videos, since they don’t allow multi-tracked Timelines, no video clips can be placed one above the other which is an essential part for any split screen video maker to create the effect. However, as discussed above, there are several post-production tools, offline and online, that allow you to make split screen videos easily and without any cost.
Conclusion
Split screen video editor tools are both paid and free. Regardless of the program you use to create the effect, the output files always look more professional and informative. Furthermore, things become way simpler if the split screen video maker has simple UI, is less resource intensive, and is easy to use as it is the case with Wondershare Filmora.
Ollie Mattison
Ollie Mattison is a writer and a lover of all things video.
Follow @Ollie Mattison
Also read:
- New 2024 Approved Seamless Storytelling 3 Transition Techniques for Final Cut Pro
- New Rev Up Your Videos 10 Best Free Speed Changing Apps for iOS and Android for 2024
- New 2024 Approved Top Video Reverse Tools
- New Video Metadata Made Easy 8 Best Mac Editors for 2024
- The Complete Handbook to Converting Audio Files to Wav for 2024
- New Face Blur Mastery A Step-by-Step Guide to Free Video Editing Tools
- Updated Bring Your Vision to Life Best 1080P Video Editing Programs for 2024
- New In 2024, Discover and Fine-Tune Image Scale
- 2024 Approved Easy Video Joiner Not Working? Try These 10 Reliable Alternatives Instead
- Updated In 2024, Movie Magic on Your Device Top 10 Trailer Apps for iPhone and iPad
- New In 2024, The Art of Time Manipulation in Final Cut Pro X
- In 2024, WebM Video Compression Made Easy Best Online Services
- Updated VN Video Editor Pro Review Does It Live Up to the Hype, In 2024
- New Maximize Your Music Potential The Benefits of Reading About Mp3 Conversion
- 2024 Approved The Ultimate Guide to Vignette Apps Free and Paid Options for iOS and Android
- From Widescreen to Vertical The Easy Way to Repurpose Your Videos
- Social Media Design Dimensions What You Need to Know
- 2024 Approved The Ultimate List of Online Vertical Video Editing Software
- Updated Video to GIF Made Easy Top 28 Conversion Tools for 2024
- New In 2024, Discover the Best Free Video Editing Tools for Gamers
- New In 2024, The Ultimate Guide to Converting Videos for VR Headsets
- New In 2024, Insights From the Top-Rated OGG Converters
- Updated 2024 Approved Videopad Video Editor A Detailed Review and Comparison with Other Editors
- 2024 Approved Bring Your Videos to Life Top 5 iPhone Video Editing Apps
- New In 2024, Video Editing Mastery Online Tutorials for Beginners and Pros
- New In 2024, Create Stunning Invites Best Video Maker Apps for iOS and Android
- FCPX Tutorial Roundup The Most Popular Resources
- Updated In 2024, Best Windows Movie Maker Alternatives for Windows
- Updated The Ultimate List of Free Online Glitch Effect Software for 2024
- Updated In 2024, Mac Compatible Green Screen Software Top Picks and Features
- Updated Blur Brilliance The Ultimate Guide to Bokeh Effects Apps
- 2024 Approved Portrait Perfection Crafting Engaging Vertical Experiences
- New 2024 Approved Create Unforgettable Invites 10 Free Online Video Makers
- Effortless Conversion Selecting the Ideal YouTube to MP4 Software
- In 2024, How to Unlock Infinix Phone without Any Data Loss
- In 2024, How to Change/Add Location Filters on Snapchat For your Oppo K11x | Dr.fone
- 7 Solutions to Fix Chrome Crashes or Wont Open on Xiaomi Redmi A2 | Dr.fone
- Thinking About Changing Your Netflix Region Without a VPN On Realme C51? | Dr.fone
- In 2024, Edit and Send Fake Location on Telegram For your Asus ROG Phone 8 Pro in 3 Ways | Dr.fone
- How To Fix Unresponsive Phone Touchscreen Of Samsung Galaxy A34 5G | Dr.fone
- New In 2024, Are You Looking for Ideas for Funny YouTube Videos? Your Search Is Over. Read the Article Below and Get the Most Information Regarding Funny Videos. You Will Also Get to Know About the Best Funny Video Background Music
- The Only Guide Youll Need to Learn About GIF Video Downloader for 2024
- 11 Proven Solutions to Fix Google Play Store Not Working Issue on Lava Yuva 2 | Dr.fone
- Updated How to Make an Animated Explainer Video for 2024
- In 2024, Transfer your Apple iPhone 14 Pro Apps to New iPhone | Dr.fone
- 3 Ways for Android Pokemon Go Spoofing On Realme Note 50 | Dr.fone
- New In 2024, Ultimate Guide on Converting Word to SRT
- How to fix iCloud lock from your Apple iPhone 11 Pro Max and iPad
- How To Unlock A Found Apple iPhone 14 Plus? | Dr.fone
- In 2024, Which Pokémon can Evolve with a Moon Stone For Apple iPhone 7? | Dr.fone
- New Best 6 WMV to GIF Converters for 2024
- Updated Top 5 AI Music Video Examples and Makers to Make Them
- How to Change Netflix Location to Get More Country Version On Tecno Spark 10 Pro | Dr.fone
- In 2024, How to Unlock iCloud Activation Lock and iCloud Account From Apple iPhone 7 Plus?
- 7 Solutions to Fix Chrome Crashes or Wont Open on Meizu 21 Pro | Dr.fone
- New 2024 Approved Do You Want to Remove Unnecessary Sound From Your Video? We Are Providing You the List of the Best Software to Remove Audio From Video for Mac and Apple
- In 2024, Ultimate Guide from iPhone 14 Plus iCloud Activation Lock Bypass
- How Can I Catch the Regional Pokémon without Traveling On Apple iPhone 8 Plus | Dr.fone
- Title: New Cut, Color, and Create Top Video Editing Software for Vloggers
- Author: Charlotte
- Created at : 2024-05-19 10:32:08
- Updated at : 2024-05-20 10:32:08
- Link: https://smart-video-creator.techidaily.com/new-cut-color-and-create-top-video-editing-software-for-vloggers/
- License: This work is licensed under CC BY-NC-SA 4.0.
