

Updated Unleash Your Creativity Top 10 Free Video Editing Software for Chrome OS
Unleash Your Creativity: Top 10 Free Video Editing Software for Chrome OS
Wodershare Filmora
Filmora is one of the most popular video editing software among YouTubers, download and have a try.
Chromebooks are controlled by the ChromeOS working framework, which runs most applications on the web and saves everything on the cloud. Most Chromebooks don’t have incredible assets and components to operate heavy tasks like professional video editing.
However, various video editors for Chromebooks have been developed to carry out these tasks. Some of these video editors for Chromebook are mobile-based apps - supported by iOS and Android, while others are web-based. In this article, we’ll provide you with free editing software for Chromebook that you can use to edit your videos.
Best Free Video Editor for Chromebook in 2022
2. Kapwing
Kapwing is a free online video editor that allows users to record, edit and collaborate on videos with lots of tools. You can use it to create a video from scratch by uploading images, videos, and audio files to its workspace.
Besides that, you can add subtitles to any video easily online with Kapwing, or resize, trim, flip or rotate the video. It also provides some professional video templates for YouTube, Instagram, Ad & Sales, and TikTok, which allows you to create a video quickly and easily. All these features make it a good choice for Chromebook users.
Why you should try Kapwing on Chromebook?
- It allows you to upload media files from Chromebook, or paste a Google Drive, Google Photos, or paste a link from YouTube. What’s more, it also provides some samples to try in case you didn’t want to upload your file.
- You can use it to record, edit and share videos in one place, which saves you much time.
- It provides almost all basic video editing tools that people may need to make a video, such as adding layers, titles, elements, and audio, trimming, cropping, adjusting colors, and changing speed and aspect ratios .
- As free users, you can register and sign in to remove the watermark on videos under 5 minutes.
Pros
- Provides lots of editing tools with an intuitive interface, user-friendly, and simple to use.
- Features easy-to-use settings, entertaining themes, and automatic subtitles. It’s an excellent resource for both new and seasoned video creators.
- Automatically generate subtitles on a video which improves editing efficiency.
Cons
- Glitches in AI auto-generated subtitles.
- Limits to file sizes on the free version (up to 250MB)
- Export to 720p in free version
3. WeVideo
WeVideo is one of the leading online free video editors. It allows the user to create videos anywhere and anytime. You can find this app on App Store, Google Play, and Chrome Web Store. This video editor for Chromebook provides 1 million pieces of stock media, including videos, images, and music tracks.
Using WeVideo online video editor, you can create a square, horizontal, or vertical video for educational, school, business, and family.
Why you should try WeVideo to edit videos on Chromebook?
- It provides more uploading options: besides Google Drive and Dropbox you can import media files from social sites such as Facebook and Instagram;
- You can use it to record narrations, the Chromebook screen and webcam, and edit the recorded video for the remote learning or webinar.
- There are some video backgrounds and music tracks libraries which allows you to use these stock assets directly.
- Collaboration: Students can work together on movies, podcasts, presentations, and more in real-time.
Pros
- Good editing and creation features such as themes, titles, fonts, and green screen options.
- Features user-friendly interfaces and it is simple to use.
- Provides lots of backgrounds, music tracks, sound effects, overlays, and frames.
Cons
- Recording screen and webcam simultaneously is available for paid users only.
- Registered users can only publish a 5-minute video at 480p video resolution with a watermark.
4. YouTube Studio Video Editor 
YouTube Studio Video Editor is a platform that allows users, mainly YouTubers, to create and edit videos. It enables users who are new to video production or do not have access to video editing tools to perform basic editing. It is the best choice for YouTube content creators as you create and edit your videos, manage your presence and interact with your audience with ease. To begin, go to studio.youtube.com, upload a video, and start editing.
Why editing videos with YouTube Studio video editor on Chromebook?
- It provides some basic video editing tools such as trimming part of the video.
- You can use it to blur parts of the video with face blur or custom blur to hide some sensitive information.
- It’s totally free for all YouTube users.
Pros
- It is free and has a vast library of free music tracks and sound effects.
- There will be no watermarks at the video.
- Simple and easy to learn.
- Users have access to all the videos uploaded to YouTube.
Cons
- It has some basic editing features only.
- You can’t merger several video clips into one.
5. Adobe Spark Video
Adobe Spark Video is another exciting free editing software for Chromebook that allows users to add video clips to the library, choose a preferred theme, edit, download, and share to various platforms online. It’s from Adobe, a big name in video editing software.
With this online video maker, you can resize, crop, trim, merger, reverse videos easily, and change the video speed to make a slow motion or fast forward effect.
Main features in editing videos in Chromebook:
- Provides some basic video editing tools such as trim, merge and resize.
- You can add images, music and text to your videos with it.
- Preformatted story templates for different types of videos.
- Offers a 14-day free trial, and a paid version.
Pros
- Simple and intuitive interface
- Accessible templates
- Logos and colors are automatically filled in with branding preset, which saves a lot of work.
- Designs are relevant and up-to-date.
Cons
- Limited options when selecting a color palette for a design.
- The audio feature does not allow continuous recording.
- Watermarks exist in free versions.
6. Clipchamp
Clipchamp is a browser-based video editor that allows the user to explore a multi-layer video editing timeline. This online video editor provides some ready-to-use templates, and a stock media library which includes both footage and audio files. What’s more, it provides a flexible and fast video editing experience in video recording, editing, compressing, and converting.
Main features of using Clipchamp on Chromebooks:
- Multi-layer video editing allows you to create a PIP style video easily
- It allows you to record your webcam and your screen at the same time, and upload from online source or from desktop
- Offers free and paid versions; however, there are watermarks in the free version which you can remove by getting the paid version.
Pros
- Works seamlessly with cloud storage providers such as OneDrive and Dropbox.
- Compatible with Giphy and stock content libraries.
- Features the text to speech tool to generate narration automatically .
- It has an easy-to-understand user interface.
Cons
- Free version is limited to export at 480p resolution with watermark included.
7. Magisto
Magisto is one of the popular free editing apps for Chromebook that transforms your films into original movies. The mobile app analyzes the films and selects the most engaging segments using artificial intelligence.
Main features of using Magisto on Chromebook :
- Multiple themes.
- Edit and rearrange scenes.
- Add logos and captions.
- Premium editing styles.
- Unlimited HD movie downloads
- Offers free and paid versions
Pros:
- Super easy to use, great options for templates
- Provides options to add themes, music, and styles.
- Videos can be hosted, downloaded, and shared all within the same platform.
Cons:
- Only Pro plan offers Full HD recording.
- It does not support Image editing.
- Video analytics are available only in the most expensive plan.
8. Kizoa
Kizoa is a cloud-based platform that allows the user to work on any project anywhere. This free video editor for Chromebook enables the user to submit and edit videos without downloading anything.
Main features of Kizoa:
- Pre-made video templates.
- Access to an integrated royalty-free photo library.
- Integrated music and special effects.
- Various text and transition options.
- Offer free and paid versions.
- No watermarks
Pros
- Animation and Text tools are easy to alter
- Easy to understand the sign-up procedure.
- Users can also change the aspect ratio of videos.
Cons
- Complicated User interface
- Free versions have limited features.
- Full HD recording is only available with the paid version.
9. Kdenlive
Kdenlive is a user-friendly open-source video editor but you can use it on Chromebook computers. It’s a popular non-linear video editor that offers one of the greatest multi-track editing timelines.
Main features of Kdenlive:
- Supports multi-track editing
- Custom effects and transitions.
- Customizable user interface and shortcuts.
- Free for all users.
- No watermarks.
Pros
- Efficient in creating montage videos.
- Animation and Subtitle keyframe features.
- Color correction tools
- Support rotoscoping.
Cons
- Speed effect is low
- Limited output options.
10. Kinemaster
Kinemaster is a free editing app for Android and iOS users, but it can be used on Chromebooks as well. It combines a well-designed interface, a fantastic user experience, and a wide range of powerful tools, which makes video editing is easy and fun.
Main features of KineMaster:
- It supports high resolution video editing, for example, 4K videos at up to 60 frames per second.
- It provides both basic and professional editing tools.
- 8 different blending options to create video with effect in a magic way.
- You can backup the project, or share it to others to co-edit it.
Pros
- The KineMaster Asset Stores provides effects, music, stickers and fonts, which is very useful.
- Features some professional editing tools such as chrome key, blending mode,
- Provides projects which allows you to download and use in your device directly to re-edit further.
Cons:
- Free version will leave a watermark
11. CapCut
CapCut is a free and all-in-one video editing app for Android and iOS devices, but it can also be used on Chromebooks as well just like Kinemaster. It supports a wide range of file types and has all of the standard editing tools.
Main features of CapCut:
- It provides some video editing tools such as split, change speed, reverse and rotate.
- It has a tremendous music library which includes top music hits and sound effect.
- It allows you to add trending stickers, texts and titles without any efforts.
- It’s free for all users with a removable watermark, which can be removed easily.
Pros
- Convenient and easy to use.
- Impressive music and sound effects library
Cons:
- Only one video and audio track
Conclusion
It’s essential every user becomes familiar with the various free video editing software for Chromebook because if your preferred video editor for Chromebook is unable to meet your needs, or if Adobe video editing software is too difficult to master, you can try another alternate solution and get the most out of it.
Free Games Galore: Top 10 Download Sites for PC, Android, and Tablet
Top 10 Best Free Game Download Sites [PC & Android][2024]

Ollie Mattison
Mar 27, 2024• Proven solutions


We all know and firmly believe that games are an integral part of our life. But the world has progressed, and we yearn to achieve real-life experiences through virtual reality instead of experiencing the actual thing. Online games are not only mentally stimulating, but they are also very addictive. Not everyone wants to pay to play games for a couple of hours, so here is a list of top free game downloading sites. You can download full versions of your favorite games for free.
Recommended Video Recorder & Editor for Gameplay: Filmora
If you want to edit a video recorded from games with more effects and templates, we recommend using Filmora . It is an easy-to-use video editor. It offers various title templates. You can also use it to record game videos. Just download it to have a try. Don’t know how to make a video? Visit the Wondershare Video Community and get some inspiration in video creation.
Part 1: Best Free PC Game Download Sites
1 Acid Play
Platforms: OS X and Windows

Key Features:
- Huge gaming library
The acid play has a gigantic collection of games of various types. The games at acid play have been categorized into action, arcade, board games, RPG, card games, puzzles, driving games, simulation, etc.
- Custom Search
The customized search helps you find the exact game you are looking for. It saves time since you cannot browse through thousands of games.
- Ratings
If you are new to this site or looking for a new game to play, you can choose only without trying every game to decide the best one. Just check the ratings provided by other players, and it will solve your problem. You can also rate a game according to your liking.
Pros:
- The games are easily downloadable and free.
- There is a large variety of games available to play.
Cons:
- The site is not updated, and no new games are introduced.
2 Origin Games
Platforms: OS X and Windows
Origin games are another best-known digital distribution platform for a free online gaming experience. It contains a fairly large library of premium games, but origin games provide links for free downloads for a limited time.
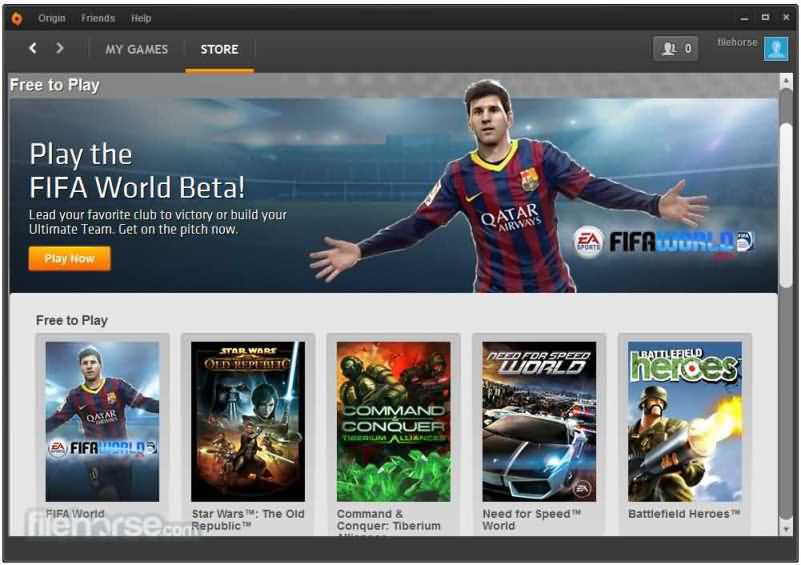
Key Features:
- Social Features
Origin provides its users with many social features like profile management, networking with friends through chatting, and video streaming via TwitchTV. You can also share your game library and community integration through social media and networking sites like Facebook, Xbox Live, PlayStation Network, and Nintendo Network.
- Variety in games
It provides various games, from PC games to Fifa and even classic games like Plant Vs. Zombies are also available.
- On-the-house games
The on-the-house features allow the customers to download a free trial of a premium game.
Pros:
- It provides great game streaming features.
- is developed by a renowned and successful company so that it can be trusted.
- The ‘on-the-house specials’ are appreciated by many gamers, allowing them to play a paid game for free now and then.
Cons:
- It has a lot of updates and takes an unreasonable amount of time to install and update the software.
- Customers have complained that they provide expired discount codes.
- Customer service needs to be improved as it is not very responsive.
3 AllGamesAtoZ
Platforms: OS X and Windows
If you want the best full version of a game for free, then AllGamesAtoZ is where you should go.
Key Features:
- The website is full of addictive games from different genres like action, arcade, shooting, role-playing, adventure, racing, simulation, etc.
- Multiple links for downloading a single game are available.
- A customized search bar is available so that you can locate the exact game you are looking for without having to browse through thousands of games.
- The games on AllGamesAtoZ are available on Windows, Linux, and Mac.
- A forum for game reviews is provided, so it is easier to decide which game you want to download without trying them all.
Pros:
- The gaming library is enormous.
- The game reviews make it easier to make a decision and save time.
- The website does not transfer viruses and is entirely safe from scams.
Cons:
- The downloading process is quite long.
- The website is not updated with new games.
4 Mega Games
Platforms: OS X and Windows
It is another highly recommended online gaming site. It not only provides PC games for free but also offers 3D PlayStation games to be downloaded on your PC without any charge.

Key Features:
- Search and download
Mega games allow a search and download option for every game published on their site.
- PlayStation games
It has provided its customers with not only PC games but also 3D PlayStation games that can be downloaded for free.
- Cheat codes
Apart from all the standard gaming features, mega games also provide free cheat codes for the games.
Pros:
- The games are easily downloaded.
- The games have variety.
Cons:
- The website stops working after a while, and the download gets interrupted
5 Caiman.us
Platforms: OS X and Windows
It is another digital distribution platform for free online gaming. After the death of the site’s developer, the site has gone offline.

Key Features:
- It has a vast collection of games and over twenty free games categories.
- 2D and 3D gaming experiences are also provided.
- A customized search is available to make it easier for players to find the game they are looking for.
Pros:
- There is a vast collection of free games to download and play.
Cons:
- The site is not well organized and confusing.
- The search bar is at the very bottom of the page, so a person might find it hard to locate.
- Since the site has gone offline, the games are not updated, so there are no new games.
Part 2: Best Android Game Download Sites to Download Free Android Games
Android is growing very fast; now, almost everyone uses it and prefers it over any other software. Here are the best websites from where you can download free android apps:
1 Google Play
Google Play is the most common website to download free android apps. It is free, it is fast, and it is efficient. You can not only use this from your android mobile but also operate it and download apps using your laptop.

Key Features:
- The apps are easily downloaded, depending upon your internet connection.
- The purchase methods are through credit cards, and the procedure is straightforward.
- The platform allows everyone and anyone to sell their games.
- Sign up through your Google account is necessary to access these features.
Pros:
- It is easily accessible.
- It is pre-installed on all android supported devices.
- It contains a massive collection of unique apps, from books to music, workout, and games of various types.
Cons:
- Since everyone and anyone can access it without paying any registration fee, it is exposed to scams and harassment.
- A few games do not function and keep crashing.
2 Android Games Room

It contains thousands of free gaming apps in different categories like action, arcade, adventure, simulation, song games, and puzzle games. The download links are readily available; you can even access this site from your mobile by scanning a QR code. This site is a pretty good platform to download free games but has certain flaws. It does not allow a multiplayer gaming experience, and no customer services are provided.
3 Android Apps
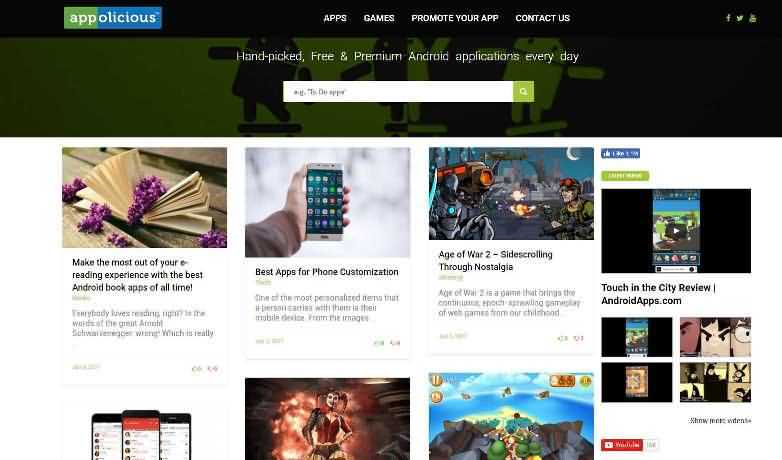
It is another platform to download android apps for free. This site is pretty good since it updates games that developers handpick almost daily. You can also promote your app using the ‘promote your app’ feature. The site has a lot of updates and takes an unreasonable amount of time to install and update the software. Furthermore, you can say that they do not have a customer service function because nobody ever responds to the customer’s queries.
4 1 Mobile
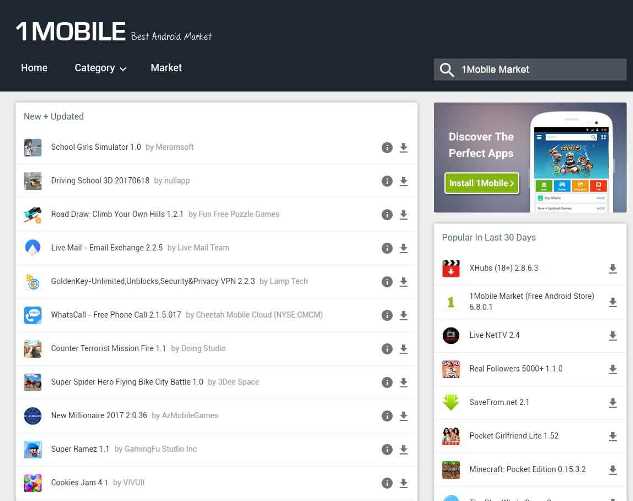
One mobile is a free android store. It provides its users the easiest way to locate, download and manage free apps. 1 Mobile has over eighty (80) million apps. One mobile has just been recently updated, has a brand new interface design, and operates much smoother. The content is more prosperous, smoother, and a thousand times better than before the latest update. All the apps and games are 100% free forever without hidden charges. It supports various languages like English, Korean, Chinese, French, Spanish, Japanese, and Portugal.
5 Approx
It provides the best free apps not only for android but OS as well. You can download it on your phone by scanning a QR code. This software has been functioning for the past six years and is free from viruses or malware.
To furnish your gameplay videos, Filmora also provides some cool effects, transitions, and elements, such as camera shake chaos effects, distortion effects, 3D change, speed blur transitions, and more. Moreover, you can always find some specially designed gaming effects in the Filmstock effects store.
Ollie Mattison
Ollie Mattison is a writer and a lover of all things video.
Follow @Ollie Mattison
Ollie Mattison
Mar 27, 2024• Proven solutions
We all know and firmly believe that games are an integral part of our life. But the world has progressed, and we yearn to achieve real-life experiences through virtual reality instead of experiencing the actual thing. Online games are not only mentally stimulating, but they are also very addictive. Not everyone wants to pay to play games for a couple of hours, so here is a list of top free game downloading sites. You can download full versions of your favorite games for free.
Recommended Video Recorder & Editor for Gameplay: Filmora
If you want to edit a video recorded from games with more effects and templates, we recommend using Filmora . It is an easy-to-use video editor. It offers various title templates. You can also use it to record game videos. Just download it to have a try. Don’t know how to make a video? Visit the Wondershare Video Community and get some inspiration in video creation.
Part 1: Best Free PC Game Download Sites
1 Acid Play
Platforms: OS X and Windows
Key Features:
- Huge gaming library
The acid play has a gigantic collection of games of various types. The games at acid play have been categorized into action, arcade, board games, RPG, card games, puzzles, driving games, simulation, etc.
- Custom Search
The customized search helps you find the exact game you are looking for. It saves time since you cannot browse through thousands of games.
- Ratings
If you are new to this site or looking for a new game to play, you can choose only without trying every game to decide the best one. Just check the ratings provided by other players, and it will solve your problem. You can also rate a game according to your liking.
Pros:
- The games are easily downloadable and free.
- There is a large variety of games available to play.
Cons:
- The site is not updated, and no new games are introduced.
2 Origin Games
Platforms: OS X and Windows
Origin games are another best-known digital distribution platform for a free online gaming experience. It contains a fairly large library of premium games, but origin games provide links for free downloads for a limited time.
Key Features:
- Social Features
Origin provides its users with many social features like profile management, networking with friends through chatting, and video streaming via TwitchTV. You can also share your game library and community integration through social media and networking sites like Facebook, Xbox Live, PlayStation Network, and Nintendo Network.
- Variety in games
It provides various games, from PC games to Fifa and even classic games like Plant Vs. Zombies are also available.
- On-the-house games
The on-the-house features allow the customers to download a free trial of a premium game.
Pros:
- It provides great game streaming features.
- is developed by a renowned and successful company so that it can be trusted.
- The ‘on-the-house specials’ are appreciated by many gamers, allowing them to play a paid game for free now and then.
Cons:
- It has a lot of updates and takes an unreasonable amount of time to install and update the software.
- Customers have complained that they provide expired discount codes.
- Customer service needs to be improved as it is not very responsive.
3 AllGamesAtoZ
Platforms: OS X and Windows
If you want the best full version of a game for free, then AllGamesAtoZ is where you should go.
Key Features:
- The website is full of addictive games from different genres like action, arcade, shooting, role-playing, adventure, racing, simulation, etc.
- Multiple links for downloading a single game are available.
- A customized search bar is available so that you can locate the exact game you are looking for without having to browse through thousands of games.
- The games on AllGamesAtoZ are available on Windows, Linux, and Mac.
- A forum for game reviews is provided, so it is easier to decide which game you want to download without trying them all.
Pros:
- The gaming library is enormous.
- The game reviews make it easier to make a decision and save time.
- The website does not transfer viruses and is entirely safe from scams.
Cons:
- The downloading process is quite long.
- The website is not updated with new games.
4 Mega Games
Platforms: OS X and Windows
It is another highly recommended online gaming site. It not only provides PC games for free but also offers 3D PlayStation games to be downloaded on your PC without any charge.
Key Features:
- Search and download
Mega games allow a search and download option for every game published on their site.
- PlayStation games
It has provided its customers with not only PC games but also 3D PlayStation games that can be downloaded for free.
- Cheat codes
Apart from all the standard gaming features, mega games also provide free cheat codes for the games.
Pros:
- The games are easily downloaded.
- The games have variety.
Cons:
- The website stops working after a while, and the download gets interrupted
5 Caiman.us
Platforms: OS X and Windows
It is another digital distribution platform for free online gaming. After the death of the site’s developer, the site has gone offline.
Key Features:
- It has a vast collection of games and over twenty free games categories.
- 2D and 3D gaming experiences are also provided.
- A customized search is available to make it easier for players to find the game they are looking for.
Pros:
- There is a vast collection of free games to download and play.
Cons:
- The site is not well organized and confusing.
- The search bar is at the very bottom of the page, so a person might find it hard to locate.
- Since the site has gone offline, the games are not updated, so there are no new games.
Part 2: Best Android Game Download Sites to Download Free Android Games
Android is growing very fast; now, almost everyone uses it and prefers it over any other software. Here are the best websites from where you can download free android apps:
1 Google Play
Google Play is the most common website to download free android apps. It is free, it is fast, and it is efficient. You can not only use this from your android mobile but also operate it and download apps using your laptop.
Key Features:
- The apps are easily downloaded, depending upon your internet connection.
- The purchase methods are through credit cards, and the procedure is straightforward.
- The platform allows everyone and anyone to sell their games.
- Sign up through your Google account is necessary to access these features.
Pros:
- It is easily accessible.
- It is pre-installed on all android supported devices.
- It contains a massive collection of unique apps, from books to music, workout, and games of various types.
Cons:
- Since everyone and anyone can access it without paying any registration fee, it is exposed to scams and harassment.
- A few games do not function and keep crashing.
2 Android Games Room
It contains thousands of free gaming apps in different categories like action, arcade, adventure, simulation, song games, and puzzle games. The download links are readily available; you can even access this site from your mobile by scanning a QR code. This site is a pretty good platform to download free games but has certain flaws. It does not allow a multiplayer gaming experience, and no customer services are provided.
3 Android Apps
It is another platform to download android apps for free. This site is pretty good since it updates games that developers handpick almost daily. You can also promote your app using the ‘promote your app’ feature. The site has a lot of updates and takes an unreasonable amount of time to install and update the software. Furthermore, you can say that they do not have a customer service function because nobody ever responds to the customer’s queries.
4 1 Mobile
One mobile is a free android store. It provides its users the easiest way to locate, download and manage free apps. 1 Mobile has over eighty (80) million apps. One mobile has just been recently updated, has a brand new interface design, and operates much smoother. The content is more prosperous, smoother, and a thousand times better than before the latest update. All the apps and games are 100% free forever without hidden charges. It supports various languages like English, Korean, Chinese, French, Spanish, Japanese, and Portugal.
5 Approx
It provides the best free apps not only for android but OS as well. You can download it on your phone by scanning a QR code. This software has been functioning for the past six years and is free from viruses or malware.
To furnish your gameplay videos, Filmora also provides some cool effects, transitions, and elements, such as camera shake chaos effects, distortion effects, 3D change, speed blur transitions, and more. Moreover, you can always find some specially designed gaming effects in the Filmstock effects store.
Ollie Mattison
Ollie Mattison is a writer and a lover of all things video.
Follow @Ollie Mattison
Reaction Video Mastery: The Top Tools and Software
Top 5 Reaction Video Makers
Ollie Mattison
Mar 27, 2024• Proven solutions
A reaction video can be any type of video in which the host reacts to ideas and opinions that are expressed in another video. Reacting to a video that attracts a lot of attention on the Internet might put you in the middle of the debate the video you’re commenting on is covering.
Reaction videos boil down to expressing your attitude about the topic you feel strongly about, but they must also be entertaining to watch. That is why you are going to need software that enables you to capture both your screen and webcam footage, as the audience needs to see the host and what he or she is reacting to. So, in this article we are going to take you through the top 5 reaction video makers you can use on PC and Mac computers.
Top 5 Reaction Video Makers for Windows and Mac
It is worth noting that besides software that enables you to create reaction videos, you are going to need an external microphone , and in some cases lighting and other equipment that is commonly used for the production of YouTube videos . Let’s take a look at what the top 5 reaction video makers have to offer.
1. Filmora
Price: Freemium
Compatibility: Windows, Mac
Filmora grants you access to all the tools you are going to need while creating a reaction video Its screen recorder tool enables you to capture your computer’s screen and the webcam footage simultaneously so that you can record the video to which you are recording as well as your reaction at the same time. Watch the video below to explore how Daniel record and make a reaction video with Filmora.
Optionally, you can capture your computer’s screen and your reaction separately and then use Filmora to sync these two video files. The first thing you will have to do if you decide to use this method of creating a reaction video is to create a project and import all footage into it. You should then place the footage on two separate video tracks on the timeline, and readjust the size of each video in the preview window.

Filmora lets you remove the background of the video clips you don’t want to include in the final cut with the human segmentation effect under AI Portrait. This feature allows you to separate people from the video background , and replace them with a new one. And then you can blend the reaction video with the original one fluently. After you complete the video editing process you can export your project to your YouTube or Vimeo account directly from Filmora.

There are several ways to create a reaction video in Filmora, you can read this article to find out the details: How to Make a Reaction Video with Filmora?
Pros
- Excellent screen recording options
- Equipped with a broad range of effects, text overlays, and transitions
- Supports all commonly used video file formats
- Videos can be exported in resolutions up to 4K
Cons
- All reaction videos created with the free version of Filmora are watermarked.
- Requires at least a basic set of video editing skills
2. VSDC
Price: Free
Compatibility: Windows
In order to start making a reaction video with VSDC, you must first record your reaction to the video and make sure that the video you’re reacting to is saved on your computer’s hard drive. You should then create a new project in VSDC, specify the resolution for the entire project and proceed to import all media files you’re going to need during the video editing process, by selecting the Video option from the Add Object menu.
Place the files on the editor’s timeline so that they are positioned one above the other. The reaction video should occupy the full screen, and you can use the preview window to adjust the size of the reaction video. You should than readjust the on-screen position and the size of the video you’re reacting to, before proceeding to preview the resulting video. In case you like the result you should click on the Export button and choose the output file format and the destination to which the reaction video will be exported.
Pros
- No previous video editing experience needed
- Offers a rich selection of transitions and visual effects
- Videos can be exported directly to YouTube from VSDC in resolutions up to 4K
- Offers desktop capturing tools
Cons
- Lacks advanced video editing tools
- Outdated interface design
3. iMovie
Price: Free
Compatibility: macOS, iPhone, iPad
The process of making a reaction video in iMovie isn’t much different from the process of making any other type of video. Before you start working on your new reaction video, you need to make sure that you have all the media files you want you to use in your project. You can then simply import them into iMovie, and place footage of yourself reacting to a video to the timeline. Afterward, you should place the actual video to which you are reacting above or below the video file that contains the footage of your reaction, depending on which video clip you want to use as a background video.
However, the overlaid video is not going to be automatically visible in the preview screen, so you should just click on the Video Overlay Settings and pick the Picture in Picture option. As soon as you select this option the overlay video will become visible in the preview window, where you can adjust its size and position. When ready, you should export your reaction video and upload it to your channel.
Pros
- The quick and easy video editing process
- Available to all Mac users for free
- Excellent for inexperienced video editors
- A rich selection of visual effects
Cons
- No screen capturing tools
- Audio editing options could be better
4. OBS
Price: Free
Compatibility: macOS, Windows, Linux
OBS is a screencasting software that enables you to create live streams or record all actions you perform on your computer’s screen. After you launch OBS, you should select the For Recording option, and this reaction video maker will optimize the project settings automatically. Once the OBS’ main window loads, you just have to specify the sources from which you want to record the footage. Simply right-click anywhere within the Sources tab, select the Add option and choose the Display Capture setting from the submenu.
You can then repeat the same process to select Audio Output Capture option, in order to record the audio from the video you’re reacting to. Afterward, you should head over to the Add menu once more and add the Video Capture Device to the Sources tab. Optionally, you can readjust the size of each video source in the Preview Window, and hit the Start Recording button.
Pros
- Free for PC and Mac users
- Enables users to specify the format of the output video
- Captures videos in HD resolution
- Excellent audio recording features
Cons
- OBS crashes easily
- Not aimed at inexperienced users
5. VegasPro 18
Price: Freemium
Compatibility: Windows
Both the video of your reaction and the video to which you are reacting must be recorded before you start editing them in Sony Vegas Pro. Making a reaction video with this video editing software is a relatively easy task that only requires you to position your footage correctly on the timeline.
The video containing your reaction should be below the video you are commenting on so that the second video can be treated as an overlay. Click on the Event Pan/Crop button and readjust the size and the on-screen location of the video you’re reacting to. When done, you can proceed to sync both videos so that your reactions correspond with the events in the other video. Don’t forget to preview the reaction video you’ve created before exporting it.
Pros
- Offers professional video editing tools
- Grants users full control over the footage
- Intuitive and modernly designed interface
- Supports a broad range of output file formats
Cons
- Aimed only at professional video editors
- Capturing a computer screen with Sony Vegas Pro is not possible
Conclusion
In order to gather thousands of views, comments, and likes, every detail in your reaction videos needs to be perfect. Video reaction makers we featured in this article enable you to have complete creative control over the process of making a reaction video.
Among all these above, if you want to go for a free one, I’ll say you should go for OBS.
If you want to go for a paid one but don’t want to pay too much for it, I’ll suggest you go for Filmora, which provides you several ways to create a reaction video easily on Windows and Mac.
Ollie Mattison
Ollie Mattison is a writer and a lover of all things video.
Follow @Ollie Mattison
Ollie Mattison
Mar 27, 2024• Proven solutions
A reaction video can be any type of video in which the host reacts to ideas and opinions that are expressed in another video. Reacting to a video that attracts a lot of attention on the Internet might put you in the middle of the debate the video you’re commenting on is covering.
Reaction videos boil down to expressing your attitude about the topic you feel strongly about, but they must also be entertaining to watch. That is why you are going to need software that enables you to capture both your screen and webcam footage, as the audience needs to see the host and what he or she is reacting to. So, in this article we are going to take you through the top 5 reaction video makers you can use on PC and Mac computers.
Top 5 Reaction Video Makers for Windows and Mac
It is worth noting that besides software that enables you to create reaction videos, you are going to need an external microphone , and in some cases lighting and other equipment that is commonly used for the production of YouTube videos . Let’s take a look at what the top 5 reaction video makers have to offer.
1. Filmora
Price: Freemium
Compatibility: Windows, Mac
Filmora grants you access to all the tools you are going to need while creating a reaction video Its screen recorder tool enables you to capture your computer’s screen and the webcam footage simultaneously so that you can record the video to which you are recording as well as your reaction at the same time. Watch the video below to explore how Daniel record and make a reaction video with Filmora.
Optionally, you can capture your computer’s screen and your reaction separately and then use Filmora to sync these two video files. The first thing you will have to do if you decide to use this method of creating a reaction video is to create a project and import all footage into it. You should then place the footage on two separate video tracks on the timeline, and readjust the size of each video in the preview window.
Filmora lets you remove the background of the video clips you don’t want to include in the final cut with the human segmentation effect under AI Portrait. This feature allows you to separate people from the video background , and replace them with a new one. And then you can blend the reaction video with the original one fluently. After you complete the video editing process you can export your project to your YouTube or Vimeo account directly from Filmora.
There are several ways to create a reaction video in Filmora, you can read this article to find out the details: How to Make a Reaction Video with Filmora?
Pros
- Excellent screen recording options
- Equipped with a broad range of effects, text overlays, and transitions
- Supports all commonly used video file formats
- Videos can be exported in resolutions up to 4K
Cons
- All reaction videos created with the free version of Filmora are watermarked.
- Requires at least a basic set of video editing skills
2. VSDC
Price: Free
Compatibility: Windows
In order to start making a reaction video with VSDC, you must first record your reaction to the video and make sure that the video you’re reacting to is saved on your computer’s hard drive. You should then create a new project in VSDC, specify the resolution for the entire project and proceed to import all media files you’re going to need during the video editing process, by selecting the Video option from the Add Object menu.
Place the files on the editor’s timeline so that they are positioned one above the other. The reaction video should occupy the full screen, and you can use the preview window to adjust the size of the reaction video. You should than readjust the on-screen position and the size of the video you’re reacting to, before proceeding to preview the resulting video. In case you like the result you should click on the Export button and choose the output file format and the destination to which the reaction video will be exported.
Pros
- No previous video editing experience needed
- Offers a rich selection of transitions and visual effects
- Videos can be exported directly to YouTube from VSDC in resolutions up to 4K
- Offers desktop capturing tools
Cons
- Lacks advanced video editing tools
- Outdated interface design
3. iMovie
Price: Free
Compatibility: macOS, iPhone, iPad
The process of making a reaction video in iMovie isn’t much different from the process of making any other type of video. Before you start working on your new reaction video, you need to make sure that you have all the media files you want you to use in your project. You can then simply import them into iMovie, and place footage of yourself reacting to a video to the timeline. Afterward, you should place the actual video to which you are reacting above or below the video file that contains the footage of your reaction, depending on which video clip you want to use as a background video.
However, the overlaid video is not going to be automatically visible in the preview screen, so you should just click on the Video Overlay Settings and pick the Picture in Picture option. As soon as you select this option the overlay video will become visible in the preview window, where you can adjust its size and position. When ready, you should export your reaction video and upload it to your channel.
Pros
- The quick and easy video editing process
- Available to all Mac users for free
- Excellent for inexperienced video editors
- A rich selection of visual effects
Cons
- No screen capturing tools
- Audio editing options could be better
4. OBS
Price: Free
Compatibility: macOS, Windows, Linux
OBS is a screencasting software that enables you to create live streams or record all actions you perform on your computer’s screen. After you launch OBS, you should select the For Recording option, and this reaction video maker will optimize the project settings automatically. Once the OBS’ main window loads, you just have to specify the sources from which you want to record the footage. Simply right-click anywhere within the Sources tab, select the Add option and choose the Display Capture setting from the submenu.
You can then repeat the same process to select Audio Output Capture option, in order to record the audio from the video you’re reacting to. Afterward, you should head over to the Add menu once more and add the Video Capture Device to the Sources tab. Optionally, you can readjust the size of each video source in the Preview Window, and hit the Start Recording button.
Pros
- Free for PC and Mac users
- Enables users to specify the format of the output video
- Captures videos in HD resolution
- Excellent audio recording features
Cons
- OBS crashes easily
- Not aimed at inexperienced users
5. VegasPro 18
Price: Freemium
Compatibility: Windows
Both the video of your reaction and the video to which you are reacting must be recorded before you start editing them in Sony Vegas Pro. Making a reaction video with this video editing software is a relatively easy task that only requires you to position your footage correctly on the timeline.
The video containing your reaction should be below the video you are commenting on so that the second video can be treated as an overlay. Click on the Event Pan/Crop button and readjust the size and the on-screen location of the video you’re reacting to. When done, you can proceed to sync both videos so that your reactions correspond with the events in the other video. Don’t forget to preview the reaction video you’ve created before exporting it.
Pros
- Offers professional video editing tools
- Grants users full control over the footage
- Intuitive and modernly designed interface
- Supports a broad range of output file formats
Cons
- Aimed only at professional video editors
- Capturing a computer screen with Sony Vegas Pro is not possible
Conclusion
In order to gather thousands of views, comments, and likes, every detail in your reaction videos needs to be perfect. Video reaction makers we featured in this article enable you to have complete creative control over the process of making a reaction video.
Among all these above, if you want to go for a free one, I’ll say you should go for OBS.
If you want to go for a paid one but don’t want to pay too much for it, I’ll suggest you go for Filmora, which provides you several ways to create a reaction video easily on Windows and Mac.
Ollie Mattison
Ollie Mattison is a writer and a lover of all things video.
Follow @Ollie Mattison
Shrink Your Videos: 5 Top-Rated Free Compression Apps for iOS
5 Best Free Video Compressor Apps That Reduce Video Sizes on iPhone and iPad
Ollie Mattison
Mar 27, 2024• Proven solutions
Capturing full HD or 4K footage with your iPad or iPhone is a straightforward process, but sharing that footage through messaging apps or social media can be a bit more complicated.
The size of video files recorded in 4K resolution is often measured in gigabytes and you have to compress them in order to share them with your friends.
We’ve selected the five best free video compressor apps for iPhones and iPads that will enable you to shrink your videos in minutes and post them on social networks or send them through email and messaging apps.
So, let’s take a look at how you can reduce the size of your videos using free video compressing apps for iOS.
5 Best Video Compressor Apps for iOS that Reduce Video Size
Shrinking a video’s size is easy, even after you record a video clip. Each of the free video compressor apps we included in our top five list allows you to reduce a video’s size quickly before sharing it on social media or sending it to your friends. Read on if you would like to find out more about the best free video compressor apps for iPhones and iPads.
1. Compress Videos & Resize Videos
Price: Free, but contains in-app purchases
With this free video compressor app, you won’t have to worry about the quality of the videos you’re resizing, because it preserves the video’s quality even when videos are shrunk by more than 80%. In this manner, the Compress Videos & Resize Video app can help you free up space on your iPhone or iPad.

How to reduce video size with Compress Videos & Resize Videos?
To start reducing a video’s size you just have to open the app and select all videos, recently added or any other available categories.
After tapping on a particular category, you can proceed to select one or more video clips you would like to reduce. The app is going to display the videos that are stored on your phone or in your iCloud Photo Library and show you the exact size of each video.
Once you’ve selected the videos you’d like to shrink, you should click on the Next button and proceed to the Compression Settings window. Afterward, you can simply change the Frame Rate and Video Dimensions settings by dragging the sliders to the left or to the right. When ready, tap on the Compress button and the Compress Videos & Resize Video app will shrink your videos and save to the Compressed Videos album.
2. Video Compress – Shrink Vids
Price: Free, but offers in-app purchases

You can reduce the size of videos recorded in 4K, Full HD or HD resolution in just a few simple steps. The app lets you resize one or more videos at the same time and choose the resolution of the output video. The only downside is that you must make in-app purchases to remove ads or unlock access to all of the app’s features.
How to compress video with Video Compress – Shrink Vids?
Once you installed this free compressor app for iOS on your device, you should launch it and tap on the + icon to import the video you want to compress into the app. Grant the app permission to access the Photos app and head over to the folder in which the videos you want shrink are stored.
After selecting the videos, you should tap on the Choose Preset button and select one of the available presets. Optionally, you can adjust the bitrate or preview how the videos look before and after the compression. Tap on the Continue button when you are ready and then select the destination album to which the resized videos are going to be exported. After the video compression process is completed the app will ask you if you want to delete the original video files and only keep their resized versions.
3. Video Slimmer App
Price: Free or $2,99 for Pro

Video Slimmer is much more than a simple video compressor app for iOS, as it lets its users trim, rotate or merge videos. The app’s batch processing capabilities are remarkable since you can export resized videos from Video Slimmer quickly. You can free up to 80% of your iPhone’s or iPad’s storage space by compressing videos you store on your iOS-based device.
How to compress videos with Video Slimmer App?
Shrinking multiple videos with Video Slimmer won’t take too much of your time, although the duration of the compression process depends on the size of the video clips. Click on the + icon after you launch the app, in order to select the videos from the camera roll.
Tap on the Gear icon located in the lower right corner of the screen if you would like to adjust the Video Quality and Video Size settings. In addition, the Video Slimmer App lets you choose if you want to delete the original videos from your device after the compression or add a copy of the video to the Photo Library.
Head back to the app’s main menu and tap on the Slim Now button to start compressing the videos you selected. After reducing the size of your videos you can share them on social media or send them to your friends much faster than the original high-resolution files.
4. Video Compress – Reduce Movie Size – Shrink Video
Price: Free

If you are looking for a simple and efficient free video compressor app for iPhone and iPad then Video Compress may be the right choice for you. Its interface is intuitive so you won’t need much time to get used to it even if you never compressed a video before.
How to compress video with it?
All you have to do to start compressing a video is to launch the app and select the videos you’d like to shrink from the Camera Roll. Afterward, you will be taken to the Compress window where you can see the Target Size and the percentage to which the video is going to be compressed. The only limiting factor are the output file formats because the app only allows you to save shrunk videos as MPEG-4 and QuickTime files.
All the compressed videos can be easily shared on social media or sent through email and messaging apps directly from Video Compress.
5. Video Compressor – Shrink Videos
Price: Free, but offers in-app purchases

Video Compressor app makes shrinking videos look easy because it offers a number of presets that let you choose how much you want to reduce the size of a video. Besides saving time this free video compressor for iPhones and iPads can create more storage space on your device.
How to shrink video size with this app?
Identifying large video files on your camera roll won’t take too much time since the app displays the size of all videos. Besides compressing videos, the Video Compressor app also lets you shrink photos you store on your iPhone or iPad.
Select a video you want to compress, by simply tapping on it, and then choose a preset resolution to which that video clip is going to be compressed. Optionally, you can change the Bitrate before tapping on the Compression button.
After the video compression process is over you can organize the shrunk videos effortlessly, however, you must purchase the Pro version of the app if you want to have access to all of the tools Video Compressor has to offer.
Is there any iPhone free video compressor with editor built in?
Editing a video before you share it on social media can help you get rid of unwanted parts and make the colors more vivid. iMovie is an excellent choice if you would like to trim a video or add filters and effects to it and reduce the video size. What’s more, you can use this iOS-native video editing app to reduce the size of the original video files.
Once you complete all video editing tasks you should exit the app’s Edit window by tapping done and then tap on the Share/Save Video option. iMovie offers a variety of output video file formats, so you can choose if you want to save your video in 360p, 540p, HD or 4K resolution. After you pick a preferred output resolution the iMovie is going to add the video to the Photo Library.
Bonus: How to reduce video size on iPhone & iPad when recording?
All recent iPhone and iPad models support recording in a broad spectrum of video resolutions. If you would like to decrease the resolution at which your device captures videos you should head to the Settings menu and tap on the Camera option.

Select Record Video from the Camera menu and then choose the new resolution for your videos. The default resolution is set at 1080p at 30fps, but you can easily reduce it to 720p at 30fps if you want to create videos that don’t take too much storage space.
The Record Slo-Mo option lets you choose between 720p HD at 120fps or 720p HD at 240 fps which allows you to preserve storage space while recording high-quality slow-motion videos.
Conclusion
Videos recorded with iPhones and iPads can be huge in size, and sending them or uploading them to the Internet can be a time-consuming process. Installing a free video compressing app for iOS can be a good idea if you record videos with your iPhone or iPad often. Each of the free video compressor apps we included in this article can shrink videos quickly and efficiently. Which free video compressor app are you going to choose? Leave a comment and let us know.
| Supported iOS | Supported format | User rating | |
|---|---|---|---|
| Video Slimmer | iOS 8.0 or later | MP4, MOV, AVI… | 3.7 |
| Video Compress - Shrink Vids | iOS 10.3 or later | MP4, MOV, AVI | 4.6 |
| iMovie | iOS 10.3 or later | MP4, MOV, AVI, QuickTime… | 3.9 |
| Compress Videos & Resize Video | iOS 8.0 or later | MPEG-4 and QuickTime | 4.6 |
| Video Compressor-Shrink videos | iOS 8.0 or later | MP4, MOV, AVI | 4.7 |
| Video Compress - Reduce Movie Size, Shrink Video | iOS 8.0 or later | MP4, MOV, AVI | 4.6 |
Ollie Mattison
Ollie Mattison is a writer and a lover of all things video.
Follow @Ollie Mattison
Ollie Mattison
Mar 27, 2024• Proven solutions
Capturing full HD or 4K footage with your iPad or iPhone is a straightforward process, but sharing that footage through messaging apps or social media can be a bit more complicated.
The size of video files recorded in 4K resolution is often measured in gigabytes and you have to compress them in order to share them with your friends.
We’ve selected the five best free video compressor apps for iPhones and iPads that will enable you to shrink your videos in minutes and post them on social networks or send them through email and messaging apps.
So, let’s take a look at how you can reduce the size of your videos using free video compressing apps for iOS.
5 Best Video Compressor Apps for iOS that Reduce Video Size
Shrinking a video’s size is easy, even after you record a video clip. Each of the free video compressor apps we included in our top five list allows you to reduce a video’s size quickly before sharing it on social media or sending it to your friends. Read on if you would like to find out more about the best free video compressor apps for iPhones and iPads.
1. Compress Videos & Resize Videos
Price: Free, but contains in-app purchases
With this free video compressor app, you won’t have to worry about the quality of the videos you’re resizing, because it preserves the video’s quality even when videos are shrunk by more than 80%. In this manner, the Compress Videos & Resize Video app can help you free up space on your iPhone or iPad.
How to reduce video size with Compress Videos & Resize Videos?
To start reducing a video’s size you just have to open the app and select all videos, recently added or any other available categories.
After tapping on a particular category, you can proceed to select one or more video clips you would like to reduce. The app is going to display the videos that are stored on your phone or in your iCloud Photo Library and show you the exact size of each video.
Once you’ve selected the videos you’d like to shrink, you should click on the Next button and proceed to the Compression Settings window. Afterward, you can simply change the Frame Rate and Video Dimensions settings by dragging the sliders to the left or to the right. When ready, tap on the Compress button and the Compress Videos & Resize Video app will shrink your videos and save to the Compressed Videos album.
2. Video Compress – Shrink Vids
Price: Free, but offers in-app purchases
You can reduce the size of videos recorded in 4K, Full HD or HD resolution in just a few simple steps. The app lets you resize one or more videos at the same time and choose the resolution of the output video. The only downside is that you must make in-app purchases to remove ads or unlock access to all of the app’s features.
How to compress video with Video Compress – Shrink Vids?
Once you installed this free compressor app for iOS on your device, you should launch it and tap on the + icon to import the video you want to compress into the app. Grant the app permission to access the Photos app and head over to the folder in which the videos you want shrink are stored.
After selecting the videos, you should tap on the Choose Preset button and select one of the available presets. Optionally, you can adjust the bitrate or preview how the videos look before and after the compression. Tap on the Continue button when you are ready and then select the destination album to which the resized videos are going to be exported. After the video compression process is completed the app will ask you if you want to delete the original video files and only keep their resized versions.
3. Video Slimmer App
Price: Free or $2,99 for Pro
Video Slimmer is much more than a simple video compressor app for iOS, as it lets its users trim, rotate or merge videos. The app’s batch processing capabilities are remarkable since you can export resized videos from Video Slimmer quickly. You can free up to 80% of your iPhone’s or iPad’s storage space by compressing videos you store on your iOS-based device.
How to compress videos with Video Slimmer App?
Shrinking multiple videos with Video Slimmer won’t take too much of your time, although the duration of the compression process depends on the size of the video clips. Click on the + icon after you launch the app, in order to select the videos from the camera roll.
Tap on the Gear icon located in the lower right corner of the screen if you would like to adjust the Video Quality and Video Size settings. In addition, the Video Slimmer App lets you choose if you want to delete the original videos from your device after the compression or add a copy of the video to the Photo Library.
Head back to the app’s main menu and tap on the Slim Now button to start compressing the videos you selected. After reducing the size of your videos you can share them on social media or send them to your friends much faster than the original high-resolution files.
4. Video Compress – Reduce Movie Size – Shrink Video
Price: Free
If you are looking for a simple and efficient free video compressor app for iPhone and iPad then Video Compress may be the right choice for you. Its interface is intuitive so you won’t need much time to get used to it even if you never compressed a video before.
How to compress video with it?
All you have to do to start compressing a video is to launch the app and select the videos you’d like to shrink from the Camera Roll. Afterward, you will be taken to the Compress window where you can see the Target Size and the percentage to which the video is going to be compressed. The only limiting factor are the output file formats because the app only allows you to save shrunk videos as MPEG-4 and QuickTime files.
All the compressed videos can be easily shared on social media or sent through email and messaging apps directly from Video Compress.
5. Video Compressor – Shrink Videos
Price: Free, but offers in-app purchases
Video Compressor app makes shrinking videos look easy because it offers a number of presets that let you choose how much you want to reduce the size of a video. Besides saving time this free video compressor for iPhones and iPads can create more storage space on your device.
How to shrink video size with this app?
Identifying large video files on your camera roll won’t take too much time since the app displays the size of all videos. Besides compressing videos, the Video Compressor app also lets you shrink photos you store on your iPhone or iPad.
Select a video you want to compress, by simply tapping on it, and then choose a preset resolution to which that video clip is going to be compressed. Optionally, you can change the Bitrate before tapping on the Compression button.
After the video compression process is over you can organize the shrunk videos effortlessly, however, you must purchase the Pro version of the app if you want to have access to all of the tools Video Compressor has to offer.
Is there any iPhone free video compressor with editor built in?
Editing a video before you share it on social media can help you get rid of unwanted parts and make the colors more vivid. iMovie is an excellent choice if you would like to trim a video or add filters and effects to it and reduce the video size. What’s more, you can use this iOS-native video editing app to reduce the size of the original video files.
Once you complete all video editing tasks you should exit the app’s Edit window by tapping done and then tap on the Share/Save Video option. iMovie offers a variety of output video file formats, so you can choose if you want to save your video in 360p, 540p, HD or 4K resolution. After you pick a preferred output resolution the iMovie is going to add the video to the Photo Library.
Bonus: How to reduce video size on iPhone & iPad when recording?
All recent iPhone and iPad models support recording in a broad spectrum of video resolutions. If you would like to decrease the resolution at which your device captures videos you should head to the Settings menu and tap on the Camera option.
Select Record Video from the Camera menu and then choose the new resolution for your videos. The default resolution is set at 1080p at 30fps, but you can easily reduce it to 720p at 30fps if you want to create videos that don’t take too much storage space.
The Record Slo-Mo option lets you choose between 720p HD at 120fps or 720p HD at 240 fps which allows you to preserve storage space while recording high-quality slow-motion videos.
Conclusion
Videos recorded with iPhones and iPads can be huge in size, and sending them or uploading them to the Internet can be a time-consuming process. Installing a free video compressing app for iOS can be a good idea if you record videos with your iPhone or iPad often. Each of the free video compressor apps we included in this article can shrink videos quickly and efficiently. Which free video compressor app are you going to choose? Leave a comment and let us know.
| Supported iOS | Supported format | User rating | |
|---|---|---|---|
| Video Slimmer | iOS 8.0 or later | MP4, MOV, AVI… | 3.7 |
| Video Compress - Shrink Vids | iOS 10.3 or later | MP4, MOV, AVI | 4.6 |
| iMovie | iOS 10.3 or later | MP4, MOV, AVI, QuickTime… | 3.9 |
| Compress Videos & Resize Video | iOS 8.0 or later | MPEG-4 and QuickTime | 4.6 |
| Video Compressor-Shrink videos | iOS 8.0 or later | MP4, MOV, AVI | 4.7 |
| Video Compress - Reduce Movie Size, Shrink Video | iOS 8.0 or later | MP4, MOV, AVI | 4.6 |
Ollie Mattison
Ollie Mattison is a writer and a lover of all things video.
Follow @Ollie Mattison
Also read:
- New 2024 Approved Create Epic Trailers Best Software for Mac and PC (2023 Review)
- New Meme Mastery 10 Essential Apps for Android and iOS for 2024
- New In 2024, AI-Driven Video Editing Software for Perfect Aspect Ratios
- 2024 Approved 10 Free Online Tools to Create Subtitles for Your Videos 2023 Update
- The 10 Most Popular Free Video Compressor Apps for Windows 10 for 2024
- Top Video Resume Creators Get Started with Free Templates
- New 2024 Approved Refine Your Footage How to Stabilize Videos Like a Pro in AE
- Updated The Top Gaming Intro Creation Services Ranked and Reviewed for 2024
- In 2024, Leading Online Video Teaser Creators
- New Unlock Perfect Lighting Top Video Brightening Apps
- Updated Final Cut Pro 2024 The Most In-Depth Tutorial Collection
- In 2024, The Art of Cinematic Video Production A Final Cut Pro X Tutorial
- 2024 Approved Rock-Solid Footage Mastering Video Stabilization in Adobe Premiere Pro
- When Professionals Edit Their Video Films, They Often Need to Switch Directly Between Different Recorded Scenes to Create Customized Outcome at the End for 2024
- New Free MKV Editor Top 10 Programs to Split and Trim Videos
- 2024 Approved Seamless Video Editing The Top Software for a Hassle-Free Experience
- New 2024 Approved Free 4K Video Editors Top Picks for High-Quality Results
- New In 2024, Mac Video Editor Reviews Find the Perfect Tool for Your Needs
- New 2024 Approved Video Advertising Trailer Production Platforms
- Updated 2024 Approved From Script to Screen A Kids Journey in Movie Making
- Lossless Audio, No Fuss How to Identify the Perfect FLAC Converter
- New 10 Powerful Video Editing Software Alternatives to Final Cut Pro X for 2024
- New Selecting the Best YouTube to MP4 Converter for Speed for 2024
- New In 2024, Unleash Your Creativity Best Free 3D Animation Apps for Mobile
- New In 2024, Mac Video Editing Made Easy VN Video Editor and Its Alternatives
- In 2024, Animate for Free Top 10 Whiteboard Animation Software for Windows and Mac
- Simple ways to get lost files back from Nokia C12 Pro
- 10 Easy-to-Use FRP Bypass Tools for Unlocking Google Accounts On Nokia XR21
- In 2024, How To Leave a Life360 Group On Apple iPhone 13 Pro Max Without Anyone Knowing? | Dr.fone
- How To Bypass FRP on Motorola Defy 2
- In 2024, Detailed guide of ispoofer for pogo installation On Samsung Galaxy A05 | Dr.fone
- How Honor X7b Mirror Screen to PC? | Dr.fone
- 6 Ways to Change Spotify Location On Your Motorola Edge 2023 | Dr.fone
- In 2024, Hassle-Free Ways to Remove FRP Lock from Motorola Phones with/without a PC
- How Can I Recover Corrupted Excel File 2016
- Recommended Best Applications for Mirroring Your Xiaomi Redmi 13C Screen | Dr.fone
- How to Bypass Google FRP Lock on Tecno Phantom V Fold Devices
- In 2024, 3 Ways to Track Apple iPhone 6 Plus without Them Knowing | Dr.fone
- In 2024, How to Track Oppo Reno 10 Pro+ 5G Location by Number | Dr.fone
- Simple Solutions to Fix Android SystemUI Has Stopped Error For Realme 11 5G | Dr.fone
- How and Where to Find a Shiny Stone Pokémon For Samsung Galaxy A54 5G? | Dr.fone
- Disabling iPhone 7 Parental Restrictions With/Without Password | Dr.fone
- In 2024, Ways to stop parent tracking your Apple iPhone 13 Pro | Dr.fone
- New Top Way to Freeze-Frame in Final Cut Pro
- In 2024, Two Ways to Track My Boyfriends Xiaomi 13T Pro without Him Knowing | Dr.fone
- 8 Ultimate Fixes for Google Play Your Vivo Y27 4G Isnt Compatible | Dr.fone
- How to Transfer Data from Vivo X100 to Samsung Phone | Dr.fone
- Title: Updated Unleash Your Creativity Top 10 Free Video Editing Software for Chrome OS
- Author: Charlotte
- Created at : 2024-06-08 14:57:15
- Updated at : 2024-06-09 14:57:15
- Link: https://smart-video-creator.techidaily.com/updated-unleash-your-creativity-top-10-free-video-editing-software-for-chrome-os/
- License: This work is licensed under CC BY-NC-SA 4.0.
